Rob Ray from the Buffalo Sabres reads Brady Brady and the Most Important Game by Chuck Temple and Mary Shaw.
Brady Brady and the Icehogs face their toughest rivals in the biggest tournament of the season!
The Gold Stick trophy is the big prize that Brady Brady and the Icehogs are after, and this year they get to play for it on home ice. The team puts in lots of extra practice and time promoting the event to their community. On game day, they play fair and battle hard, earning a spot in the final. But in the most important game, their rivals the Dragoons play dirty and defeat the Icehogs.
Brady and his friends are crushed. It feels like playing fair doesn’t matter at all! Or does it?
A pep talk and a surprise game help Brady and his friends understand that good sportsmanship is how they can really be winners.
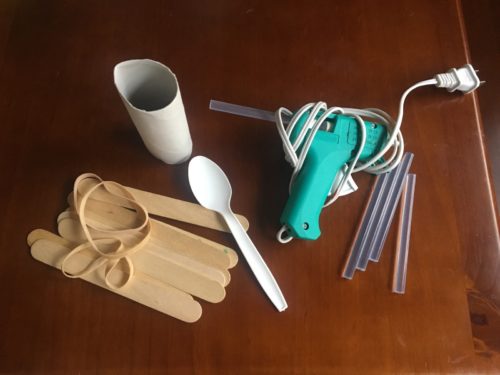
Popsicle
sticks, rubber bands, toilet paper tube, hot glue, plastic spoon, plastic cup
Length:
Build
time: 5-10 minutes
Academic Subjects:
Science/
Engineering
This
lesson supports the following standards:
ETS1.A:
Defining Engineering Problems – A situation that people want to change or
create can be approached as a problem to be solved through engineering. Such
problems may have many acceptable solutions. (secondary to KPS2-2)
ETS1.A: Defining Engineering Problems –
Possible solutions to a problem are limited by available materials and
resources (constraints). The success of a designed solution is determined by
considering the desired features of a solution (criteria). Different proposals
for solutions can be compared on the basis of how well each one meets the
specified criteria for success or how well each takes the constraints into
account.
Directions for Mini-Basketball Catapults:
Even
though we may be missing out on basketball this season, we still can run fun
science experiments around basketball. For today’s experiment, we will be
building our own catapults and seeing if we can score a basket.
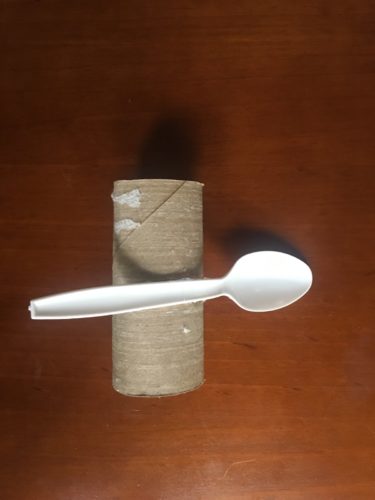
TP
Catapult instructions:
There are many ways to build a catapult. A very basic catapult needs two things. A plastic spoon and a toilet paper roll.
Next, we will build a weight. Crumple up a small piece of paper and make sure it fits on the spoon. Only use light weights! A pom pom would also be great.
Once the glue is dry, place the paper ball on the spoon, make sure the area is clear and hit the end of the spoon. The ball will go flying into the air.
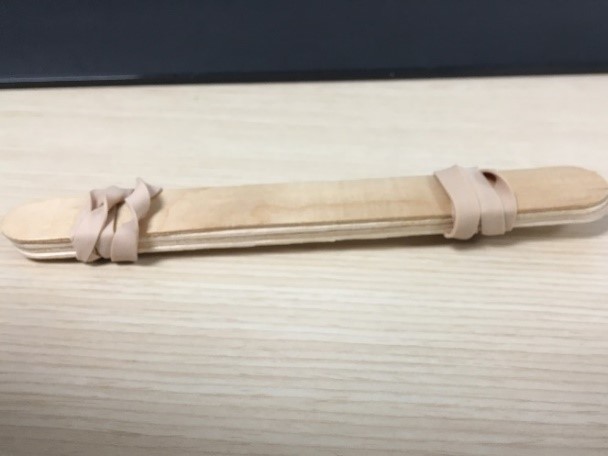
Popsicle Stick Catapult
Directions:
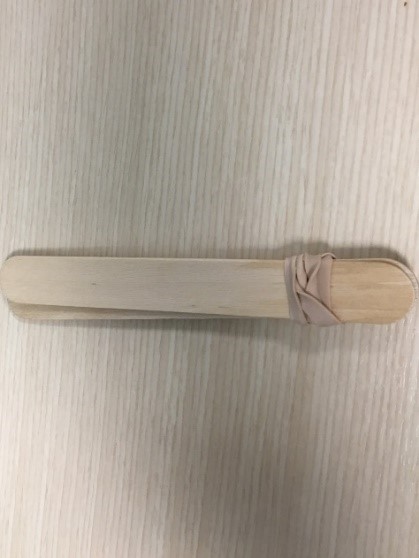
Rubber band at least three popsicle sticks on top of each other at both ends.
Rubber band two popsicle sticks together and leave one side open.
Slide the two sets together.
Crisscross rubber bands across the middle.
Add your catapult! Depending on what supplies you have at home a small plastic cup can be glued down.
Or a plastic spoon can be tied to the middle with rubber bands.
Once your catapult is built,
find a weight to launch. Make sure the weight is light. Students can use pom
poms or a small piece of crumpled paper. Once you have a ball place it in the
spoon or cup. Make sure the area is clear. Push down on the spoon or cup and
let go! Your ball will go flying! If you are feeling up to the challenge grab
another plastic cup and use that as your net! By using trial and error, you can
keep moving the net until you score a basket!
Vocabulary:
Catapult– A device used to launch objects.
Simple machine- any basic device that can apply force to an object. There are many different types of simple machines. They can include lever, wheel and axle, pulley, inclined plane, wedge, and screw.
Fulcrum– A device that is used to balance two things. In our basic catapult demonstration, it is the toilet paper roll. The fulcrum is used to pivot the lever and launch the weight.
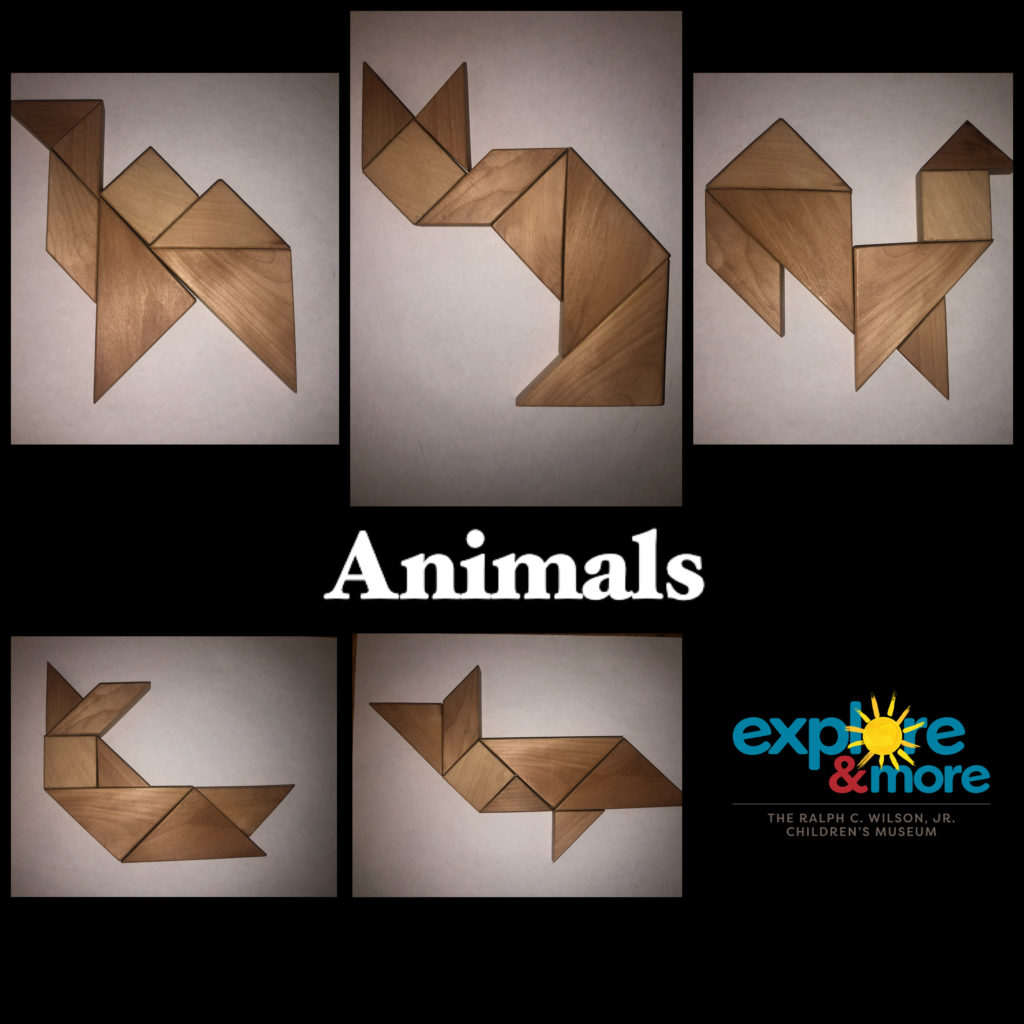
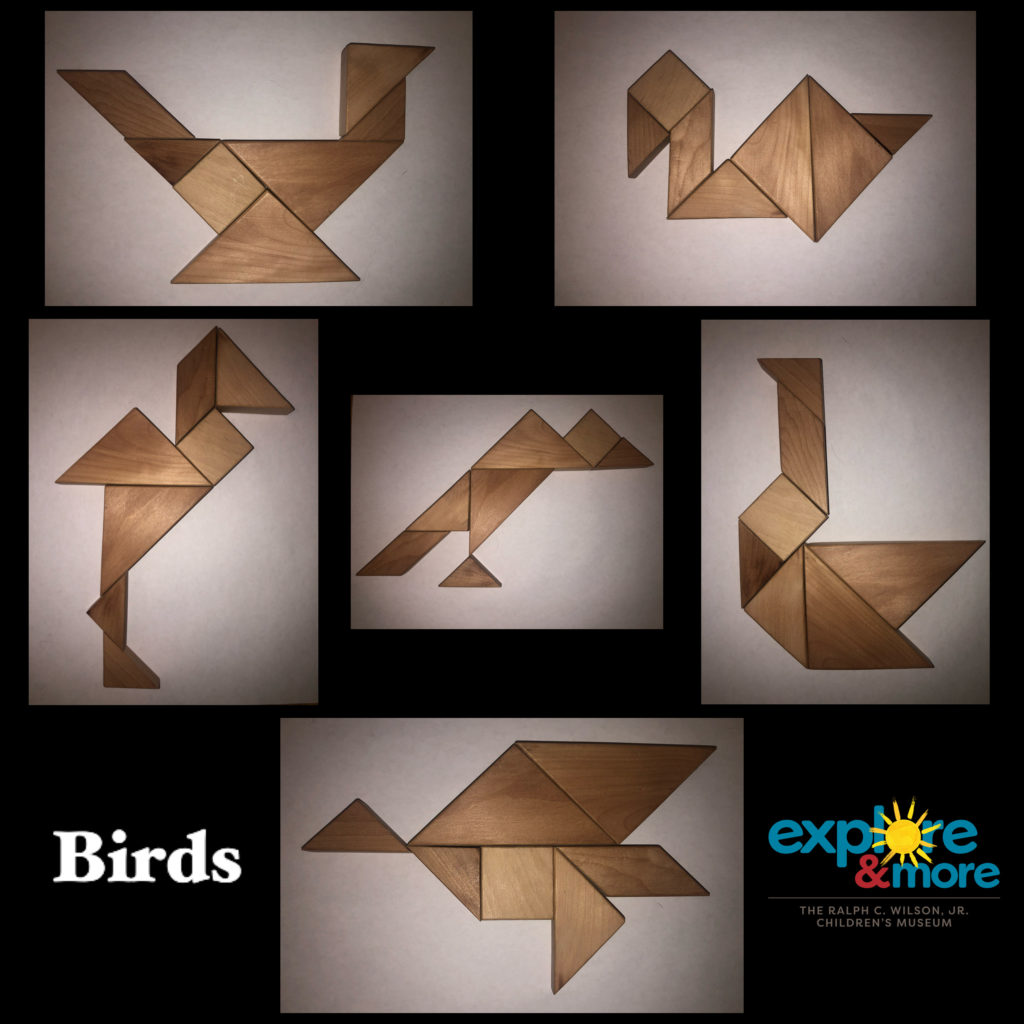
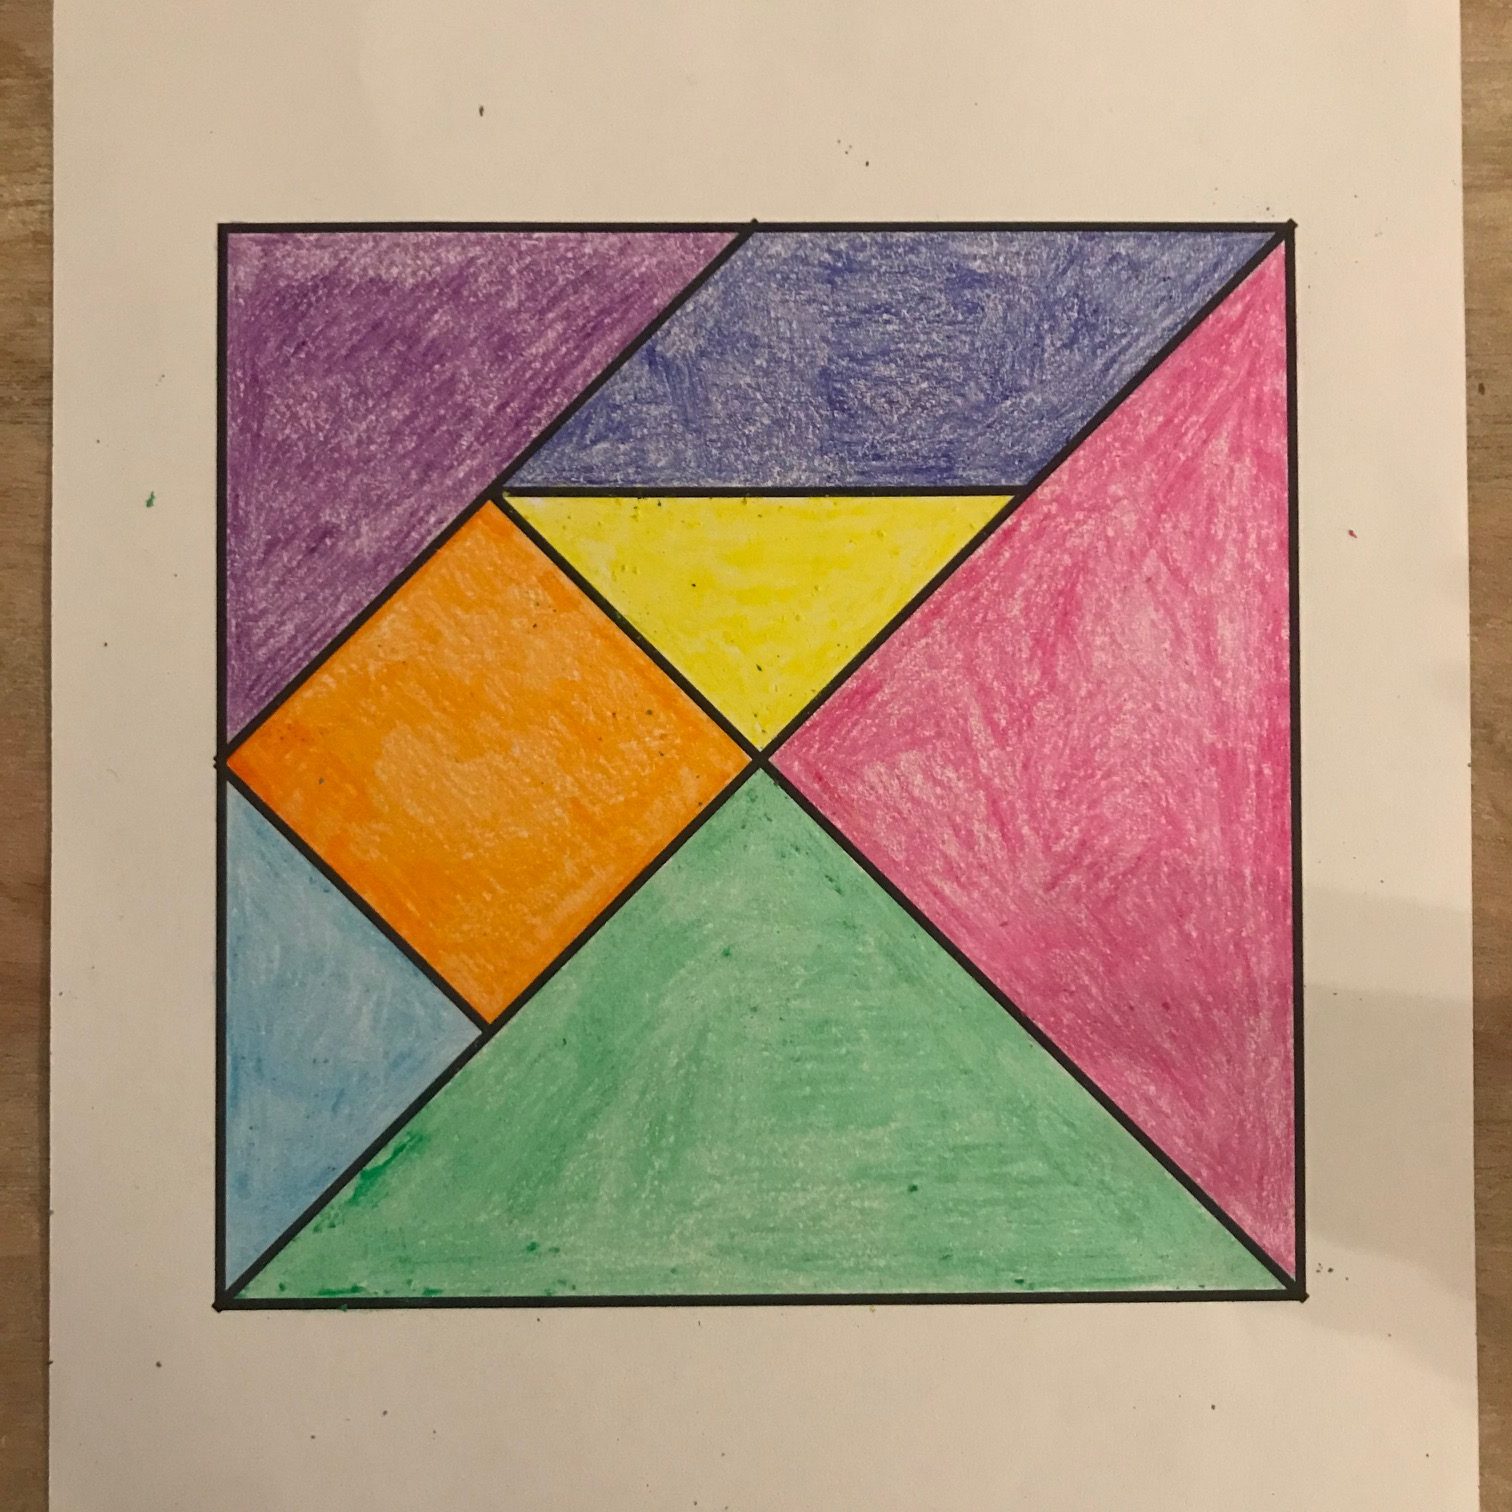
Invented in China centuries ago, tangrams are one of the oldest types of puzzle. According to some historians, they traveled around the world on trade ships in the 19th century, quickly becoming a popular parlor game in Europe and the Americas. The Chinese term for tangrams translates loosely to “the seven boards of skill.” A complete tangram set always contains seven shapes that a player must rearrange to form larger shapes and figures.With just some paper, scissors, and markers, you can make your own tangram set at home and use it to work out different configurations. This is a great game for practicing spatial reasoning, creative thinking, problem solving, and fine motor skills, while learning some core geometric concepts!
Social Studies, Math This lesson supports your student’s curriculum: MATH: K.G.A.1, K.G.A.2, 1.G.A.1, 3.G.A.1, 3.G.A.2SOC: 3.4b, 3.5a
Directions:
Step 1: Print out the blank tangram set, downloadable here, or trace all of its lines onto a sheet of paper. Step 2: Use markers or crayons to color in the shapes. Ideally, each shape should be a different color. Step 3: Cut out each shape, following the black lines. There should be seven shapes in total. Can you name them all? Step 4: Try to recreate the different figures illustrated below. Remember, you must use all seven of the tangram shapes, and they cannot overlap! We used our puzzle pieces to make a cat.
Hint: The figures that reveal the different shapes and colors are easier to solve. The silhouetted figures are much more difficult! You can find many more tangram challenges online and in books. Challenge yourself!
·It can be just as hard to arrange all of the tangram pieces back into a square – give it a try! How many different configurations can you find?
· How many different squares can you make with the smaller shapes? How many rectangles? How many triangles? Can you build a triangle with only two of the shapes? How about with three, four, five, or six?
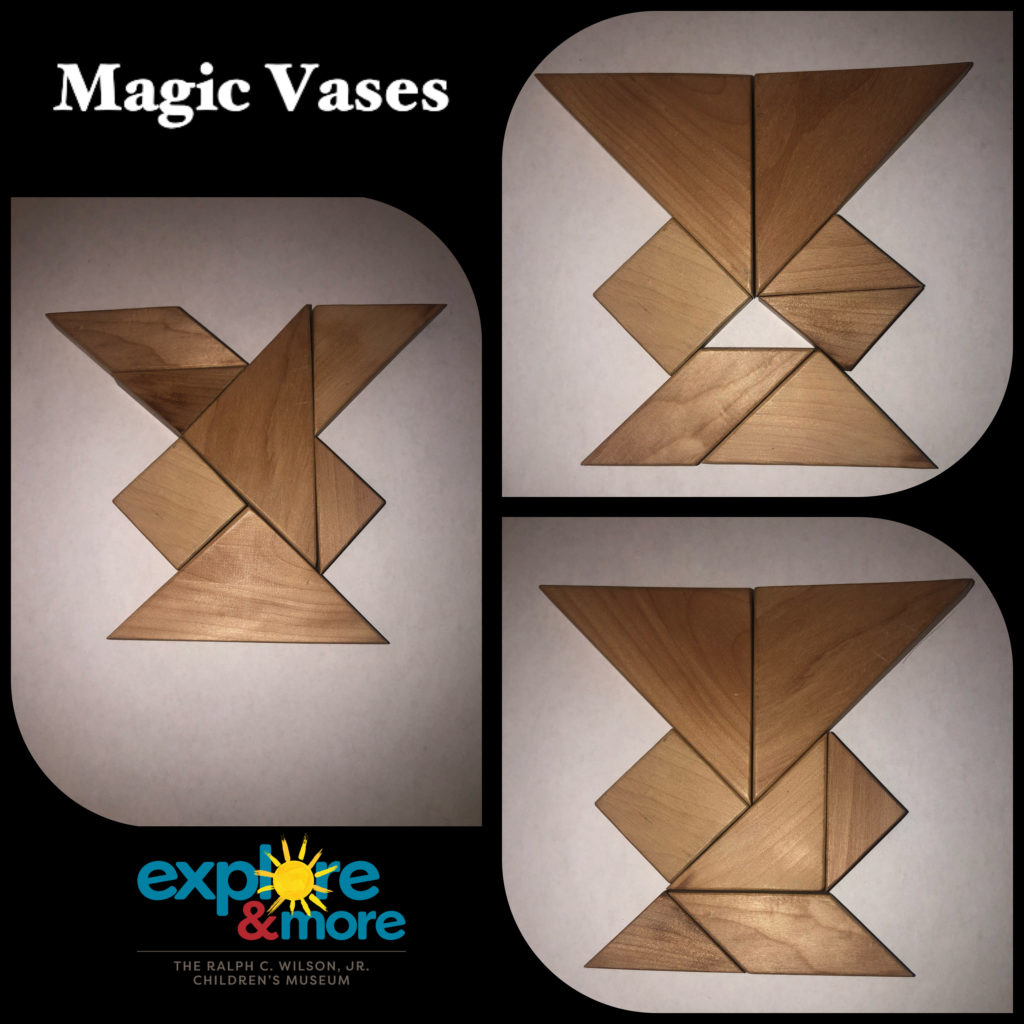
Fun Facts:
· Tangram paradoxes or “dissection fallacies” occur when two figures are made using the same number of shapes, but one appears to be a subset of the other or to have pieces missing. One example is the “Magic Vases,” shown below, where some of the vase figures seem to have shapes missing, even though they are all made from the same seven tangram shapes. ·The children’s book, Grandfather Tang’s Story, by Ann Tompert, incorporates tangrams directly into the story and provides some good puzzles to try as you read.
Written by Will Kawalec Lead Play to Learn Facilitator
This lesson gives your child the opportunity to create their very own cloud! This activity is fun for both adults and children and can provide an awesome activity that children will marvel at. While doing this activity caregivers can teach their children about clouds and how condensation and rain happens. Feel free to incorporate the vocabulary words below!
Materials:
A jar with a lid Hot water Ice cubes Hairspray
Length:
Set up: 5 Minutes Activity 5-20 Minutes
Academic Subject(s):
Science
A few weeks ago we posted a lesson about making a cloud rain! In that lesson we learned about precipitation in the water cycle. Today we are going to learn about evaporation and condensation by making our own clouds in a jar!
Directions:
Step 1: Heat up water should be hot but not boiling. Pour into open jar so it is about 1/3 of the way full, place lid on and shake to warm up jar. Remove lid again. Step 2: Place lid of jar upside down on top of the jar, place as many cubes as you can on the top of the jar. I used the ring of the jar upside down to help hold on extra ice cubes! Step 3: After about 30 seconds remove the lid and the ice from the jar and add a quick spray of hairspray into the jar. Step 4: Place the lid back on the jar. Step 5: Condensation will begin to occur, you will notice this rather quickly, wait a little bit and remove the lid, the escaping air will be an actual cloud!
Vocabulary Words
· Condensation– When water converts from a gas to a liquid. In the water cycle this is after water has evaporated in the air and begins to collect in the clouds. · Meteorology– The branch of science that studies the weather. A meteorologist predicts what weather will happen. · Precipitation– The condensation falling into the atmosphere. Precipitation in this experiment is rain however, it can also come in the form of snow, ice, sleet or hail. · Atmosphere – The gasses that surround the earth or another planet. For earth this is the air we breathe every day! · Water Cycle – This is the process of water circulating between the earth and the atmosphere. There are four basic steps in the water cycle. 1. Collection: examples of collection are oceans, rivers, lakes, streams etc. This is the part of the water cycle with water remains on the earths surface. 2.Evaporation: when water is heated up by the sun and turns into a gas 3. Condensation: When water converts from a gas to a liquid. In the water cycle this is after water has evaporated in the air and begins to collect in the clouds. 4. Precipitation: The condensation falling into the atmosphere. Precipitation in this experiment is rain however, it can also come in the form of snow, ice, sleet or hail.
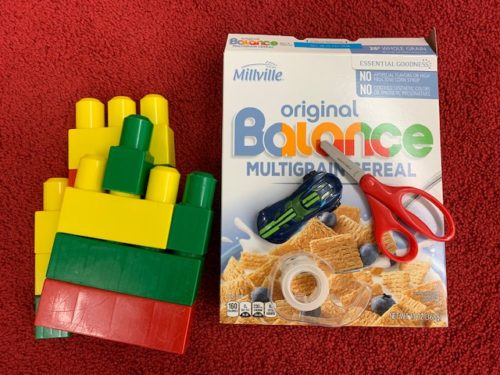
Empty cereal box Kid scissors Blocks or legos Car, ball, etc. (toys to try on the ramp) Tape (optional)
Length:
Set-up: 5 minutes Active: 15-20 minutes
Academic Subject(s):
Engineering This lesson supports the following standards: ETS1.A: Defining Engineering Problems – A situation that people want to change or create can be approached as a problem to be solved through engineering. Such problems may have many acceptable solutions. (secondary to KPS2-2) ETS1.A: Defining Engineering Problems – Possible solutions to a problem are limited by available materials and resources (constraints). The success of a designed solution is determined by considering the desired features of a solution (criteria). Different proposals for solutions can be compared on the basis of how well each one meets the specified criteria for success or how well each takes the constraints into account.
Are you looking for a fun activity on a rainy day perhaps? This easy craft made with materials from your home, can help children discover physics principals as they test the different speeds of objects. They will be having so much fun they won’t even realize that they are learning the basics of speed and velocity!
Directions:
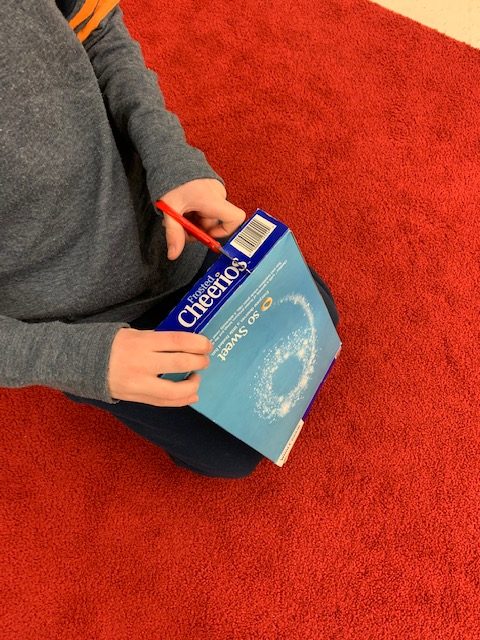
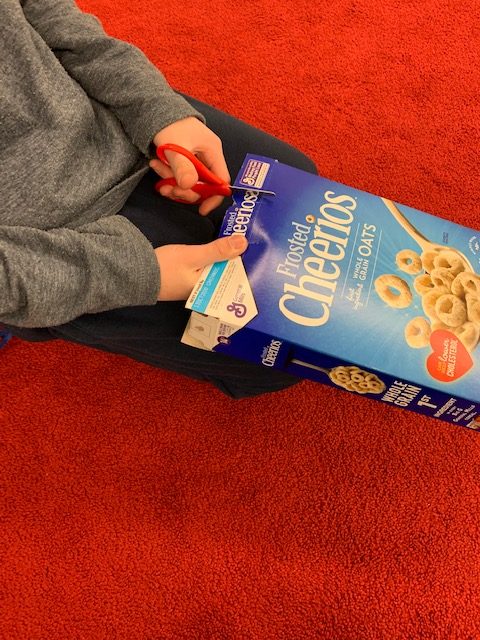
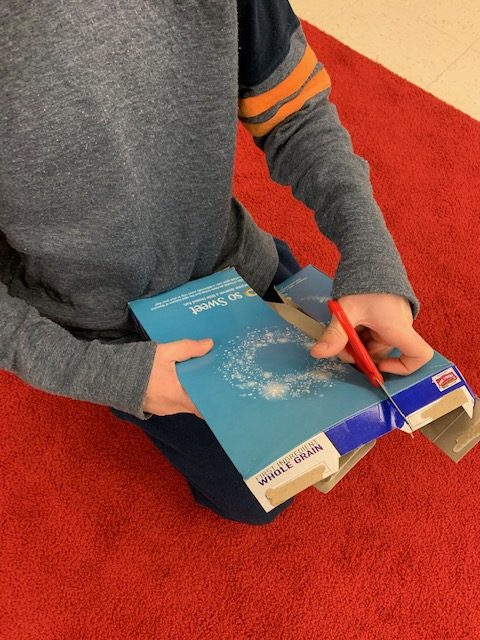
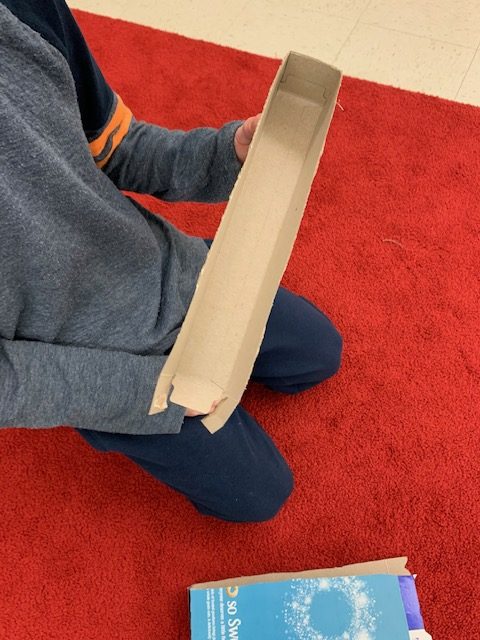
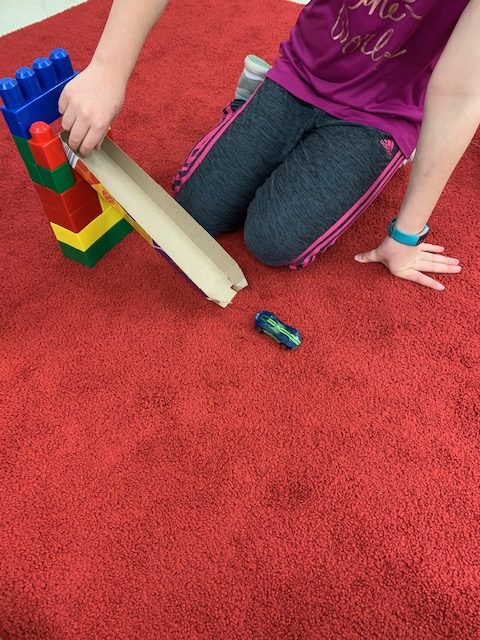
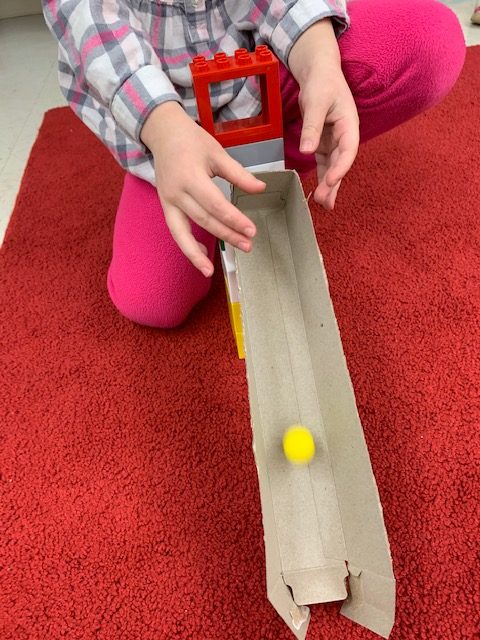
Step 1: Cutting the ramp will be tricky, so give your child some guidance before they cut or assist them if necessary. You could even use a marker and a ruler to make guidelines to help them understand where to cut. Take an empty cereal box and turn it to the side (usually where the nutrition label is). This section will be the length of the ramp. Start your cut at the top of the box about 2 inches from the side and cut all the way down. Cut through the bottom of the box, (this part of the box should have already been closed, and should stay closed when cutting) and then continue cutting onto the backside. Cut the backside of the box all of the way back up to the top about 2 inches from the side as well. Now you have your ramp!
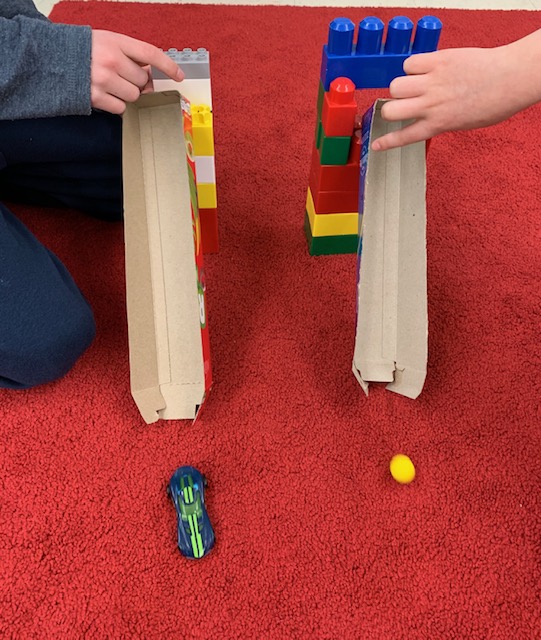
Step 2: Get ready to build! Have your children use legos, duplos or any kind of blocks in your home to build a support for the ramp. They can build the blocks with a “window” near the top for the closed side of the ramp to sit in for stability, or the ramp can rest on top of the blocks at an angle. This may require you to lightly tape the ramp to the blocks so it doesn’t slip off. Step 3: Once your ramp is secure in/on the blocks, you’re ready to test it out! Choose some different toys: a ball, a car, a coin, etc. to see how well things slide down the ramp. You could even have your child measure and write each object’s distance down in a notebook, (the amount of inches or feet each item traveled from the top of the ramp to wherever it landed). Have them compare which object traveled the farthest and discuss why they think that was the case. One other fun thing to try is to adjust the height of the ramp, higher or lower, and see how that changes the speed of the objects. You could even create a second ramp and block build to have objects race each other! Remember, there is no wrong way to create this activity, so allow your child’s imagination with their block build (and even the toys that they test!) to run wild!
Vocabulary Words:
Speed – Is a measurement of how fast an object moves relative to a reference point. Speed can be calculated using this formula: Speed = Distance/Time Velocity – Is the speed of something in a given direction. Velocity can be calculated using this formula: Velocity = the change in distance/the change in time Stability – (from the root word stable) – An object or structure not likely to give way or overturn; something that is firmly fixed.
