Written by: Paola and Charlie Explore & More Member Family
Materials
Magnet Building Tiles Building Blocks Kitchen Toys Art Supplies-OR-Anything that reminds you of Explore & More
Length:
Play Time is Unlimited!
Charlie lives close to the museum and when its nice out we do socially distance friendly exercise to canalside and back. Sooooooo we HAVE to pass by the museum on these days and as we sail into summer, she is going to have to continue passing by her favorite place and not be allowed in.
Charlie still doesn’t understand “WHYYYYY…..?” (I hear that a lot) and keeps asking if today is the day we can go in. It must be incredibly confusing, especially since we were there so often!
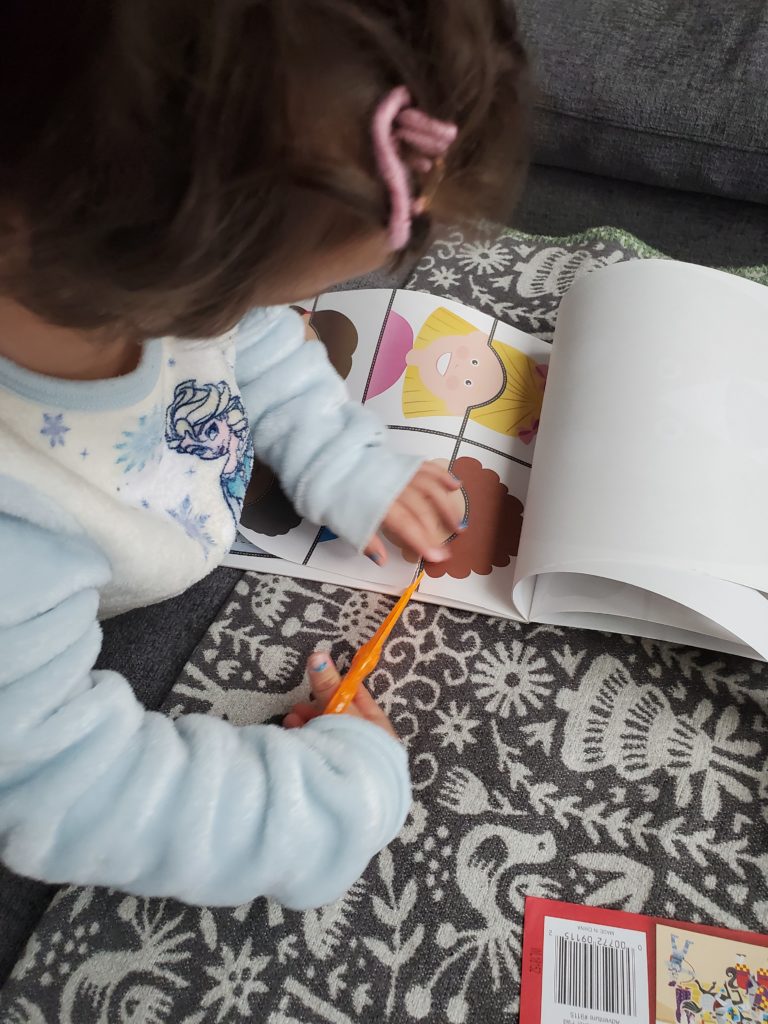
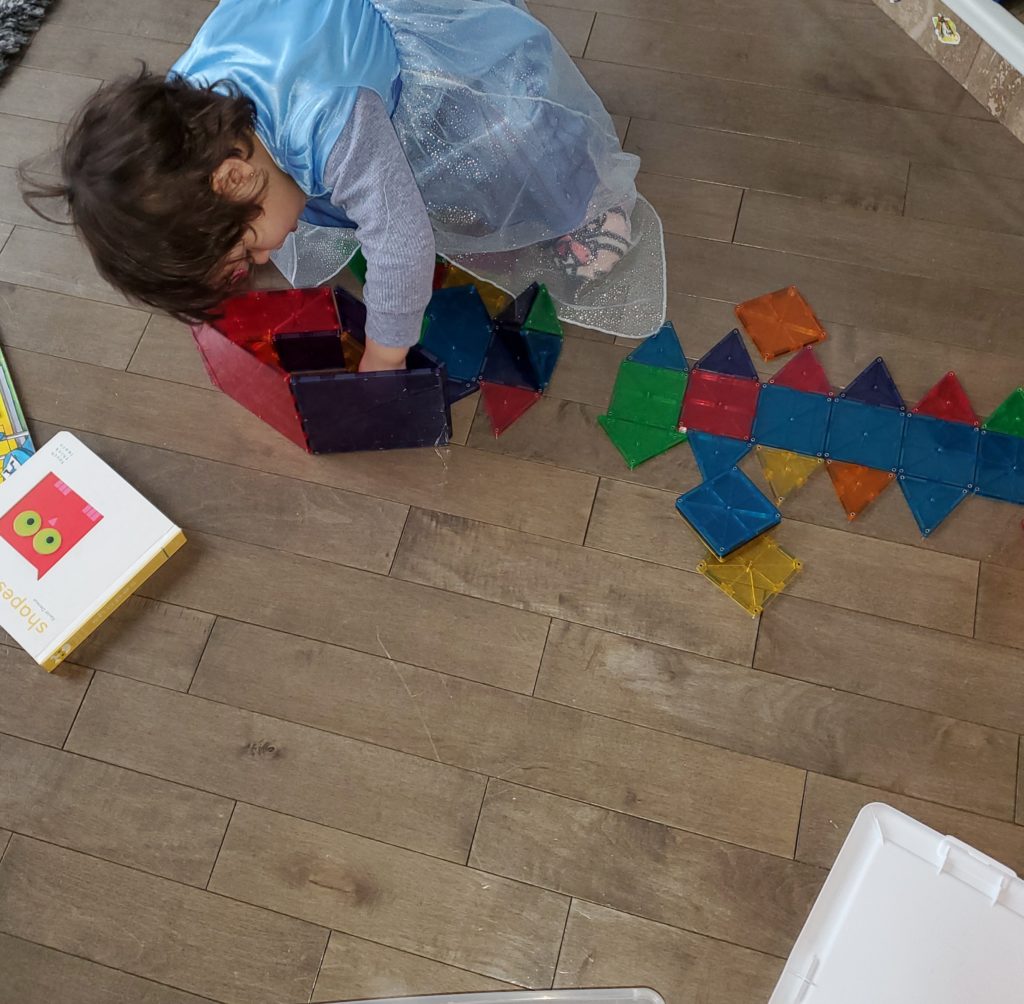
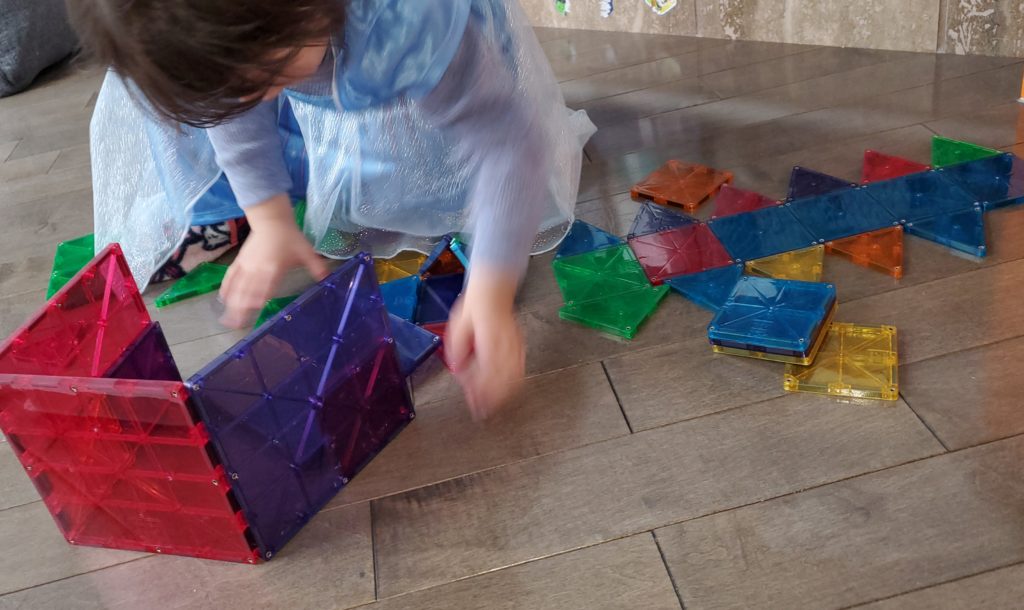
Therefore, bringing some aspects from the museum home has been especially crucial to acclimating Charlie into her new normal daily routine. It’s much easier to say no when she has a version of her favorite Explore & More spots at home.
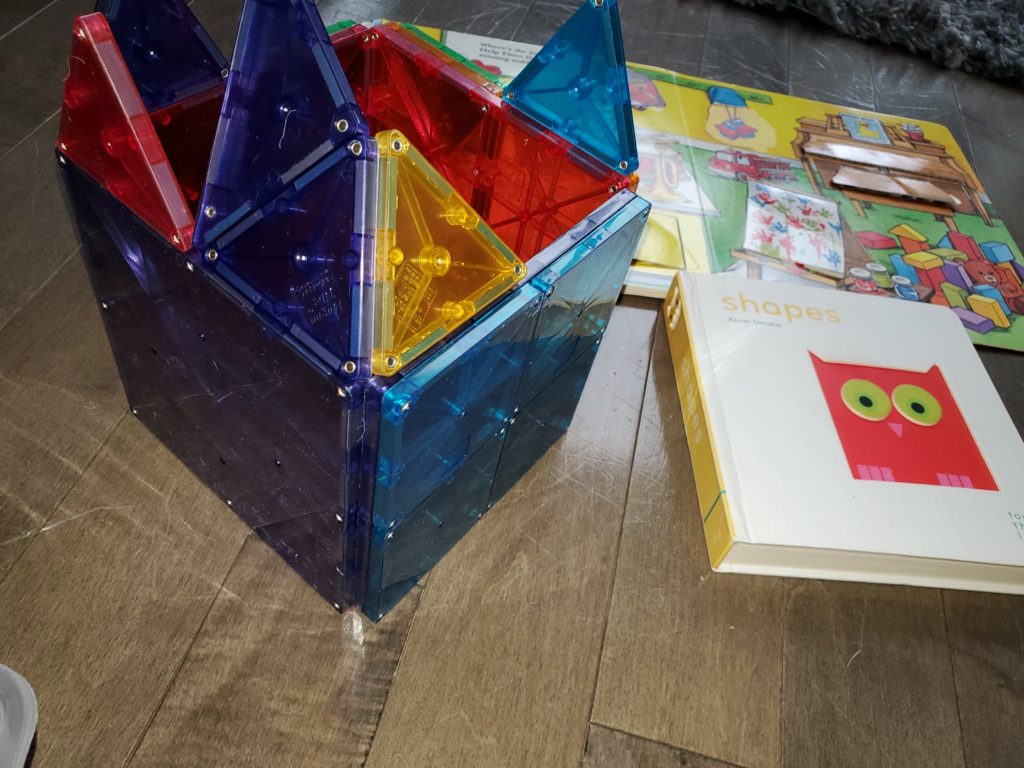
Believe it or not, one of Charlie’s favorite spots at the museum is the magnetic tile table by the lockers. We were able to find some at a local toy store (supporting small business!) and now she is always building something. “Just like museum,” she says. I also include these tiles when we do lessons on shapes, numbers or colors. She can now count out 4 yellow triangles- for example.
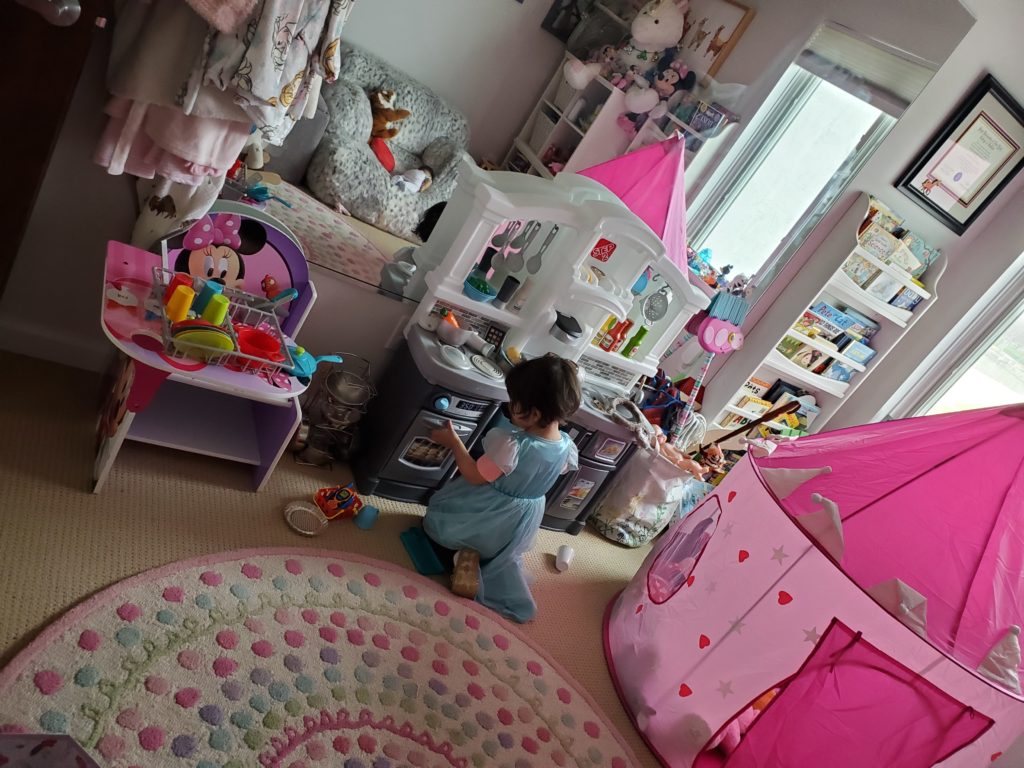
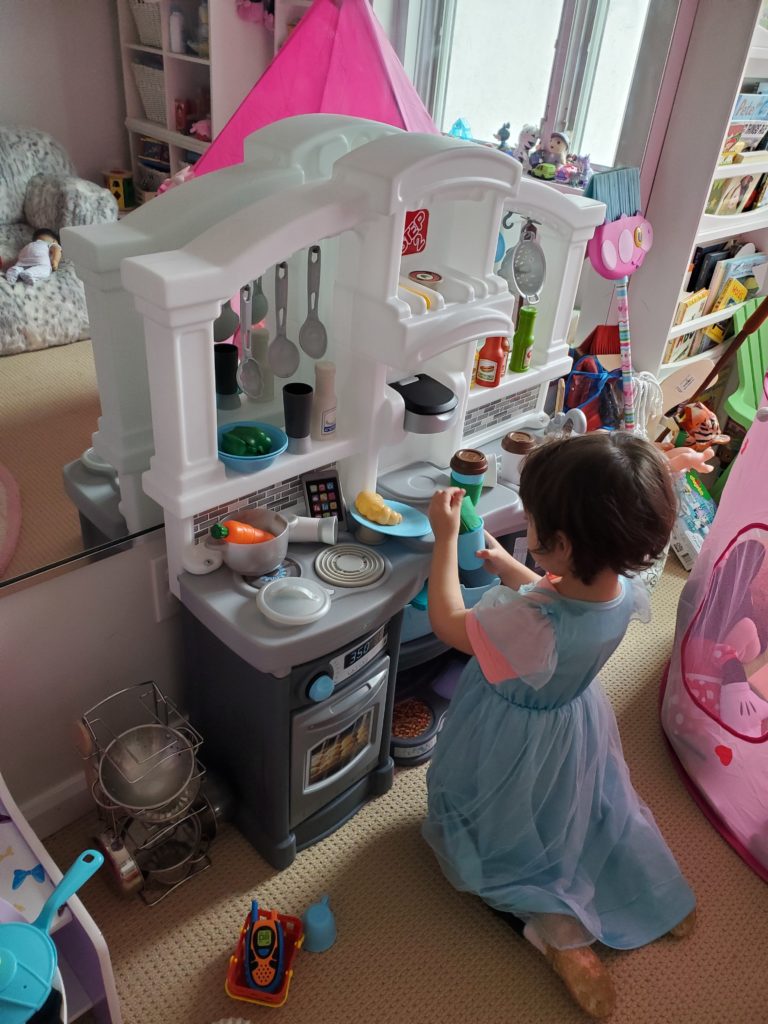
You will also see pictures of our version of the museum kitchen she misses so much as well as art project ideas I learned from Mrs. Tammy & Mrs. Karen during our weekly Children’s Garden class.
You too can create some of these special Museum experiences in your own home! For us, the magnet tiles were key to recreating Charlie’s favorite experience but think of what you and your family love most about the Museum – is it the Tinkering Tank or Art Studio where you can create for hours on end or Moving Water where you can splash and play all day? Use these fond memories to recreate a little piece of Explore & More in your own home until we can all play together again!
supported by the Peter C. Cornell Trust / WNY Foundation
Written by: Julia Bozer Cultural Program Educator
Easy Weaving
Take a close look at your favorite pair of jeans or linen pants. How is the material held together? Can you spot the overlapping vertical and horizontal lines? Many types of fabric are woven on a loom, a tool that interlaces different pieces of yarn together at right angles to form a tight grid. If you’ve visited our museum’s mini West Side Bazaar, you’ve seen many textiles with colorful patterns and designs woven right into the cloth – maybe you’ve even created your own on our weaving wall! Well, here’s a little secret: you can make a basic loom using nothing but cardboard, scissors, and yarn. Follow the steps below for an easy weaving project you can do right at home with your kids. Help them fashion their own coaster, wall hanging, or bracelet while honing their fine motor and math skills!
Materials
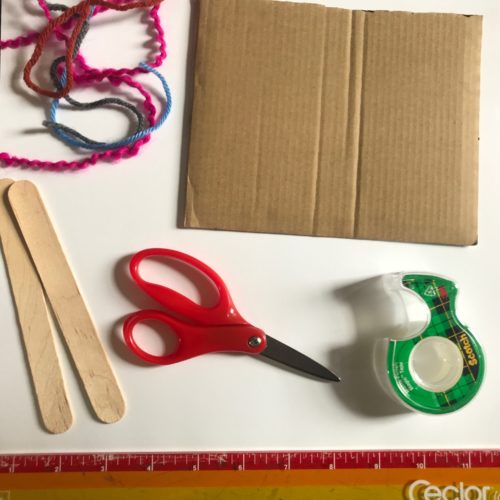
Sturdy cardboard, cut into a rectangle or square Scissors Yarn Ruler Plastic sewing needle – or make your own using a pipe cleaner or paper clip Tape (optional) Popsicle sticks (optional) Beads (optional)
Length:
10-15 minutes to build the loom 40-45 minutes to weave
Academic Subject(s):
Arts, Math This lesson supports your child’s school curriculum: ARTS: VA:Cr1MATH: PreK-2.MD.A
Directions:
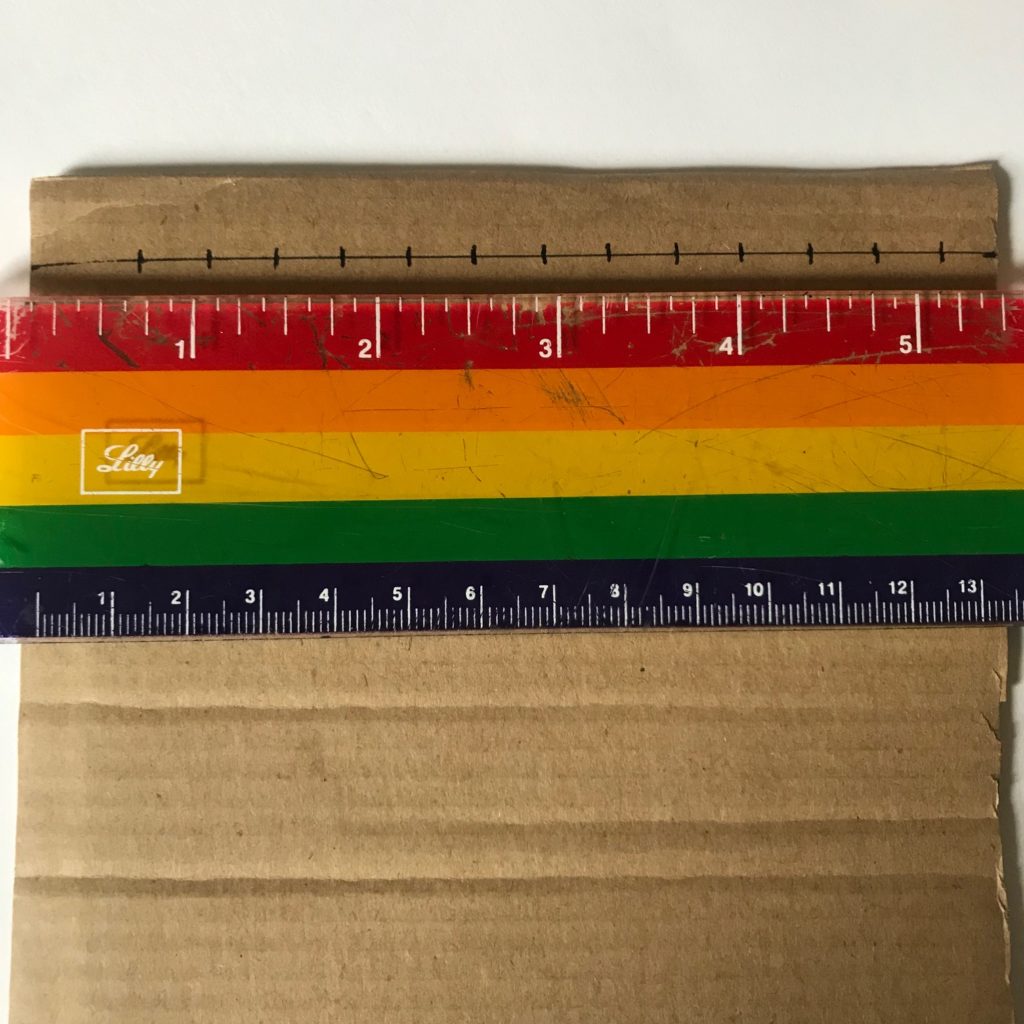
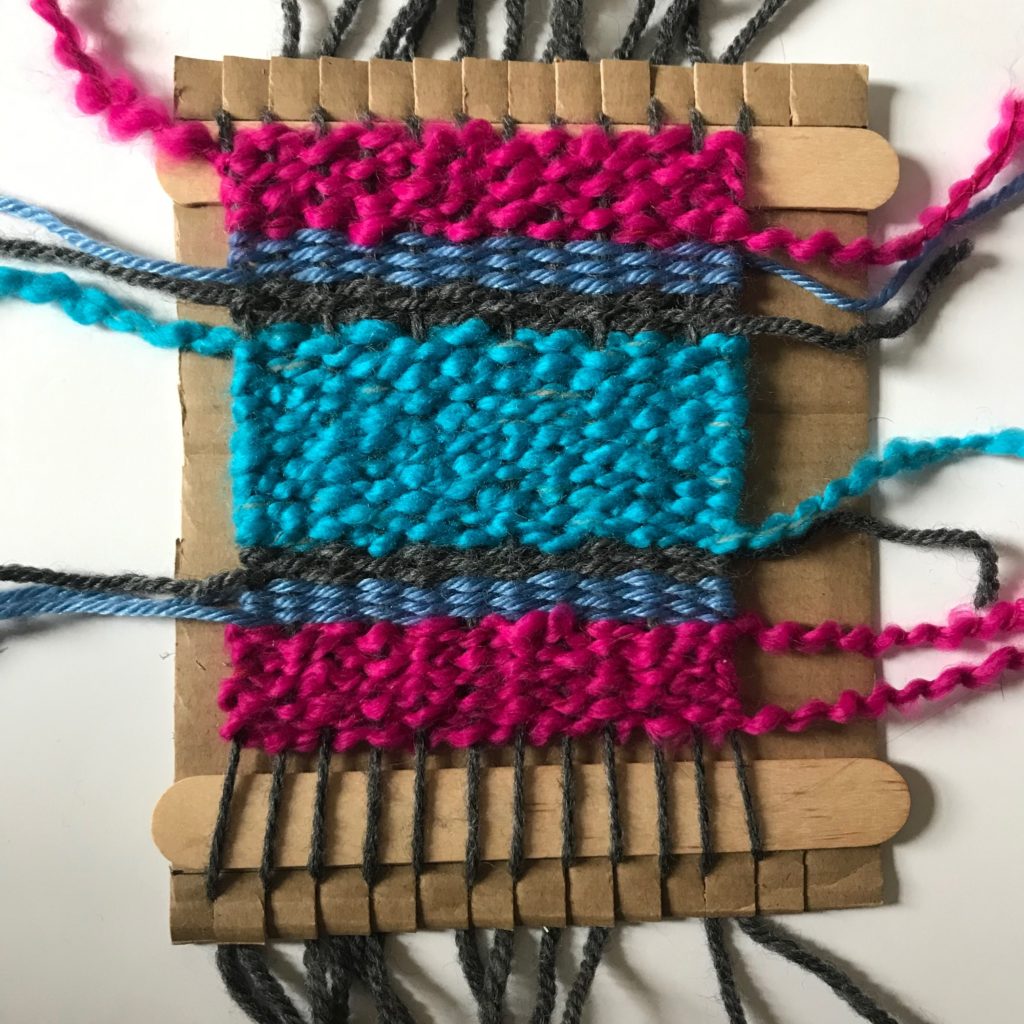
Step 1: Prepare your loom. Using a ruler, measure about 1/2 inch down from the top of the cardboard, marking points at either end. Draw a straight, horizontal line connecting the points with the flat edge of the ruler. Leaving some space at the end, draw hash marks every 3/8 or so along the line – the exact interval does not matter, as long as the spacing is consistent. The smaller your interval, the tighter your weave will be. Repeat this step at the bottom of the cardboard, making sure to match the measurements on top. Remember: the size of the cardboard and the measurements you choose will determine the dimensions, or the width and length, of your finished weaving.
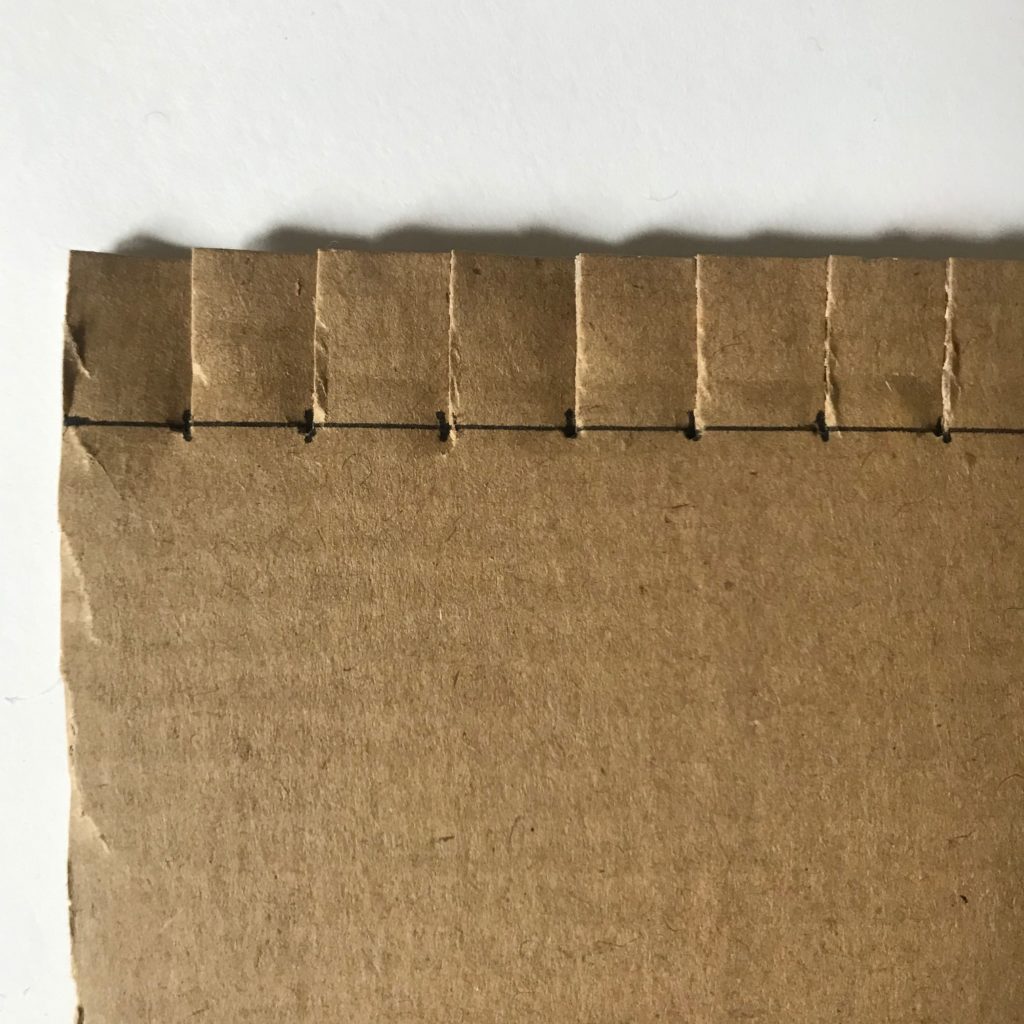
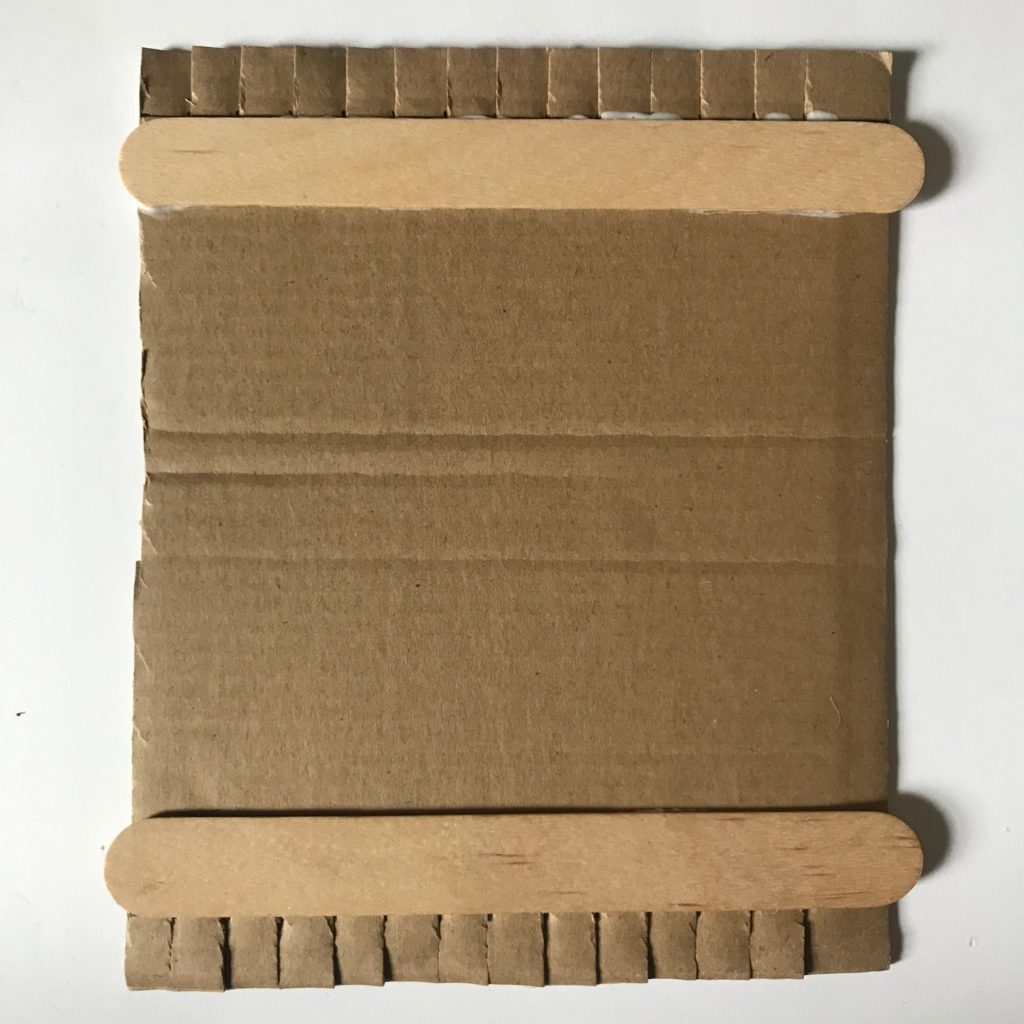
Step 2: Construct your loom. Using scissors, cut down from the top edge of the cardboard toward each hash mark, staying perpendicular(at a right angle) to the horizontal line. Make sure to stop once you hit the line. Repeat at the bottom.We also glued craft sticks across the top and bottom of the cardboard, aligning the top edge of the upper craft stick, and the bottom edge of the lower craft stick, with the horizontal lines. The craft sticks create extra tension and space, keeping the loom taut for easier weaving.
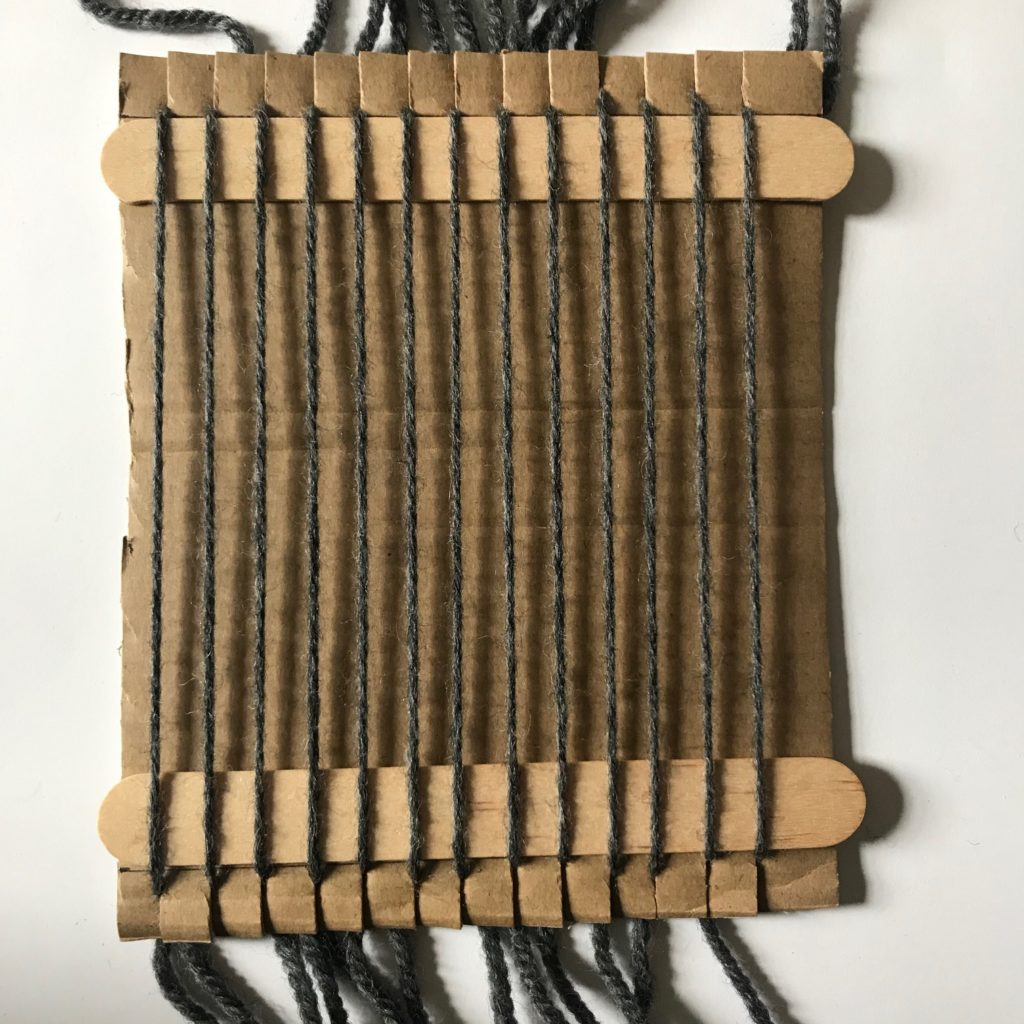
Step 3: Thread your loom. Count how many pairs of notches you cut across the loom (we had 12). Cut the same number of pieces of yarn and thread them through each top and bottom notch, leaving 3-4 inches loose at either end as a “tail.” If you like, you can secure the tails to the back of the cardboard with tape, but we skipped this step.These vertical threads are called the warp. They should be pulled fairly taut but not so tight that they stretch out the yarn.
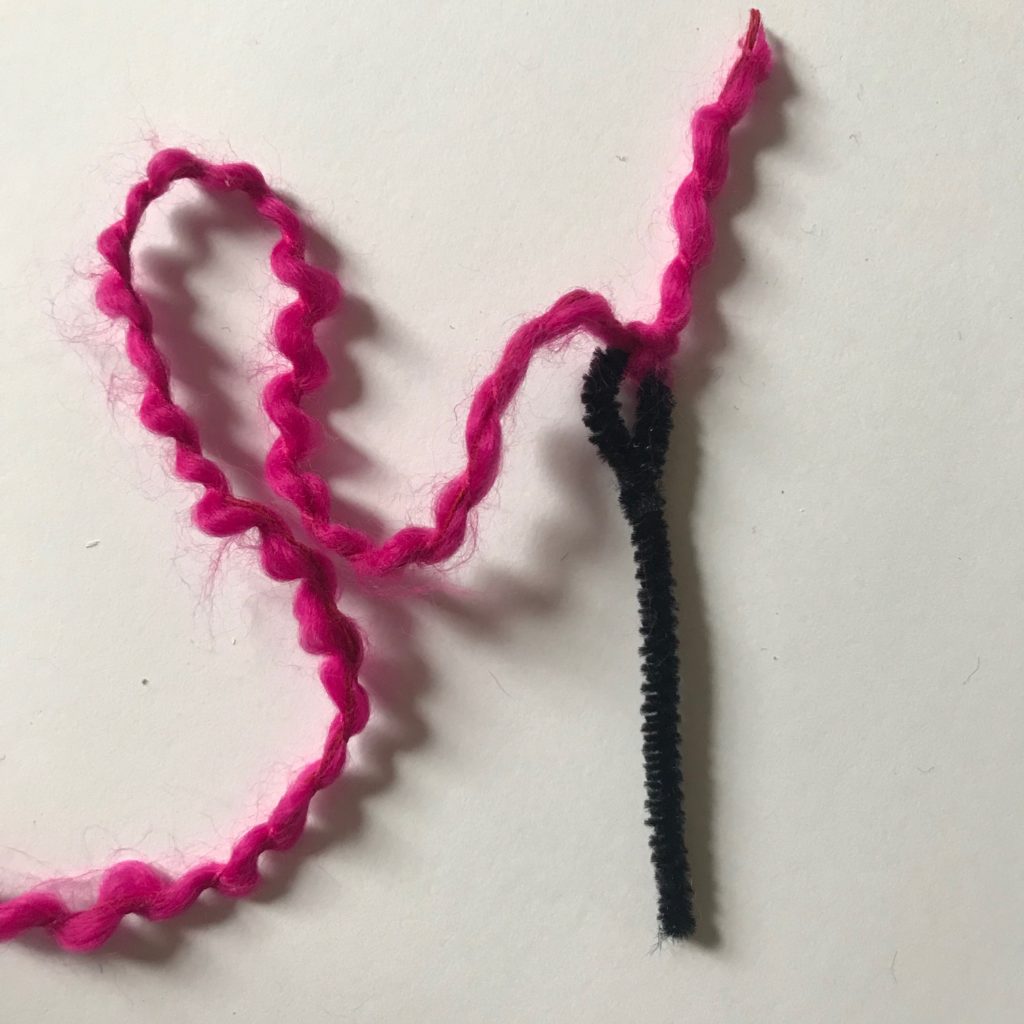
Step 4: Thread the needle. If you have a dull plastic sewing needle, great! We made our own by twisting the end of a piece of pipe cleaner into a loop.Cut a long piece of yarn and thread the end through the eye of the needle, tying a single knot to hold it in place.
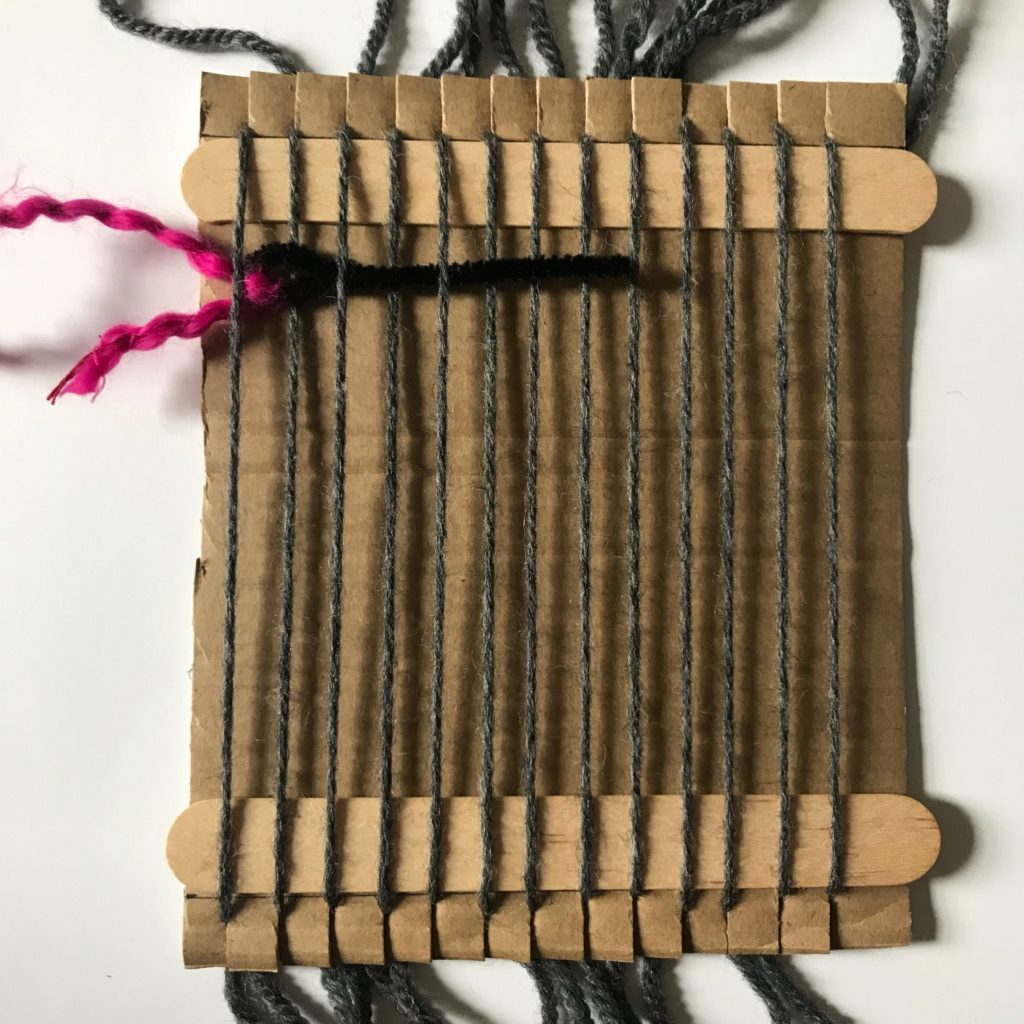
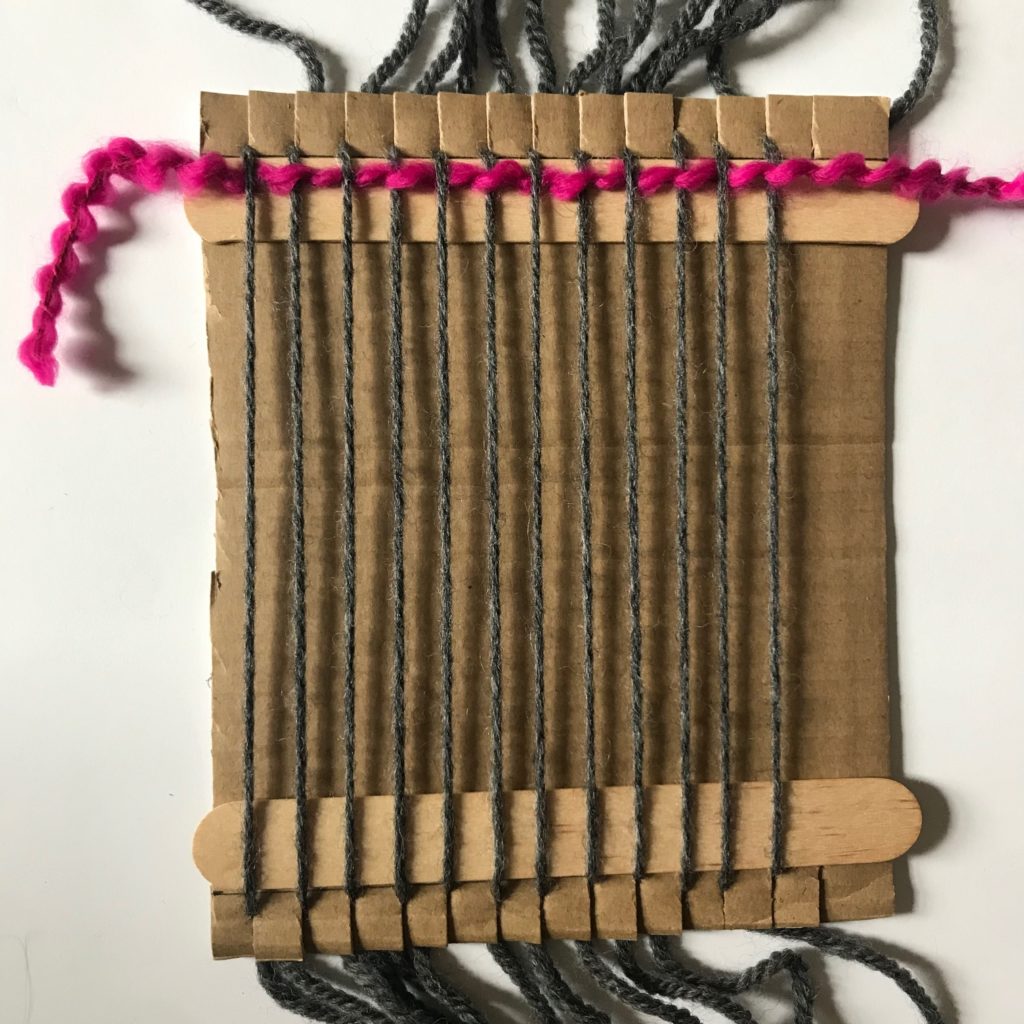
Step 5: Begin weaving. Slide the tip of the needle under the first thread in the warp and up over the next, moving right. Continue weaving, alternating under and over each thread (under the third, over the fourth, etc.). Pull the yarn all the way through the final thread, leaving a 3-4 inch tail loose on the left. For younger children, you can tie this loose end onto the first thread to secure it, but it will stay in place on its own once you have completed a few rows. To create the next row, weave in the other direction. Make sure to follow a pattern opposite the one you just completed (go over where you went under, under where you went over, etc.), so as not to undo your hard work! These horizontal, woven threads are called the weft. Notice how they run perpendicular to the vertical lines of the warp.
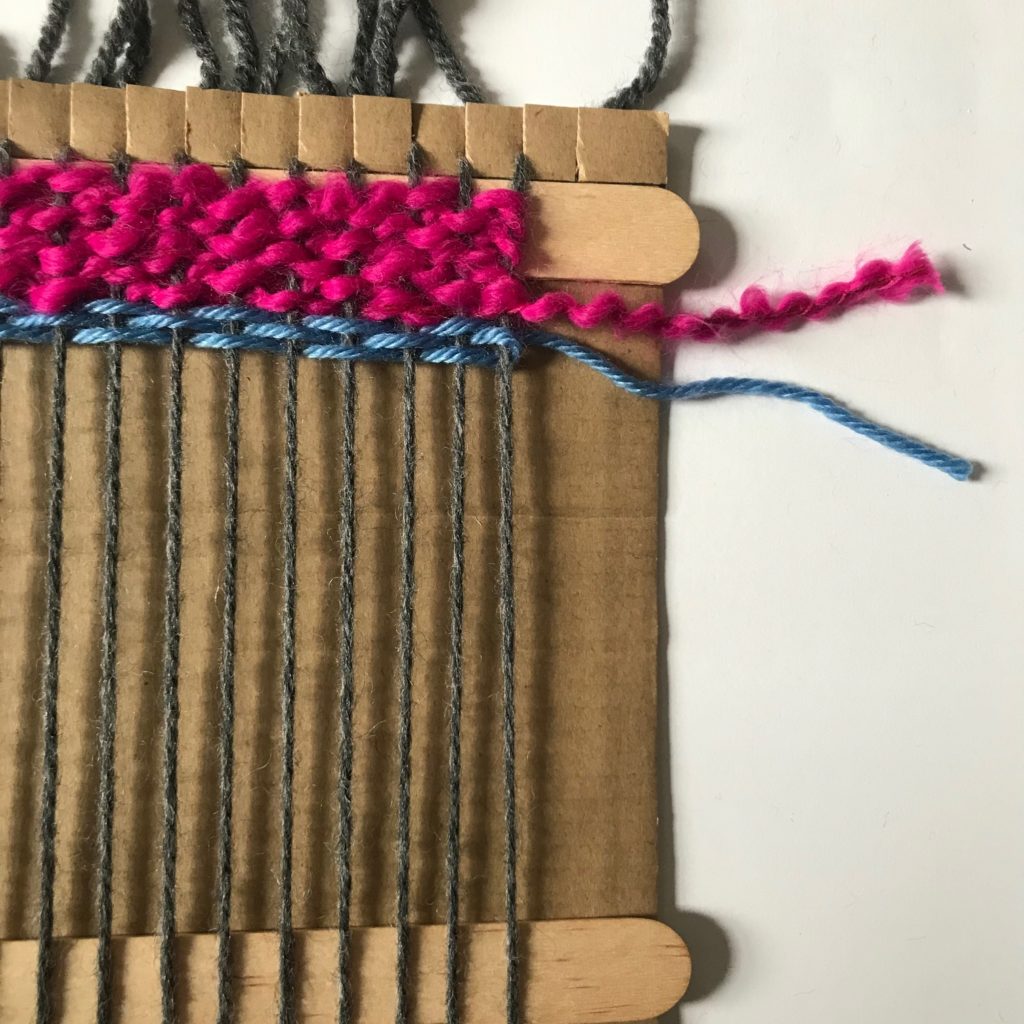
Step 6: Keep your rows snug. As you work, every row or two, use your fingers to gently push the woven weft rows together, eliminating any gaps from your design.
Step 7: Change yarn and accessorize, as desired. If you reach the end of your piece of yarn or want to use another color, finish a row and cut, leaving a 3-4 inch tail hanging off the end. Begin the next row from the same spot using a new piece of yarn, similarly leaving a 3-4 inch loose tail. If you want, you can tie these ends directly onto the warp as you go along, though we did not.
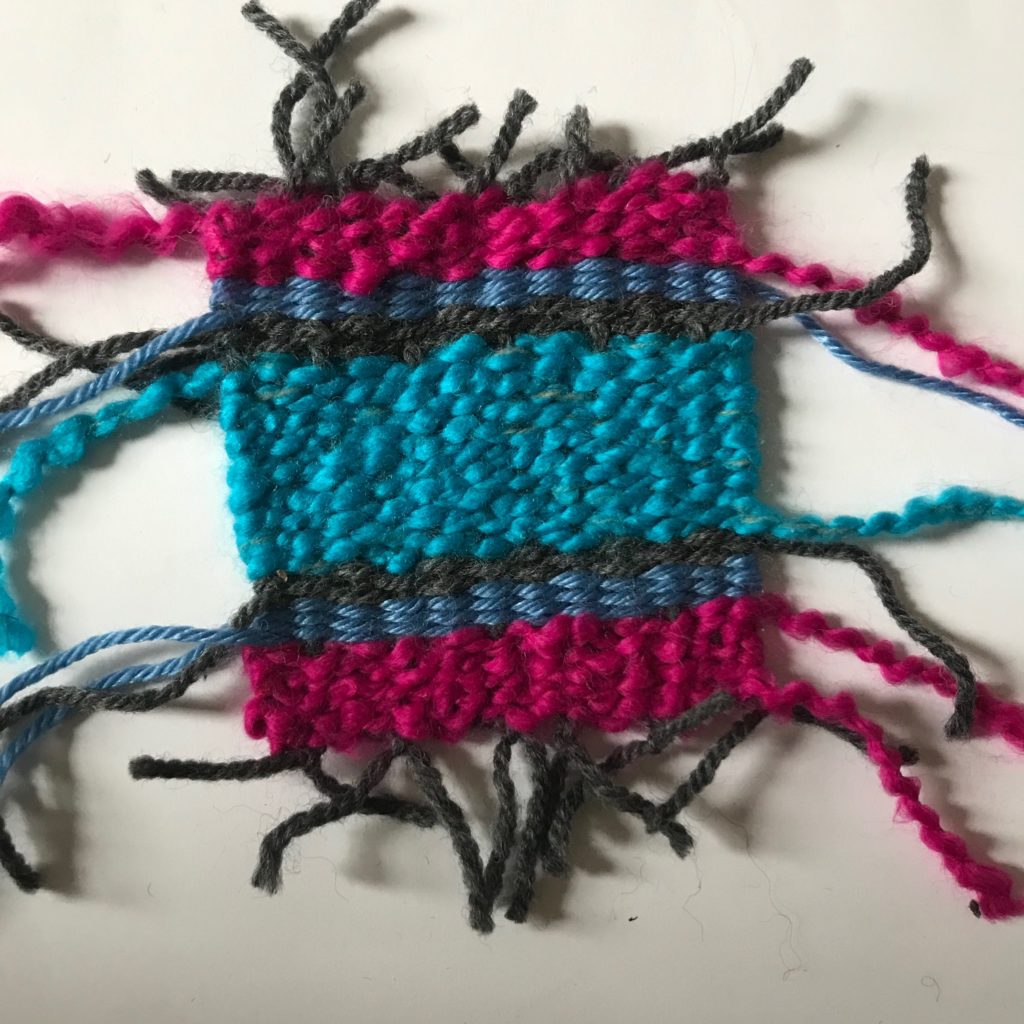
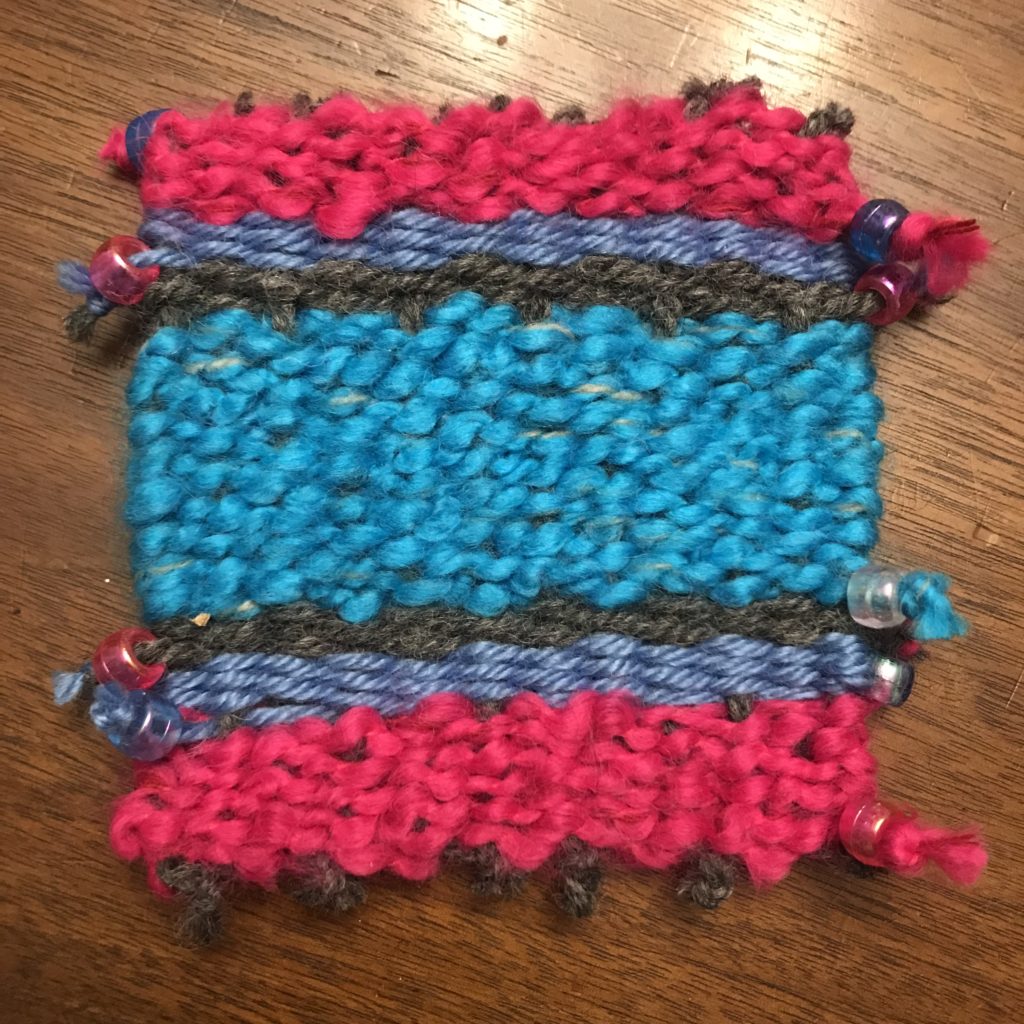
Step 8: Remove your weaving from the loom. When you reach the bottom or decide your weaving is finished, remove the tape at the back of the cardboard and carefully pull the warp threads out from the notches, ensuring none of your weaving comes loose. Once you have lifted your weaving from the cardboard, double-knot the vertical warp threads together at their upper ends – tie strands 1 & 2 together, then strands 3 & 4, and so on. Make sure any loose tails sticking out on either side are tied onto the warp or tucked and woven into the back of the design. Then trim the ends to neaten. We decided to tie beads on to decorate. Repeat this process with the loose ends of the warp at top and bottom.
Step 9: Pat yourself on the back. You just finished a beautiful weaving! My daughter decided to keep her design as is and to use it as a coaster. You can also modify it to hang on the wall by tying the top to a thin branch or craft stick and adding some hanging beads or pom-poms to the bottom.
Here are some tips to keep in mind as you work: · Make sure the spacing between your warp threads is consistent, so your design isn’t uneven. This is why it is so important to take careful measurements! ·Keep the yarn taut as you weave, but not too tight. If you stretch the yarn too much, you could distort the shape of your weaving, pulling it in at the middle. ·Make sure to leave enough of a “tail” at the end of each new or cut piece of yarn. This will be important at the end of the project, when you secure any loose strands to the weaving. Did you have fun weaving on your own handmade loom? We hope you did! Now that you have mastered the basics, think up some other weaving projects you can try. With this same process, using looms of different sizes, you can make coasters, placemats, bracelets, even scarves and blankets for your stuffed animals!
Key words and concepts:
Weaving: Making fabric by interlacing separate strands of yarn at right angles Loom: A device used to assist in weaving fabric; the loom holds threads tightly in place so otherthreads can be wrapped around them Tension: The state of being stretched tight, usually by applying force Dimensions: The measurable attributes of a given object, like its length, width, and height Vertical: Upright; in a vertical line, the top is directly above the bottom Horizontal: Flat, parallel to the ground Perpendicular: Straight lines that meet at a right(90-degree) angle, like the two lines of a plus sign*When vertical and horizontal lines intersect, they are perpendicular to one another Warp: The vertical threads of yarn on a loom over and under which other threads are woven Weft: The horizontal threads on a loom, woven over and under the vertical threads
For further discussion: Where does yarn come from? Yarn is made from different types of fibers. Some (like cotton) come from plants. Others, like wool (from sheep), alpaca, silk (from silkworm larvae) angora (from rabbits), or mohair and cashmere (from goats) come from animals. Can you find these different materials in your closet? Check out the labels! What are your clothes made from?
Written by: Amelia Schrade Senior Manager of Learning and Education
Materials
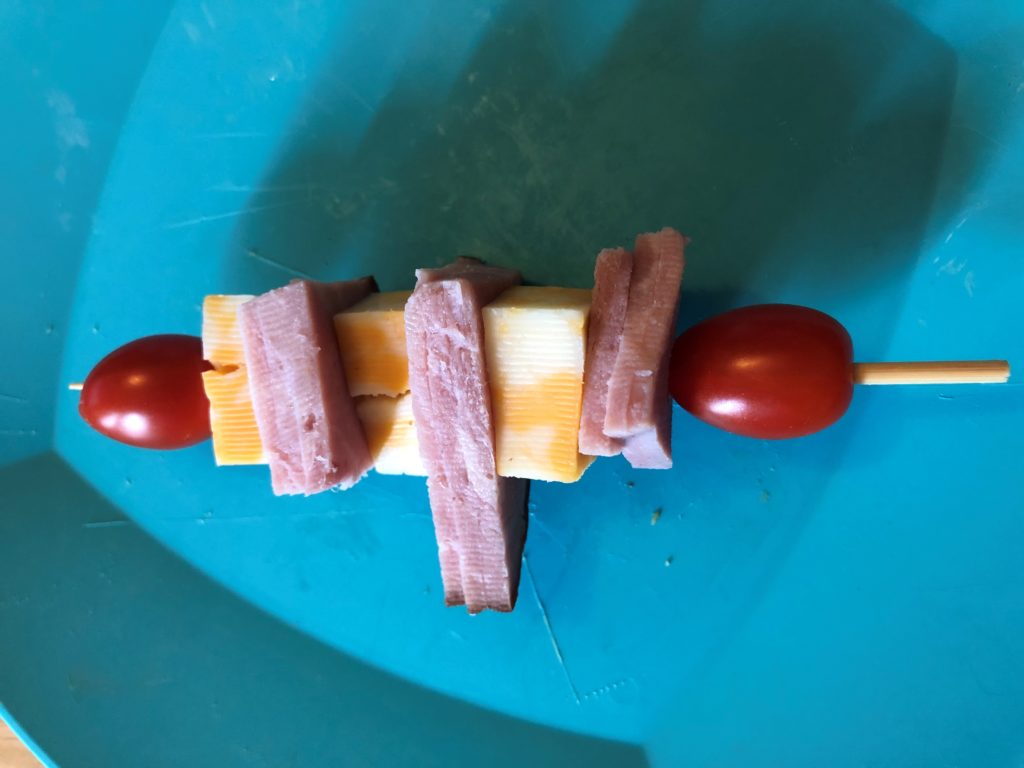
Lunch meat Cheese Cubes Tomatoes (or other vegetable) Skewer (cut in half)
Length:
5 minutes
April 23rd is National Picnic Day! Hopefully it is a nice day in your neighborhood and you are able to have an outdoor picnic with your family today! Not everyone enjoys sandwiches for a picnic and they can be even more challenging for our friends that have gluten sensitivities. Don’t worry if it is cold or rainy in your neighborhood today! You can still enjoy this traditional activity inside! Get a blanket and set up an area on your kitchen or living room floor. Turn off electronics and unplug for an indoor picnic lunch! This tasty sandwich alternative is fun to prepare together and makes a great lunch for your outdoor or indoor picnic lunch!
Directions:
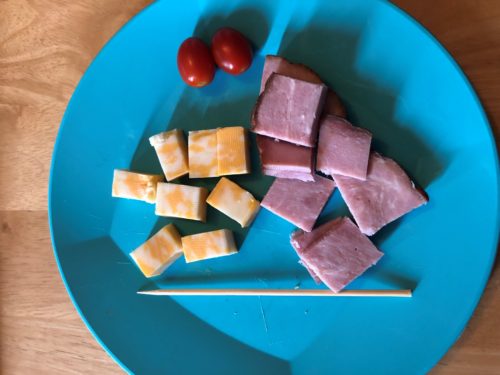
Step 1: Precut cheese cubes and lunch meat. If you have thicker lunch meat like me, you can cut this into different shapes. This is a great lesson for kiddos who are still learning shapes! Step 2: First, skewer your vegetable and push it all the way to the bottom. I used a cherry tomato but you can use whatever you have at home or your child’s favorite! Other great options are carrots and cucumber. Step 3: Alternate skewering cheese and meat to create a pattern on your skewer! Step 4: Top off your skewer with another vegetable! Repeat these steps to create as many skewers as your family needs to enjoy their picnic! You can use different cheeses, meats and vegetables to change up the flavor!
Encourage your child to practice making new patterns or finishing a pattern you created. Even this simple lunch can be turned into a wonderful learning opportunity. I hope you and your family enjoy this simple skewer “sandwich”! Share a photo of your family picnic on the Explore & More Facebook page!
Vocabulary Words
Picnic: An outdoor outing that involves packing and bringing a meal, often enjoyed on a blanket Pattern: When you repeat a design two or more times.
Happy Earth Day! We wanted to celebrate Mother Earth by reading you a little story about what happens when you plant a seed. We were lucky enough to have Daun from the Grassroots Gardens of WNY read today’s story, no one knows better what happens when you plant a seed!
If you plant a carrot seed . . . a carrot will grow.
If you plant a cabbage seed . . . cabbage will grow.
But what happens if you plant a seed of kindness . . . or selfishness?