sponsored by: national grid
By: Valerie Drapeau
Education Coordinator
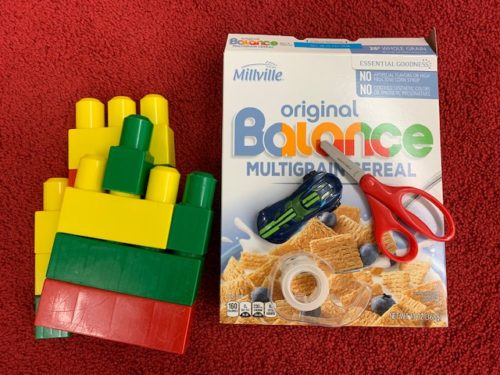
Materials:
Empty cereal box
Kid scissors
Blocks or legos
Car, ball, etc. (toys to try on the ramp)
Tape (optional)
Length:
Set-up: 5 minutes
Active: 15-20 minutes
Academic Subject(s):
Engineering
This lesson supports the following standards:
ETS1.A: Defining Engineering Problems – A situation that people want to change or create can be approached as a problem to be solved through engineering. Such problems may have many acceptable solutions. (secondary to KPS2-2)
ETS1.A: Defining Engineering Problems – Possible solutions to a problem are limited by available materials and resources (constraints). The success of a designed solution is determined by considering the desired features of a solution (criteria). Different proposals for solutions can be compared on the basis of how well each one meets the specified criteria for success or how well each takes the constraints into account.
Are you looking for a fun activity on a rainy day perhaps? This easy craft made with materials from your home, can help children discover physics principals as they test the different speeds of objects. They will be having so much fun they won’t even realize that they are learning the basics of speed and velocity!
Directions:
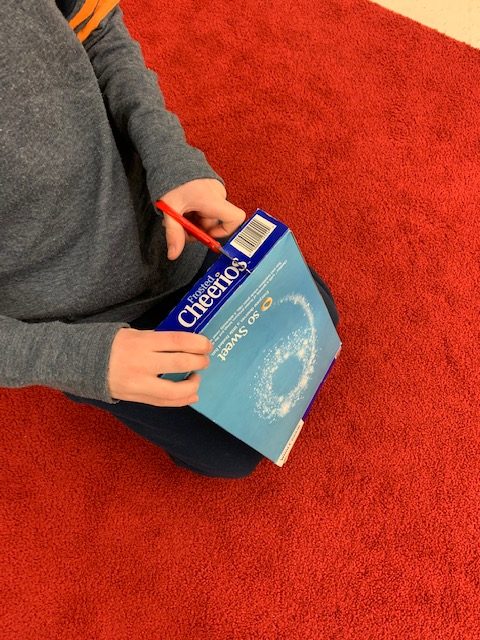
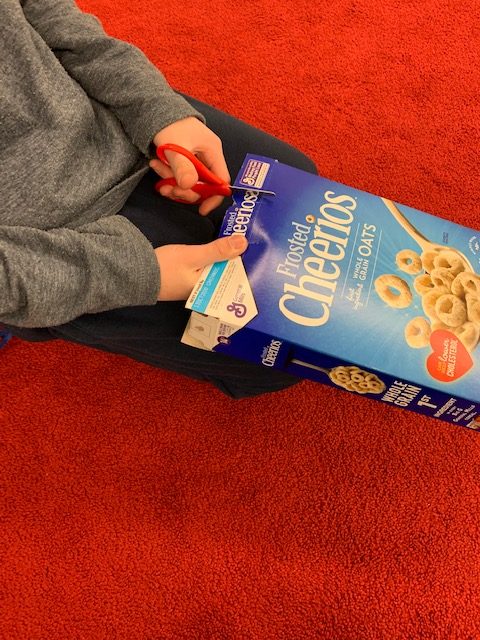
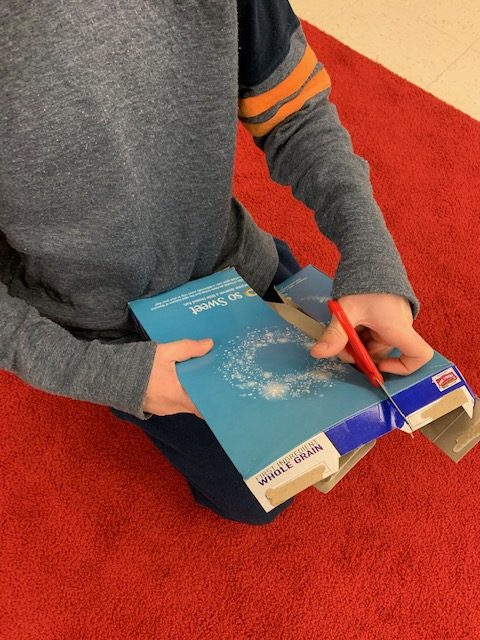
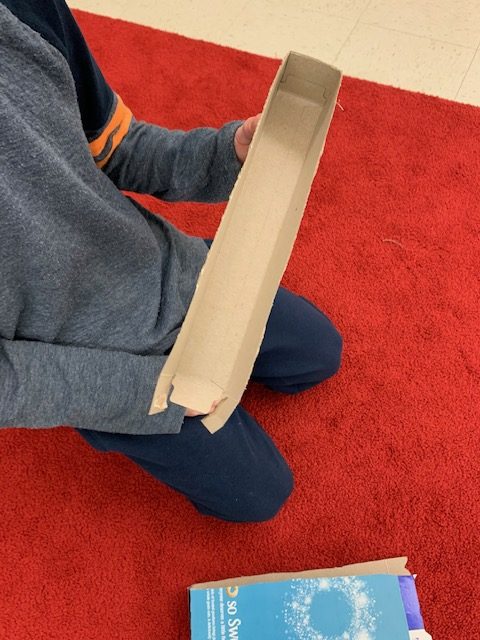
Step 1: Cutting the ramp will be tricky, so give your child some guidance before they cut or assist them if necessary. You could even use a marker and a ruler to make guidelines to help them understand where to cut. Take an empty cereal box and turn it to the side (usually where the nutrition label is). This section will be the length of the ramp. Start your cut at the top of the box about 2 inches from the side and cut all the way down. Cut through the bottom of the box, (this part of the box should have already been closed, and should stay closed when cutting) and then continue cutting onto the backside. Cut the backside of the box all of the way back up to the top about 2 inches from the side as well. Now you have your ramp!
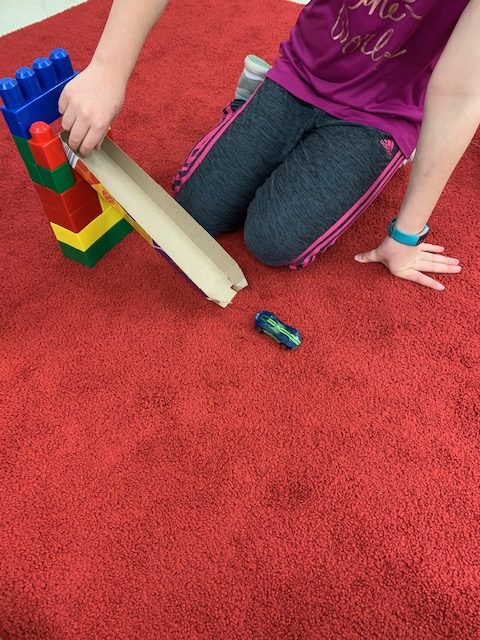
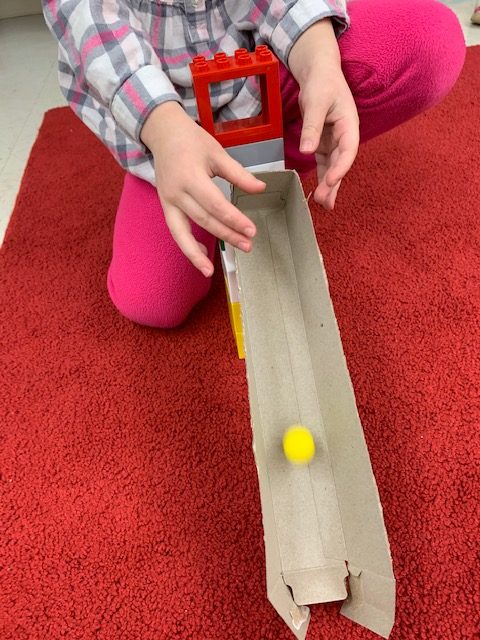
Step 2: Get ready to build! Have your children use legos, duplos or any kind of blocks in your home to build a support for the ramp. They can build the blocks with a “window” near the top for the closed side of the ramp to sit in for stability, or the ramp can rest on top of the blocks at an angle. This may require you to lightly tape the ramp to the blocks so it doesn’t slip off.
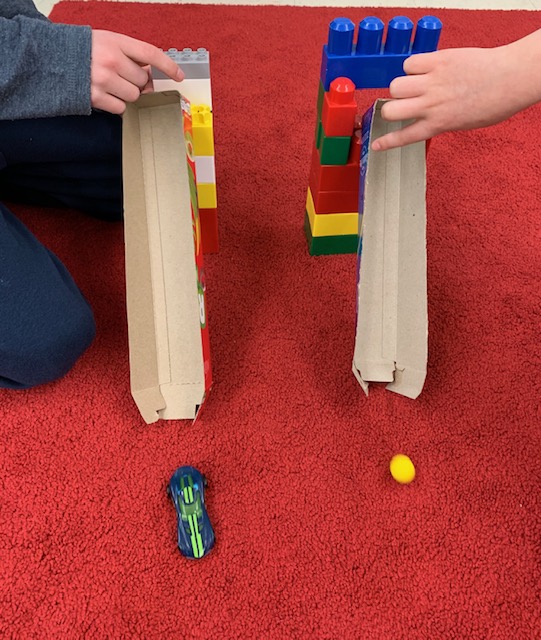
Step 3: Once your ramp is secure in/on the blocks, you’re ready to test it out! Choose some different toys: a ball, a car, a coin, etc. to see how well things slide down the ramp. You could even have your child measure and write each object’s distance down in a notebook, (the amount of inches or feet each item traveled from the top of the ramp to wherever it landed). Have them compare which object traveled the farthest and discuss why they think that was the case. One other fun thing to try is to adjust the height of the ramp, higher or lower, and see how that changes the speed of the objects. You could even create a second ramp and block build to have objects race each other! Remember, there is no wrong way to create this activity, so allow your child’s imagination with their block build (and even the toys that they test!) to run wild!
Vocabulary Words:
Speed – Is a measurement of how fast an object moves relative to a reference point. Speed can be calculated using this formula:
Speed = Distance/Time
Velocity – Is the speed of something in a given direction. Velocity can be calculated using this formula:
Velocity = the change in distance/the change in time
Stability – (from the root word stable) – An object or structure not likely to give way or overturn; something that is firmly fixed.