Sanity Savers: World Flag Snacks

supported by: The Western New York Foundation

Written by: Julia Bozer
Cultural Program Educator

 Indulge in some kitchen travel, making world flags from snack foods and leftovers! You’ll discover flags from around the globe, learn about different sizes, shapes, and colors, and enjoy an international treat.

Sanity Savers: Flag Snacks


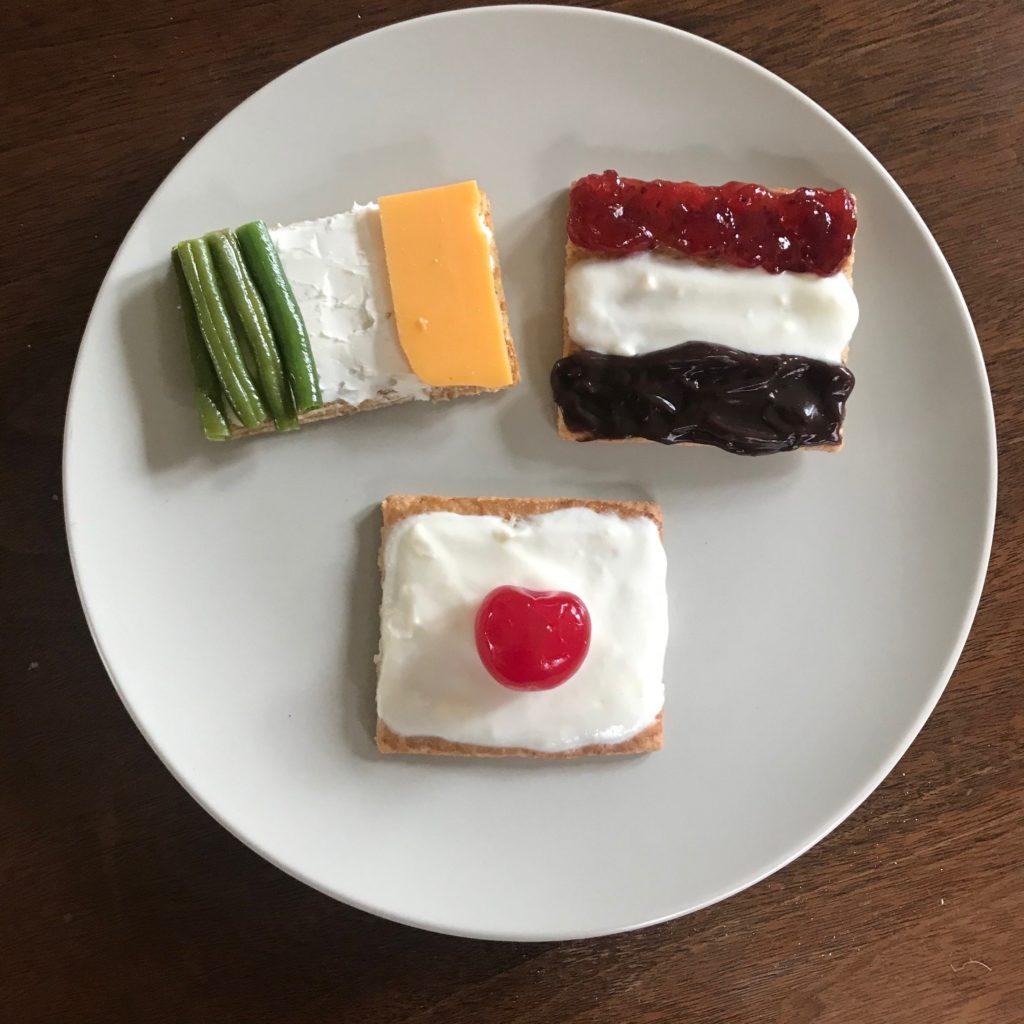
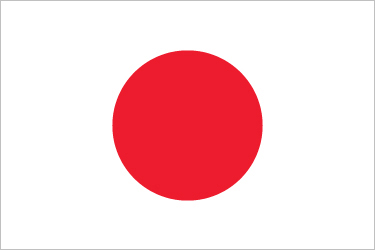
 At home, we tried both sweet and savory combinations, recreating the flags of Ireland (green beans, cream cheese, and cheddar cheese), Japan (vanilla yogurt and a cherry), and Yemen (strawberry jam, yogurt, and chocolate pudding).

We used crackers to make a rectangular base – graham crackers for sweet, 1.5 saltines for savory – but you can also assemble your designs right on the plate. And, yes, I realized later that raisins and red fruit would have been a healthier alternative to the pudding and jam.                                             

Materials                            

Crackers, yogurt, cream cheese, hummus, fruit, vegetables, raisins, peanut butter, jelly, candy, whatever is in your kitchen!

Length:

15-20 minutes 

Academic Subject(s):

Social Studies, Geometry 
This lesson supports your student’s curriculum:
·  SOC: 3.4
·  MATH: NY-K.G.1, NY-K.G.2, NY-K.G.5

This lesson supports areas of Early Childhood Development and PreK Curriculum:
·  NY-PK.G.1, NY-PK.G.4

Directions:  

Step 1: Search online or in books for images of flags you could make with food.
Hint: flags with color blocks or simple, linear shapes are the easiest to recreate.

Here are some ideas to get you started:  

Step 2: Look carefully at each flag you chose and identify its key shapes and colors. Then explore your kitchen: can you find foods that are the right color and shape to match the design on each flag?

Get creative: can you arrange smaller foods to form a stripe or star? Are there foods you can spread around to form a certain shape? You can also discuss which tastes go well together and which don’t – for example, we found some cherry tomatoes that were the perfect color for our Yemeni flag, but they wouldn’t have tasted great with the chocolate pudding… 

Step 3: Assemble your flags. Be patient. If you make a mistake, eat it up and try again! 

Step 4: Enjoy your flags, exploring the world one bite at a time. 

Discussion points as you work:
·  What do these flags have in common?
·  What shapes do you see? What colors?
·   Why do you think so many national flags have such simple shapes?·   The different parts of a flag are symbols, meant to represent a country’s history and values. What might some of the colors and emblems on these flags stand for?

Did you know?

· The study of flags is called vexillology. And the international federation of vexillologists has its own flag! It looks like this: 

Sanity Savers: Flag Snacks

·  The Japanese flag – a white rectangle with a red circle at center – is sometimes referred to as “Hinomaru,” or “the circle of the sun,” since it reflects Japan’s identity as the Land of the Rising Sun. A common Japanese treat is the “Hinomaru Bento” – a rectangular bento box filled with cooked white rice and an umeboshi (or pickled red plum) in the middle. It looks just like the national flag! 

Sanity Savers: Flag Snacks

Keep playing!
· For an extra challenge, try to think of flags you could make with typical foods used in the originating country – like the “Hinomaru Bento.” For example, could you make Italy’s flag from basil, mozzarella cheese, and tomatoes?
· Try inventing your own flag! If your household had a flag, what would it look like? What would it symbolize? 

Did you try this activity? If so, share your photos online; we’d love to see them!

Extra points for recreating flags that include animals (Mexico, Sri Lanka), architecture (Afghanistan, Cambodia), coats of arms (Ecuador, Spain), or most of all a dragon (Bhutan, Wales).

For more Sanity Savers projects click here!

Sanity Savers: Easy Block Prints

Supported by: Peter C. Cornell Trust

Written by: Julia Bozer
Cultural Program Educator

If you visited Explore & More recently, you probably played in our mini West Side Bazaar and tried on different styles of clothing from around the world. Many of the intricate patterns and designs on these textiles are printed right onto the fabric, using block printing techniques. 

Block prints are made from three-dimensional surfaces called reliefs. In a negative relief, a design is cut into a soft, flat surface, like drawing with your finger in wet sand. In a positive relief, the background is carved away, leaving the design sticking out, like with most rubber stamps. You can also make a positive relief by adding material to a hard, flat base.

When you press a relief into ink, the color stays on the outer surface. Used as a stamp, a positive image will appear in ink, while a negative image stays bare.  Here are some simple block printing methods you can try at home, using everyday materials to stamp your own patterns and designs!        

Materials                            

For a positive relief, try a wooden block, brick, or small cardboard box as a base

For a negative relief, try carving into Styrofoam or a potato

Yarn
Pencil or pen
Paintbrush
Paint or ink
Shallow pan or paper plate 

Sanity Savers: Easy Block Prints

Length:

15-20 minutes 

Academic Subject(s):

Visual Art 
This lesson supports your student’s curriculum: PreK – 5 VA.Cr.1 

Directions:  

Step 1: Choose your materials. We decided on a small cardboard box and an old sanding block for our positive reliefs and a piece of packing Styrofoam for our negative relief.

 Step 2: Add your designs. For an easy positive relief: attach items to your solid, flat surface. We wrapped yarn several times around the sanding block, using tape to keep it in place, which resulted in a simple line pattern.You could also glue small items like popsicle sticks, toothpicks, or even cardboard cutouts to the surface for a more detailed design. For an easy negative relief: Use a dull tool to carve a pattern into your soft surface. We used the tip of a paintbrush to dig deeply into the Styrofoam block. As we discovered, this can get quite messy. 

Step 3: Print your image. We poured some black paint into a shallow pan and spread it thin, but an ink pad will also work. Press your block gently into the pigment and then apply it, like a stamp, onto a blank surface. It helps to apply it to a piece of scrap paper first, to shake off any excess paint. You can print onto paper, fabric, wood, whatever you wish! We used one of our blocks to decorate a few plain t-shirts.

For further thought:

·        What items around your house have printed designs? Take a close look at clothing, hand towels, stationary. Can you recreate any of the patterns you see in your own prints?

·        Explore different surfaces around your home. What surfaces are two-dimensional? Which are three-dimensional? Can you find any three-dimensional images that use positive and negative space?

·        Some optical illusions play with our perceptions of positive and negative space – think of the classic black-and-white image below, where you see either a vase or a pair of faces, depending on which color you focus on. Would it matter if the colors were reversed? Why, or why not? Keep playing!

Sanity Savers: Easy Block Prints

·        Can you find other items around your house that would make great block prints? Get creative!

We would love to hear about your new ideas and see your results. 

For more Sanity Savers projects click here!

Sanity Savers: Planting Seeds from the Fruit you Eat

Presented by: M&T Bank

By: Julia McMahon
Lead Play to Learn Facilitator

Materials

Containers; one for each type of seed (Alternatives: upcycled plastic container, such as a yogurt cup or plastic dip container, egg carton, etc.
Be sure to make a few drainage holes in the bottom.)
Soil: a potting or seed starting mix works well, but you can also try soil from outside
Seeds: collected from fruit you’ve eaten, your pantry, or your garage/basement
Water
Tray or plate
Scoop or trowel (optional) 

Sanity Savers: Planting Seeds from the Fruit you Eat

Length:

Set up: 20-30 minutes (depending on how many seeds and pots you have)
Inactive: Typically a week or more before the seeds germinate, but don’t forget to water!Observations: 3-5 minutes each day afterward 

Academic Subject(s):

Science 
This lesson supports your student’s K – 2nd grade curriculum: SCI:  P-LS1-1 1 -LS3-1. 

Directions:

Step 1: Collect seeds from fruit in your house (Fact: If there’s a seed in it, it’s a fruit! Some things we call vegetables, like tomatoes, cucumbers, eggplant, peppers, for example, are actually the fruit of a plant.) You may also have seeds in your pantry, like dried beans. Finally, check your garage, closet, or basement, in case you have any leftover seeds, such as grass seeds, from last year.

Step 2: Fill each container with soil and pat gently with fingertips. Soil should be about an inch from the top of the pot, as pictured.

Step 3:
•     For bigger seeds like lemon, beans, and apple, make a 1 inch deep hole with your fingertip, as pictured. If you put more than one seed in each pot, be sure to space them evenly. Using your fingertips, cover the holes with the soil already in the pot.

•     For smaller seeds, like grass, sprinkle the seeds on top of the soil, then work them into the soil with your fingertips.

Step 4: Water the soil. A spray bottle easily wets the soil without disturbing the seeds.  However, you can also use a pitcher, a cup of water, or water from the faucet, just administer a slow stream of water so you don’t disturb the seeds. Water when the top layer of soil looks dry (roughly, every 1-3 days).

Step 5: Put your plants on a tray to catch any excess water and place them in a sunny window. 

Step 6: Be sure to label your plants so you know which are growing and which aren’t. 

Step 7: Observe the plants daily. Be sure to note if and when they germinate. Once they germinate, draw what you see every day. You will see changes daily once they begin to sprout!        

Sanity Savers: Planting Seeds from the Fruit you Eat

   Tip: Not all seeds will grow! Seeds need air, heat and water to grow. Did you provide all these things? Some seeds require special treatments (for example, tomato seeds need to ferment before they are ready to grow) in order to start growing. If you’re curious why certain seeds aren’t growing, do a little research into their germination requirements!

Tip: If your plants start to look crowded, pull a few out to give them more room to grow (except for grass, which grows well when its crowded). Leave some pots crowded and observe!             

 Vocabulary Words

•     Germinate: To begin to grow; sprout.  

For more Sanity Savers projects click here!

Sanity Savers: Nursing Home Mail

Sponsored by: M&T Bank

By: Val Drapeau           
Education Coordinator 

Materials:

Construction Paper
Crayons or Markers
Stickers
6×9 Mailing envelope (or larger)
Stamps 

Sanity Savers: Nursing Home Mail

Length:

Set up: 1 minute
Activity: 15-20 minutes (or as long as the children are interested in making them!) 

Academic Subject(s):

English Language Arts (ELA) and Art 

With coronavirus restrictions in full force right now, most nursing home residents are not allowed to have any visitors, including their own family.  This can be a very lonely time for people in seclusion.  Why not use our extra time at home with our kids to spread some cheer? 

Sending homemade decorated cards to local nursing home residents will put a smile on their face guaranteed!  Any age of child/adult can participate in this activity, so making it a family project could be fun! 

Directions:

Step 1: Choose a piece of construction paper and fold in half.

Step 2: Have children think of appropriate sayings that could be put on a card that would be received by someone that they don’t know.  Sayings like, “Hello!” or “Thinking of You!” or “We’re sending some cheer!” would all be great choices.  A teachable moment for continued learning could be asking your child what different things they would say to someone close to them versus someone that they didn’t know or just met.  Talk about how they came to those conclusions and why.

Sanity Savers: Nursing Home Mail

Step 3: Take some time to write on the front covers and insides of the cards with a marker or crayon.  Remember that whatever is created will brighten a person’s day; so don’t worry too much about it being perfect!

Step 4: Add some stickers that you have available around the house or have children draw some small pictures all over the cards of things like hearts, happy faces, etc.  It is a parent’s discretion on whether or not to have children sign their name.

Sanity Savers: Nursing Home Mail

Step 5: Place cards in a 6×9 mailing envelope with a little note to the nursing home staff saying something like, “Please pass these cards out to any residents that might need a little cheering up!”  

Address the envelope to a local nursing home or assisted living facility, add some stamps and then pop it into your mailbox.  Knowing that kids are thinking of them will bring such joy to residents in your community! For this community service project, any number of cards that you send would be great!  Encourage your friends to try this project too, and let’s see if we can flood our local facilities with a lot of kindness! 

Sanity Savers: Nursing Home Mail

Vocabulary Words

· Seclusion – to remove or separate from outside influence
· Conclusion – a judgment or decision reached by reasoning or the end of an event or process
· Nursing Home Facility – a private institution providing residential accommodations with healthcare, especially for elderly people
· Assisted Living Facility – Similar to the nursing home definition; however independence and privacy are encouraged more in assisted living centers while medical care is higher in a nursing home.
· Community service project – voluntary work intended to help people in a particular area

Check out our other Sanity Savers posts here!

Sanity Savers: How to Make Homemade Modeling Dough

presented by: m&t bank

By: Karen Roesser   
Early Childhood Educator 

Materials:

1 large cooking pot
Spoon
1 cup of flour
½ cup of table salt
2 teaspoons of cream of tartar
1 Tablespoon of cooking oil
1 cup of water 
Food coloring (the Wilton icing color containers make extra vibrant colors!)

Sanity Savers: How to Make Homemade Modeling Dough

 *Other add-in ideas:
– Use of package of unsweetened jello to color and SCENT your dough.  A couple of drops of scented oil like orange, lemon or peppermint will also work well.
-Adding cinnamon will give your dough a nice brown color and a great smell especially when warm!-Add some glitter and your dough will sparkle. 

Length:

Cooking time: 15 minutes
Interactive time: Hours of fun! (Dough can be kept in an airtight container or Ziploc bag and it will last for a long time.)  

Academic Subject(s):

General lesson that covers ( pre-)academics in the areas of literacy, numeracy and science, fine motor skills important for developing small muscles of hands and fingers, building vocabulary and encouraging creativity.  
This lesson supports areas of Early Childhood Development and  PreK Curriculum:
·      Developing fine motor skills.
·      Using dough as a tool for practicing academic skills, developing language, and building social-emotional relationships.

Directions:

Step 1: Measure out the needed ingredients and put them all together in a medium sized cooking pot. This is a great opportunity for older children to read and follow a recipe independently and do the measuring on their own. Younger ones can certainly help pour the ingredients in and choose their favorite color for the dough.   

Sanity Savers: How to Make Homemade Modeling Dough

Step 2: Mix together the ingredients in the pot until smooth and then squeeze in 5-10 drops of your chosen color. Encourage stirring and watching the process of the change in color.  

Step 3: The adult will cook the mixture over medium heat until it becomes solid and can be scraped up into a ball. Stir frequently during this process and scrap the bottom of the pan as it solidifies.

Sanity Savers: How to Make Homemade Modeling Dough

Step 4: Turn out the ball of dough onto a heat resistant surface and let it cool until it can be kneaded together by hand. Manipulating the dough while it is warm is a pleasant sensory experience. Talk about the changes that occurred during the process. (liquid to solid and change in color) 

Sanity Savers: How to Make Homemade Modeling Dough

Step 5:  Your modeling dough is ready to play with. It’s best to play with it on a table surface, tray or placemat that can be easily cleaned. Don’t forget to put it in that air tight container when you are done with it to save for another day. Ideas for expanding play with modeling dough 

Sanity Savers: How to Make Homemade Modeling Dough

+ Provide an assortment of “tools” to use that you would find in your kitchen.
Ex. Cookie cutters,  plastic knives/forks, small plastic containers, rolling pin, birthday candles, melon baller, potato masher etc.  

+Find objects that could be pressed into the dough to make prints. Ex: seashells, rocks, twigs, small plastic animals, alphabet letters, numbers, bottle caps etc.  

+ Practice cutting skills by snipping dough “snakes” into little pieces.  

+Roll “balls and snakes” to form the letters of the alphabet, numerals and the letters of your name. Can you make a face? Can you make an animal?  Play games for counting and making sets of objects. 

+What color dough did you make today?

What great ideas can YOU come up with when playing with your homemade modeling dough?

For more Sanity Savers projects click here!

Field trips are back! Please be aware that it will be busier than usual.