Sanity Savers: Architect Shapes

Presented by: M&T Bank

By Will Kawalec
Lead Play to Learn Facilitator

Materials:


Construction Paper
Pre-Cut Shapes (construction paper)
Glue Sticks
Crayons and/or Markers

 Length:

Set up: 5 Minutes
Activity 5-20 Minutes  

Academic Subject(s):

Art, Architecture, Math 


This lesson supports Preschool to Second Grade:


MST PK.G.A
MST K.G.A, K.G.B,
MST 1.G.A.2
MST 2.G.A.1
SCI K-2-ETS1-2 
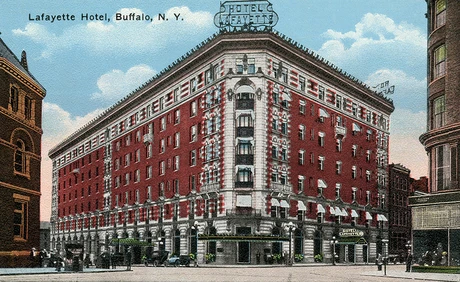
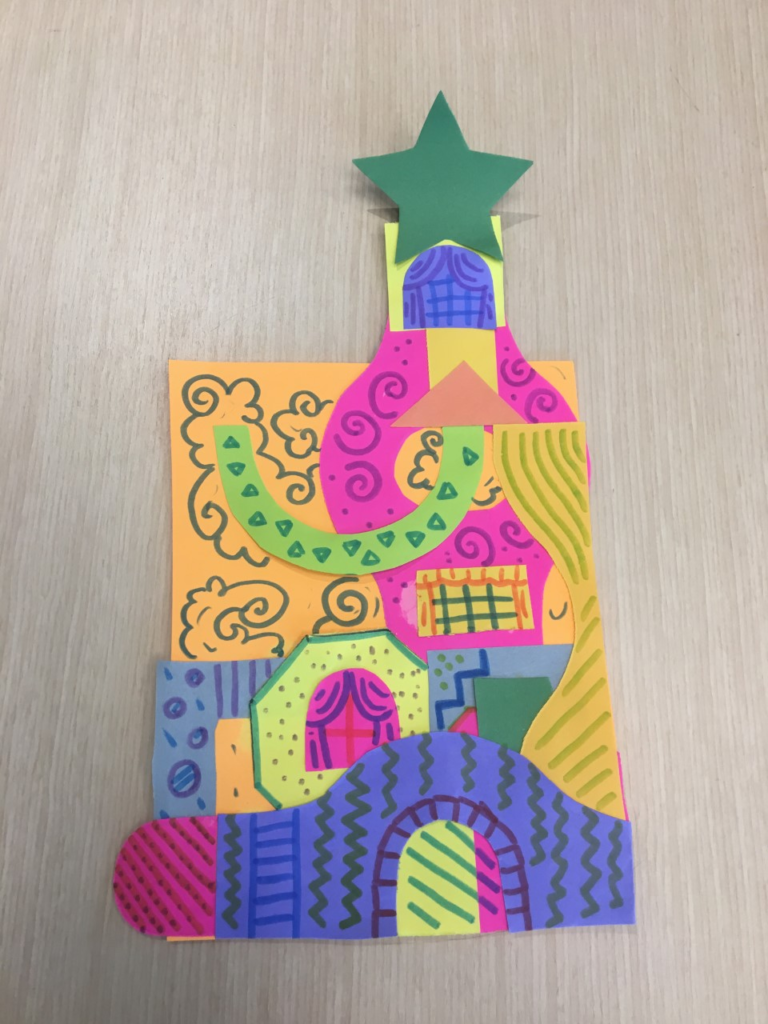
This lesson supports areas of Early Childhood Development and PreK Curriculum: To build a 2D house or building out of precut shapes.   Have a building to display that is made up of entirely shapes.  Recognizing Shapes, using shapes and imagination to create a building structure.  Using shapes to create an imaginative image.  Using shapes to mimic famous buildings ( including famous Buffalo buildings).   

Sanity Savers: Architect Shapes

Directions:

Step 1:  Start by selecting one sheet of construction paper for your buildings backdrop.
Step 2:  Select the shapes you will want to use to build your structures, circle, square, rectangle, triangles, arch, oval, column.  Step 3:  Arrange the shapes to make a structure of your choosing then when ready glue the shapes to the construction paper to make your building. 
Step 4: Decorate glued shapes after the glue has dried.   

Sanity Savers: Architect Shapes

Vocabulary Words

·Architecture: The practice of designing and constructing buildings.
·Architect:  Someone who does architecture for their career.
·Façade: The front side or face of a building.  

Check out our other Sanity Savers posts here!

Sanity Savers: Making Germs Scatter

Sponsored by: BlueCross BlueShield of WNY

By Val Drapeau
Education Coordinator

Teach your children the importance of hand washing with soap and water through this fun and easy expirement. It’s like magic!

Download a printable version here!

Materials:

1 cereal bowl
Water
Black pepper (ground, not peppercorn from a grinder)Dish soap or hand soap 

Length:

Set up: 2 minutes
Observations: Instant! (1 minute total)  

Academic Subject(s):

Science & Chemistry
 This lesson supports areas of Early Childhood Development and K – 2 Curriculum:
·Understanding of cause and effect – i.e. adding the soap to the pepper water makes the pepper scatter to the edge of the bowl. (5 – 7 years)  
Here’s why:  Soap is able to break down the surface tension of water.  That is why soap is a good cleaner!  As the soap moves into the water, the surface tension changes and the pepper flakes no longer float on top.  However, the water molecules still want to keep the surface tension going, so they pull away from the soap, and carry the pepper along with them to the edge of the bowl. 

Germs? Gross! I can’t see them so what are those anyway? Germs are tiny organisms that can cause disease. Health experts stress the importance of explaining germs to young children in order to help promote basic hygiene practices in the future. In this unprecedented time of families seeking to stay healthy with the novel coronavirus, it is imperative that our children learn the value of proper hand washing. 

How do we help our kids understand why hand washing is important though?  This quick and easy science experiment will show them why germs run from soap, and everything you need to demonstrate this is already in your home!  Kids will remember the moment the germs scatter in this powerful reminder to wash their hands. 

Directions:

Step 1: Fill a standard cereal bowl with room temperature or cold water (make sure the water is not hot as to avoid burning the child’s finger later in the process).

Sanity Savers: Making Germs Scatter


Step 2: Shake the black pepper into the water bowl until the surface is evenly covered.  Try not to sneeze!  The pepper flakes should float, not sink, upon the surface of the water.  Stirring is not needed.  Encourage your kiddos to help with this step!

Sanity Savers: Making Germs Scatter


Step 3: Have the child write down what they think will occur, (often called a hypothesis), in a notebook.  Ask them questions such as: “What do you think will happen when you touch your soapy finger to the water?” “How will the pepper flakes react?”

Sanity Savers: Making Germs Scatter


Step 4: Have the child dip their finger into the dish soap or hand soap container until the tip of their finger is covered.  You could also pour a small amount of soap into a second small bowl for the child to rub their finger into.

Sanity Savers: Making Germs Scatter


Step 5: Have the child place their soap-covered finger into the center of the pepper water and watch how the pepper instantly spreads to the edge of the bowl!  This will happen quickly so make sure to watch closely! Step 6: Discuss with them whether their hypothesis was correct.  Ask children what this experiment teaches us about washing our hands and it’s importance.  This experiment is easily repeated; just wash the cereal bowl, dry and duplicate the steps again! 

Sanity Savers: Making Germs Scatter

Vocabulary Words

  1. Hypothesis – a proposed explanation made on the basis of limited evidence as a starting point for further investigation
  2. Surface Tension – the tension of the surface film of a liquid caused by the attraction of the particles in the surface layer by the bulk of the liquid, which tends to minimize surface area
  3. Germs – Tiny organisms that can cause disease. These organisms are so small they cannot be seen by the human eye.
  4. Hygiene – practices to maintain health and prevent disease through cleanliness.  

For more Sanity Savers projects click here!

Sanity Savers: Dyed Rice

Sponsored by: M&T Bank

By Amelia Schrader
Senior Manager of Education

Have fun while teaching children about primary and secondary colors! The rice can be used for other activities and projects!

Sanity Savers: Dyed Rice
Download a printable version here!

Materials:


1 cup of uncooked rice
1 TBSP white vinegar
Food coloring (color of your choice)
Paper towel
Tray 

Sanity Savers: Dyed Rice

Length:


Set up: 5 minutes
Inactive: 1-2 hours
Play time: Unlimited!  

Academic Subject(s):

Sensory Motor, Science, Fine Motor, Gross Motor  This lesson supports areas of Early Childhood Development and  PreK Curriculum:
· Understanding of cause and effect – i.e. adding the blue food coloring makes the rice blue. (36-60 months)
· PreK Standards: Counting to tell the number of objects, acquire knowledge about the physical properties of the world and visual arts.

 Directions:


Step 1: Measure 1 cup of uncooked rice into a container with a lid or plastic bag.  

Sanity Savers: Dyed Rice


Step 2: Measure 1TBSP of white vinegar and add this to the uncooked rice. Add desired amount of food coloring to the bag as well. The more food coloring you add the more vibrant the color will appear.

Sanity Savers: Dyed Rice


**Extra Learning Tip! If your kiddo is learning color mixing use this activity as an opportunity to mix primary colors to make secondary colors! Don’t just use purple food dye, mix blue and red instead!  

Step 3: Secure the lid on top or zip the plastic bag closed and vigorously shake the container until all the rice is dyed.

Sanity Savers: Dyed Rice


Step 4: Lay paper towel out on a clean, dry tray. Pour the now colored rice onto the tray and allow it to dry for 1-2 hours.

Sanity Savers: Dyed Rice


Step 5: Once the rice is dry you can use it for anything – art projects, sensory bins, shaker bottles – the possibilities are endless! 

This is a great recipe to make along side your child. Encourage them to help you measure, pour and shake! We recommend doing this project just before lunch or a rest time so when they are fed, awake and active again the rice will be dry and ready for play!

 Vocabulary Words


·Primary Colors: These colors cannot be created by mixing together other colors. The primary colors are red, yellow and blue.
·Secondary Colors: These colors are created by mixing together two primary colors. The secondary colors are orange, green and purple. Orange is created by mixing red and yellow. Green is created by mixing blue and yellow. Purple is created by mixing blue and red.  

 Continue to follow our blog for more lessons and ideas on how to use your dyed rice!

Check out our other Sanity Savers posts here!

Sanity Savers: Leprechaun Trap

Sponsored by: M&T Bank

by Dan Walsh
STEM Educator & Cardboard Engineer Extraordinaire

This St. Patrick’s Day sit down with your child and tap into their imagination by building a leprechaun trap by using found supplies around your house!

Download a printable version here!

Leprechaun Trap

Length: Build time: 10-15 minutes 

Academic Subjects: Science/ Engineering
This subject supports your student’s 3rd-4th grade curriculum: Sci: 3-PS2-2 4-PS3-4. A
                                                 
This lesson supports areas of Early Childhood Development and PreK Curriculum: Understanding of cause and effect ie letting go of the string and dropping the cup.

Leprechaun Trap


Directions for Crane Trap for Leprechaun: 

Leprechaun Trap

Supplies ideas: Toilet paper roll, plastic spoon, straws, string, glue, and of course gold!
1.)  Tape a plastic spoon or straw to the inside of a toilet paper tube. Place the tube on a piece of construction paper. Give the tube about an inch of empty space at the top and bottom of the paper. Slowly wrap the toilet paper tube in construction paper and glue as you go. 
2.)  Once the glue has dried, cut four slits at the bottom. These slits will be used to anchor the tube onto another piece of construction paper.  
3.)  Measure out a piece of string to stretch from the straw to the cup to the ground. Give yourself some extra slack before you cut it. Glue the piece of string to the bottom of the cup. Then feed the string through the straw.
4.)  Then test out your trap. Hold the piece of string and then drop it. Wherever the cup lands is where you will need to place your bait. Your bait could be anything from gold coins to four leaf clover. Make a ring out of pipe cleaners (or draw a circle) Then place your bait in the circle.
5.)  Keep testing your trap!   

Directions for False Floor Trap for Leprechaun:

Supplies ideas: Cup, construction paper, glue, gold! 
1.)  Take a cup and place it lid down onto a piece of construction paper. Draw a circle around the cup. Before you cut the circle out, add four rectangle tabs onto the circle. (This will help you glue the paper lid onto the cup.) 
2.)  Cut a small X into the middle of the circle. Then cut the circle out. Glue the tabs onto the top of your cup.
3.)  Take the left-over construction paper and draw the template for a ladder. Do this by drawing three small rectangles and then cut them out. Glue the ladder to the cup.
4.)  Drop your bait into the cup and presto! You have a leprechaun trap.  

For more Sanity Savers projects click here!

Sanity Savers: Walking Rainbow

Sponsored by: M&T Bank

By: Amelia Schrader
Senior Manager of Education

Gather your little leprechauns and get ready to find the treasure at the end of our WALKING RAINBOW!

Download a printable version here!

Explore and More's Walking Rainbow

What you will need:

7 clear cups or jars

6 pieces of paper towel (cut to size to fit your cups)

Spoon

Water

Red, yellow and blue food coloring

Walking Rainbow

Directions:

Step 1: Line the cups in an arc similar to a rainbow. Fill cups 1, 3, 5 and 7 about halfway with room temperature water.

Did you know pouring helps refine fine motor skills and measuring supports Next Generation Science Standards?

Walking Rainbow

Step 2: Add in three drops of red food coloring to jars 1 and 7. Add three drops of yellow food coloring to cup 3 and finally add three drops of blue food coloring to cup 5. These are all primary colors. Stir each cup to fully incorporate color.

Encourage your kiddos to help with this step! Squeezing the food coloring bottle and carefully stirring each cup helps develop fine motor skills.

Step 3: Insert folded paper towel into each cup as pictured. One end of the paper towel should be submerged in the food colored water and the other end in the empty cup.

Walking Rainbow

Step 4: The paper towel will immediately start to absorb the paper towel. Carefully fill the cup the rest of the way with water. Make sure you do not add any water to the empty cups.

How does this happen? The water appears to climb the paper towel through a scientific process called capillary action. Capillary action is the process of liquids moving through a solid like a hollow tube or absorbent material. Capillary action is how plants move water and nutrients to their stalks and flowers.

Walking Rainbow

Step 5: Leave the cups alone for approximately 2 hours. When you return you will have a rainbow!

Have your kiddos write about and draw a picture of their observations.

Vocabulary Words

· Primary Colors: These colors cannot be created by mixing together other colors. The primary colors are red, yellow and blue.

· Secondary Colors: These colors are created by mixing together two primary colors. The secondary colors are orange, green and purple. Orange is created by mixing red and yellow. Green is created by mixing blue and yellow. Purple is created by mixing blue and red.

· Capillary Action: the process of liquids moving through a solid like a hollow tube or absorbent material. Capillary action is how plants move water and nutrients to their stalks and flowers.

For more Sanity Savers projects click here!

Field trips are back! Please be aware that it will be busier than usual.