Sanity Savers: Worry Dolls

supported by the peter c. cornell trust

By Julia Bozer
Cultural Program Educator

Sanity Savers: Worry Dolls

These are emotional times for children, who may be upset or confused about why we are all staying home. To help, we pulled out a soothing craft, making “worry dolls” from materials around the house.

According to one Mayan legend, the princess Ixmucane – the daughter of the sun – had a very special talent. If you told Ixmucane your troubles, she had the power to make them all disappear. Indigenous artisans in the highlands of Guatemala began making small, colorful dolls in honor of Ixmucane, which they called muñecas quitapenas. Traditionally, these “worry dolls” were made of wood, paper, wire, fabric, wool, or whatever they had on hand. As the story goes, if you whisper your fears to a worry doll before going to sleep and put it under your pillow, your problems will be gone by morning.

Worry dolls are easy to make, require few supplies, and can be customized and accessorized to fit your child’s taste. Best of all, they provide a sense of comfort in these uncertain days and might even win you some sleep!

Follow the instructions below to make your very own muñecas quitapenas at home.
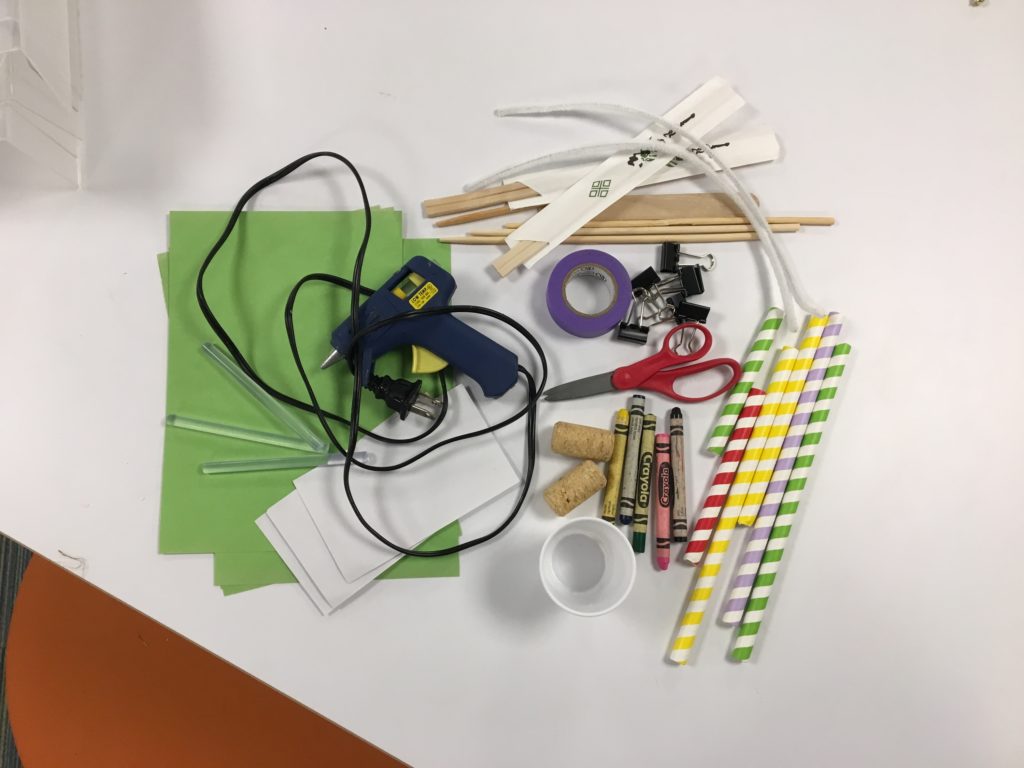
Materials:                             

Pipe cleaners, popsicle sticks, and/or clothespins
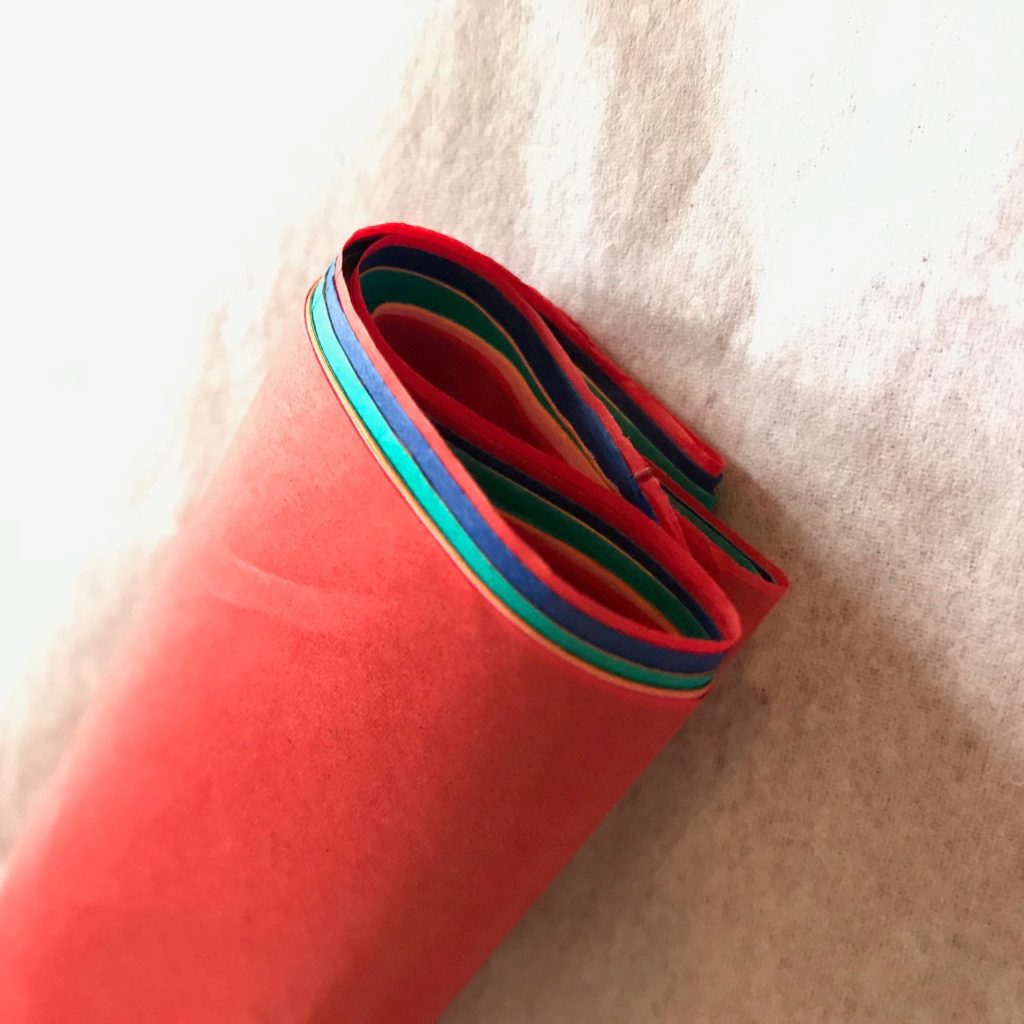
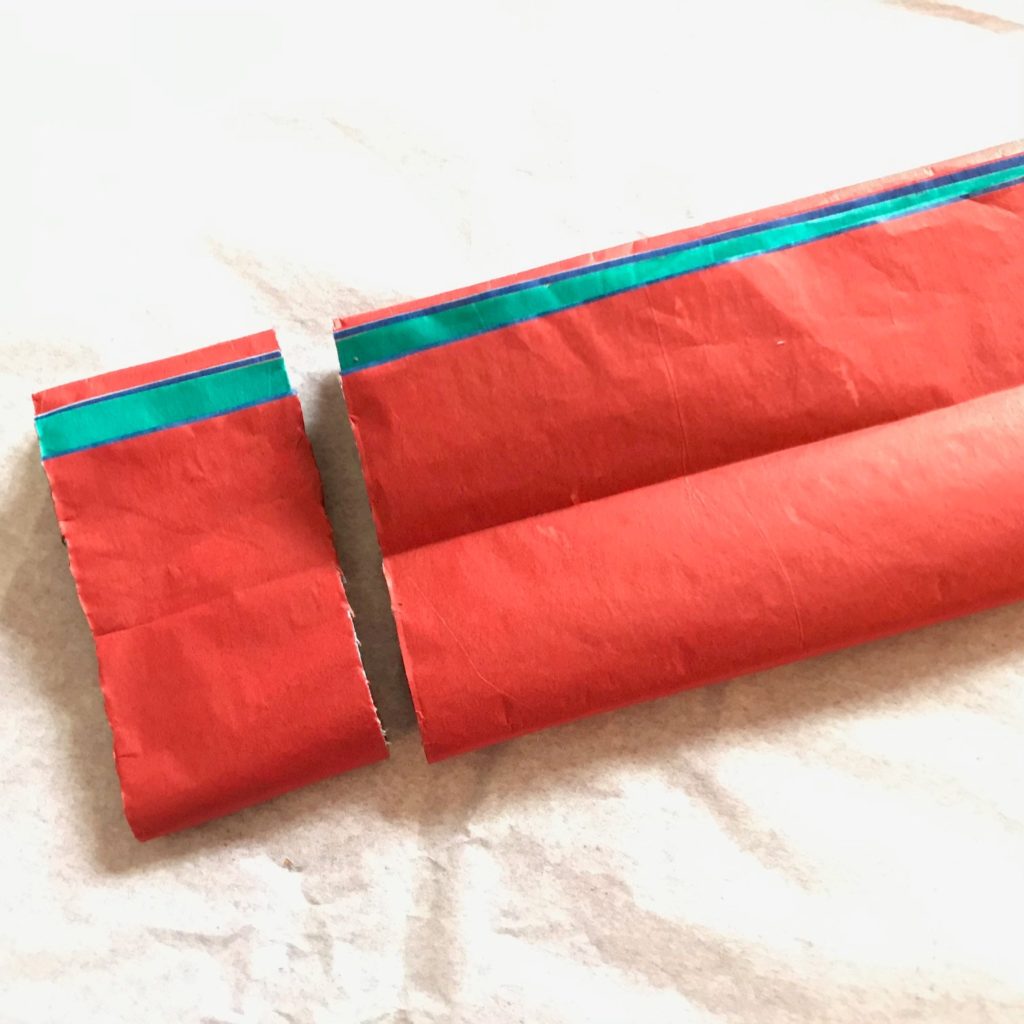
Yarn
Glue or Mod Podge (optional)
Markers

Length:

20-25 minutes

Academic Subject(s):

Social Studies

This lesson supports your student’s 4th – 5th grade curriculum: SOC 3.4, 3.5, 3.6

This lesson supports areas of Early Childhood Development and PreK Curriculum:
PreK Standards: Approaches to learning: Creativity and Imagination, physical development (fine motor), Social Studies: History and The Arts: Visual Arts

Directions:

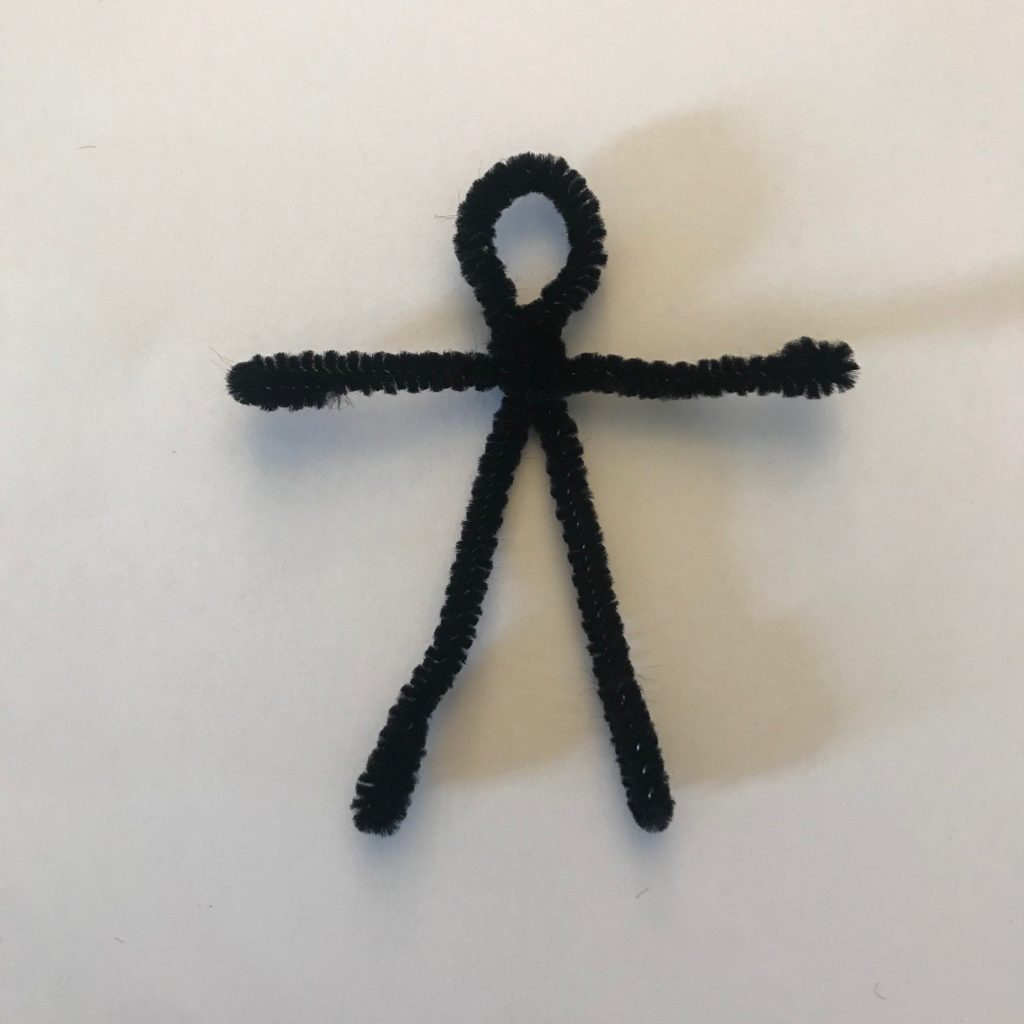
Step 1: Construct the doll’s frame. You can make the base of a worry doll from many different materials, just make sure the finished doll is small and flat enough to sit comfortably under a pillow.

Here are the two versions we liked best:

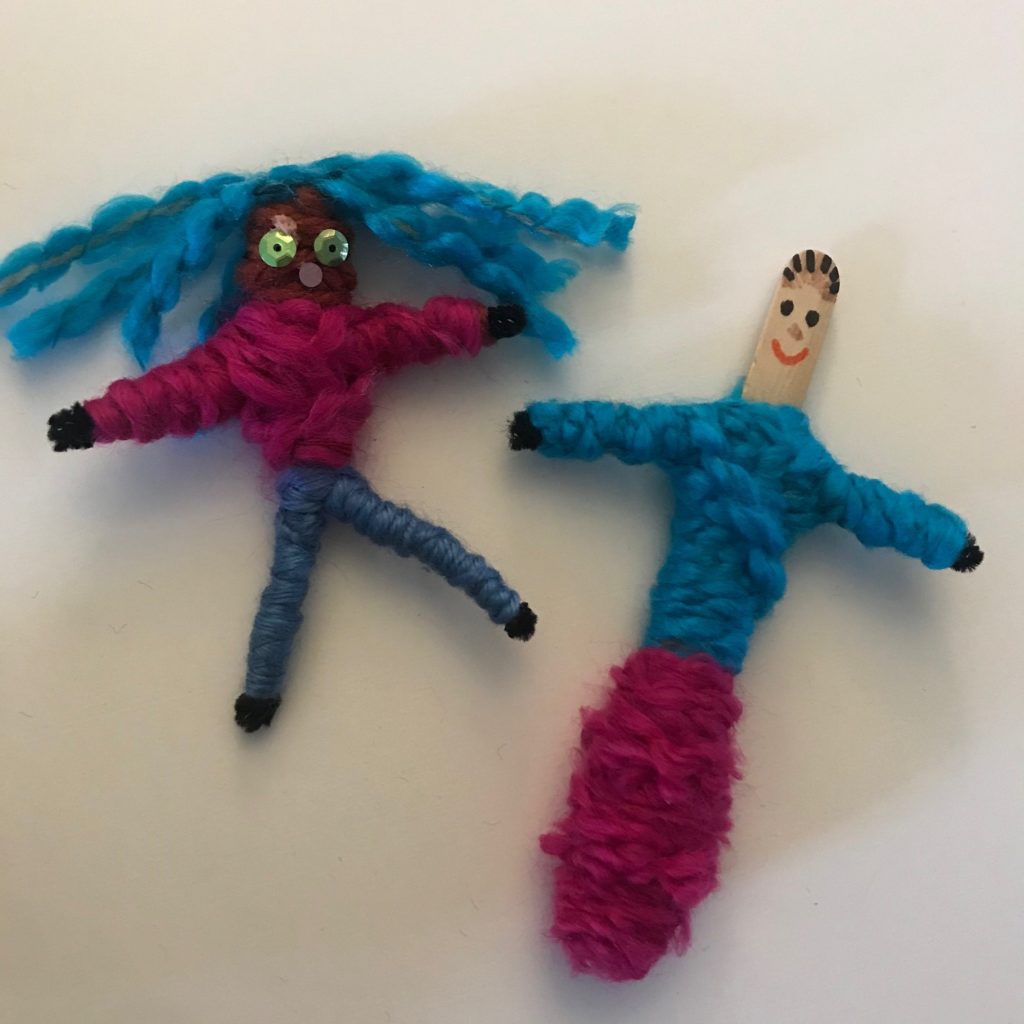
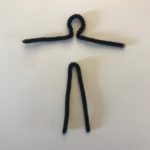
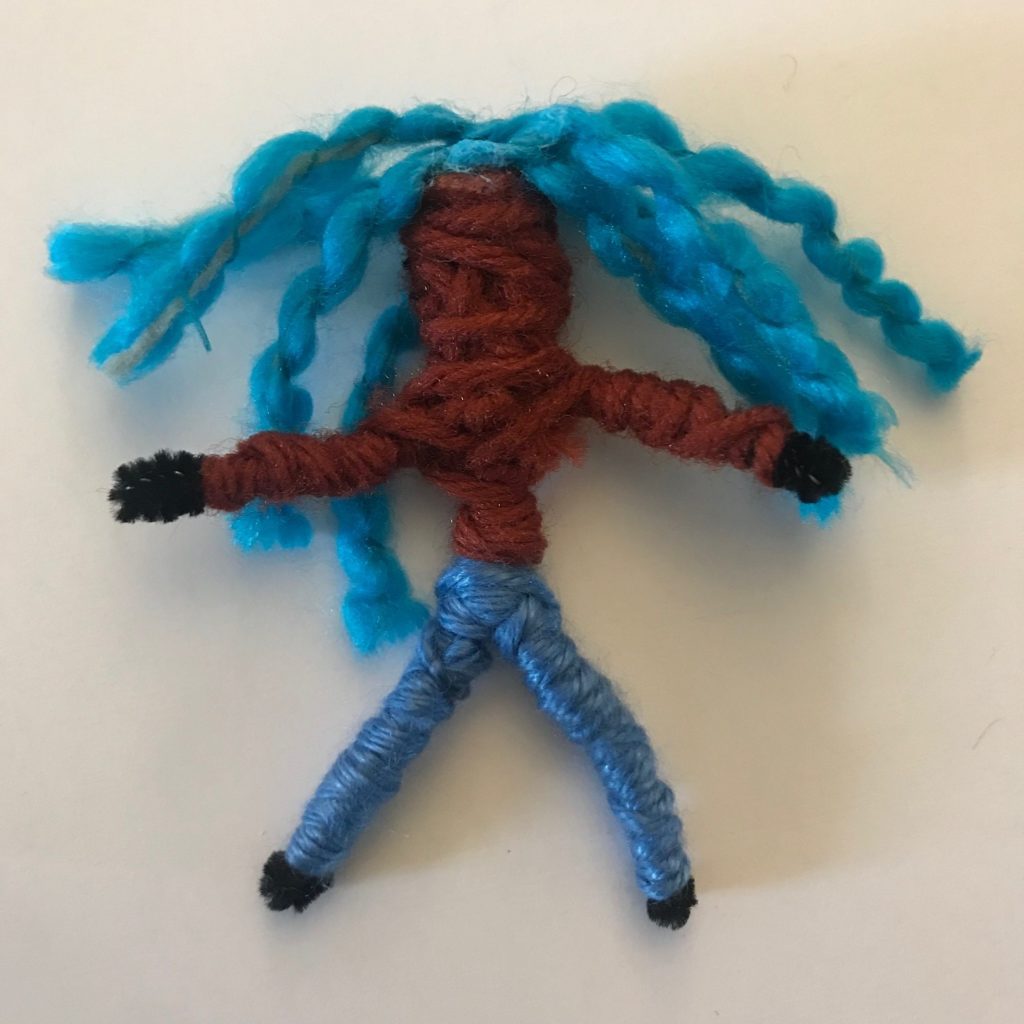
·  Pipe cleaner: Cut a pipe cleaner in half (or use two for a much larger doll). Bend the first piece into a head/arms and the second into legs, as shown below. Hook the legs around the neck to attach, then twist once around to secure. Finally, wrap the arms around each other once to shorten. I also folded the tip of each wire over a bit to soften the pointed ends of the doll. Pipe cleaner dolls are wonderfully flexible and are easy to move around and play with once complete!

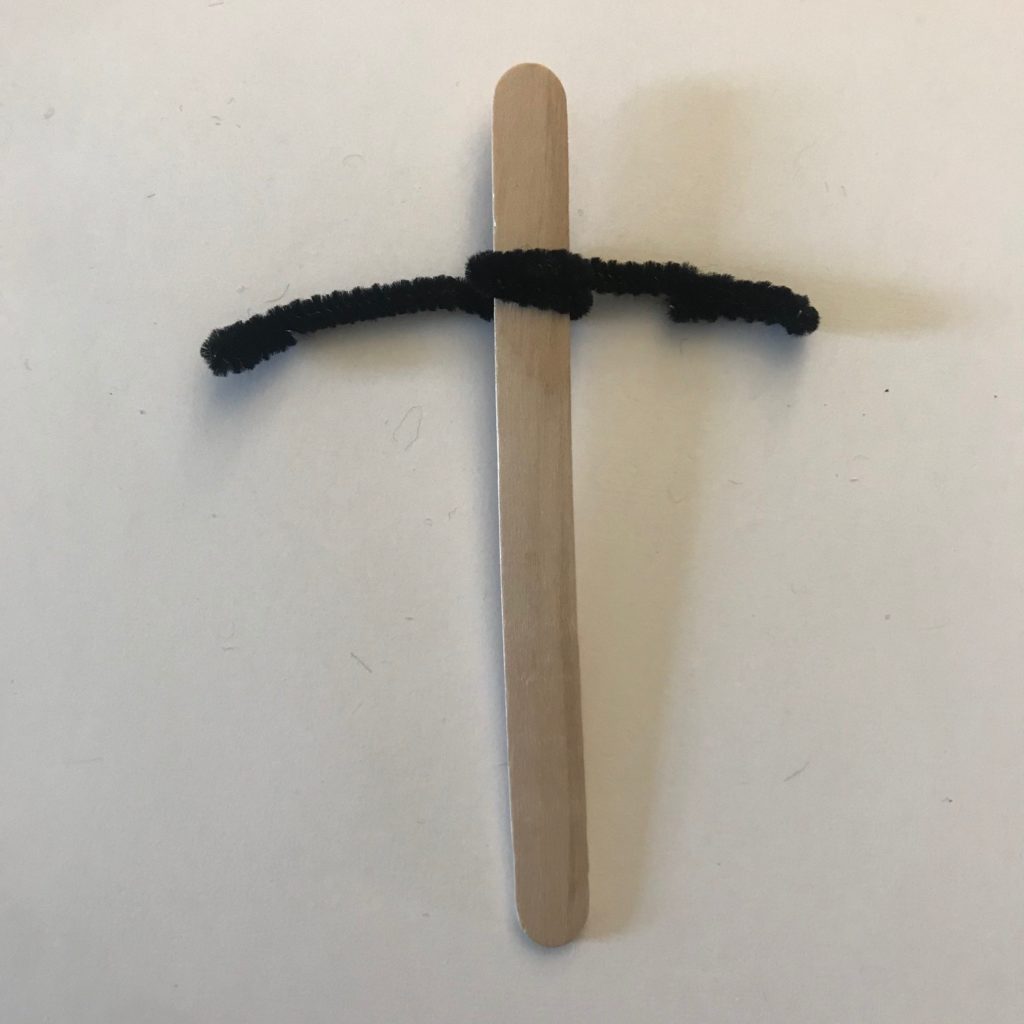
·  Popsicle stick: You can just use a popsicle stick on its own, without any further appendages. We decided to add arms by wrapping a piece of pipe cleaner once around the middle.


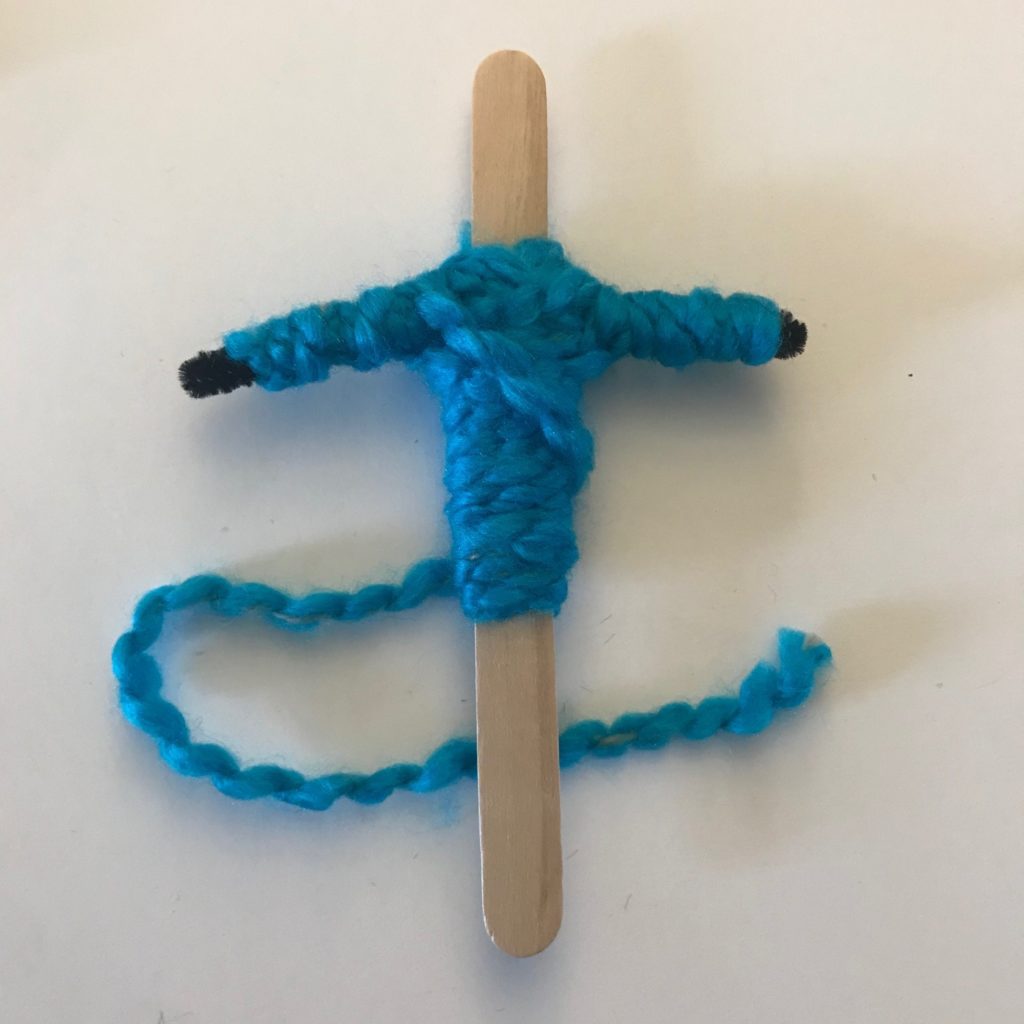
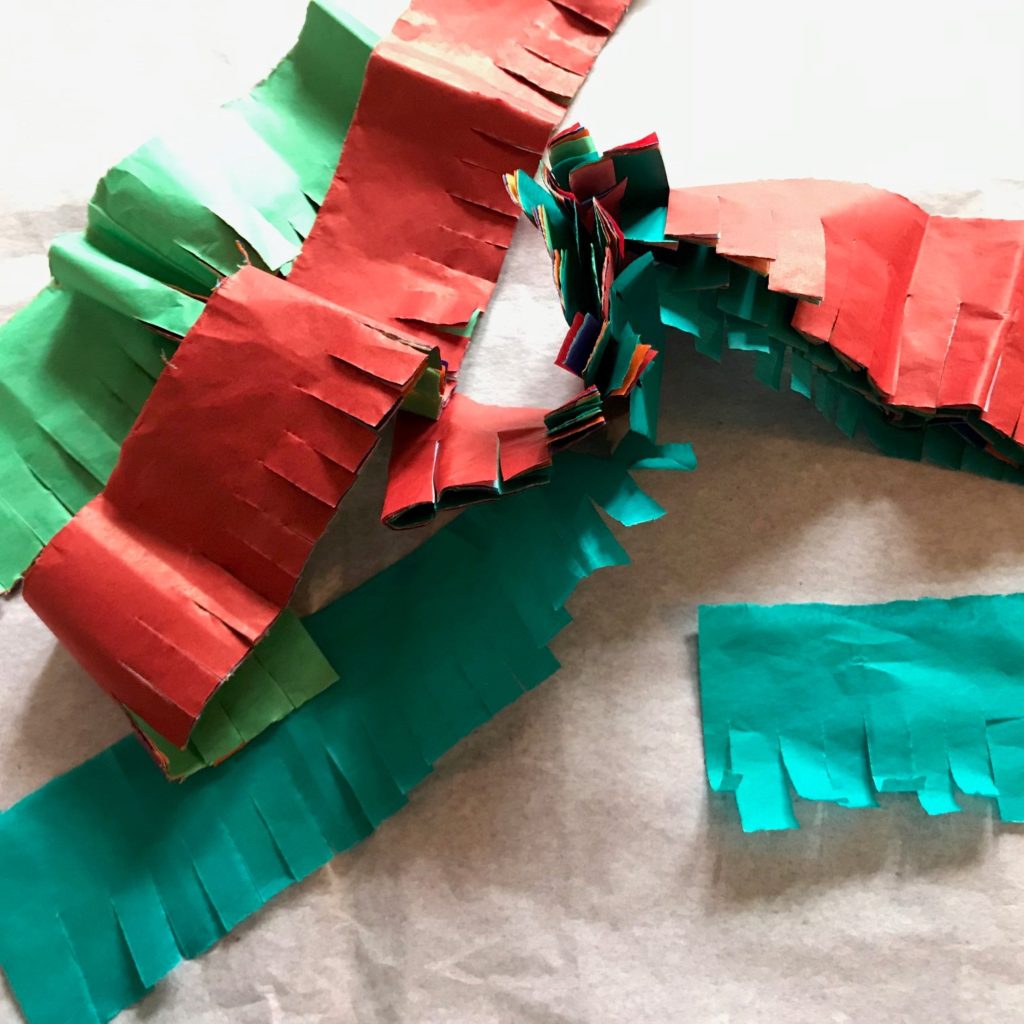
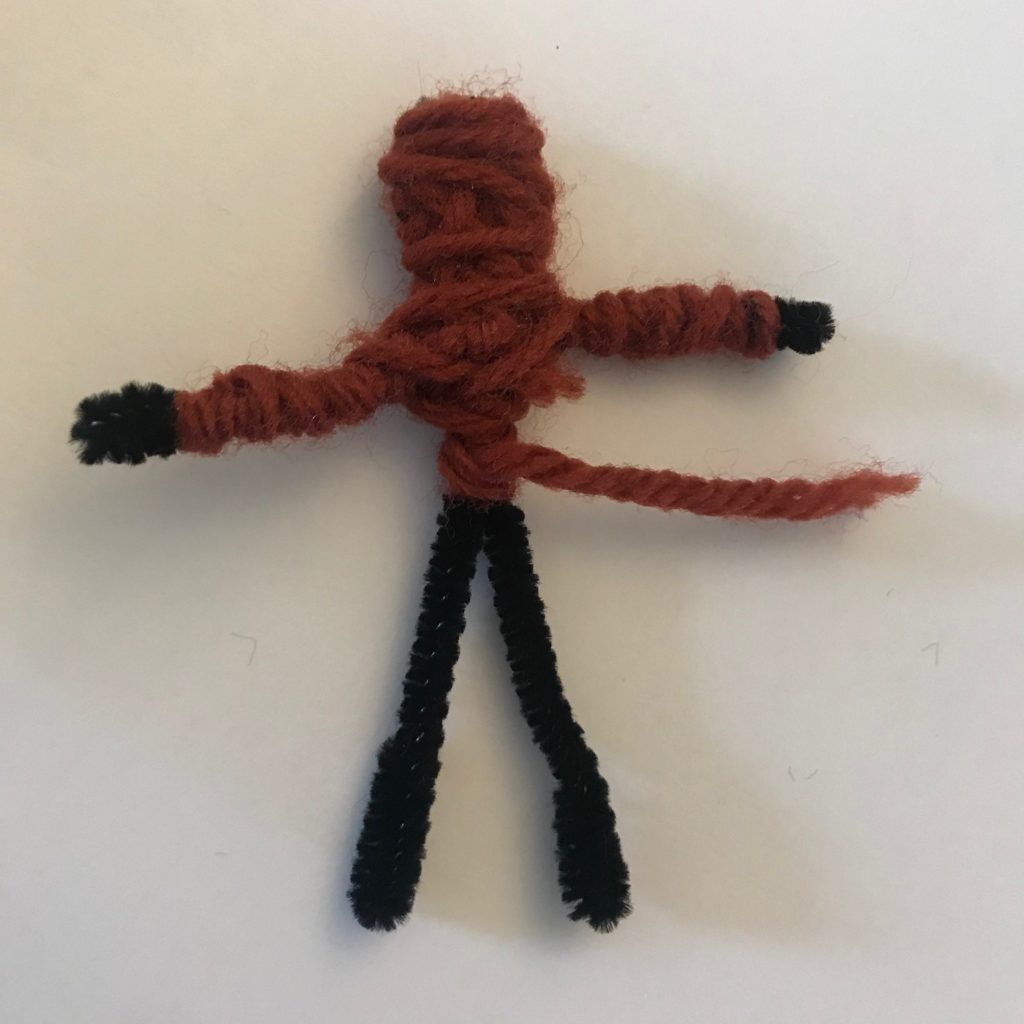
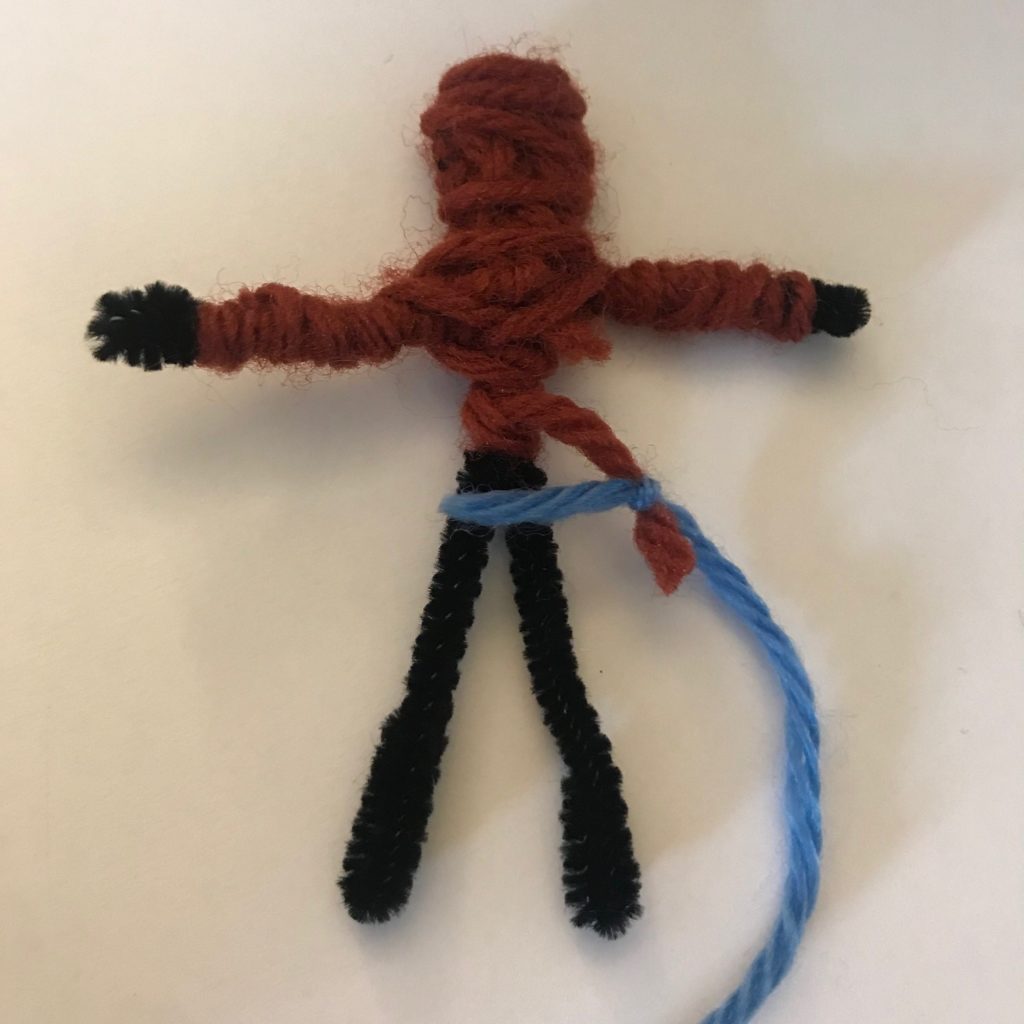
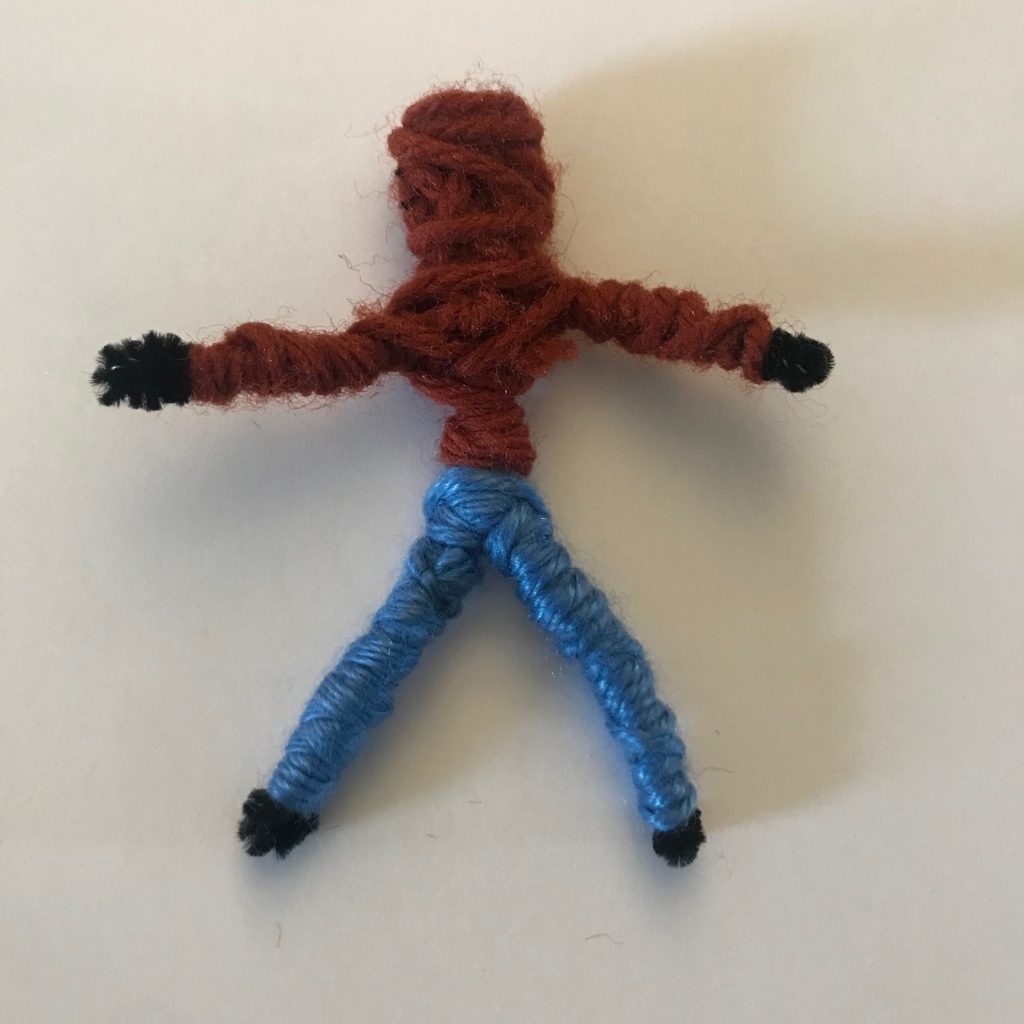
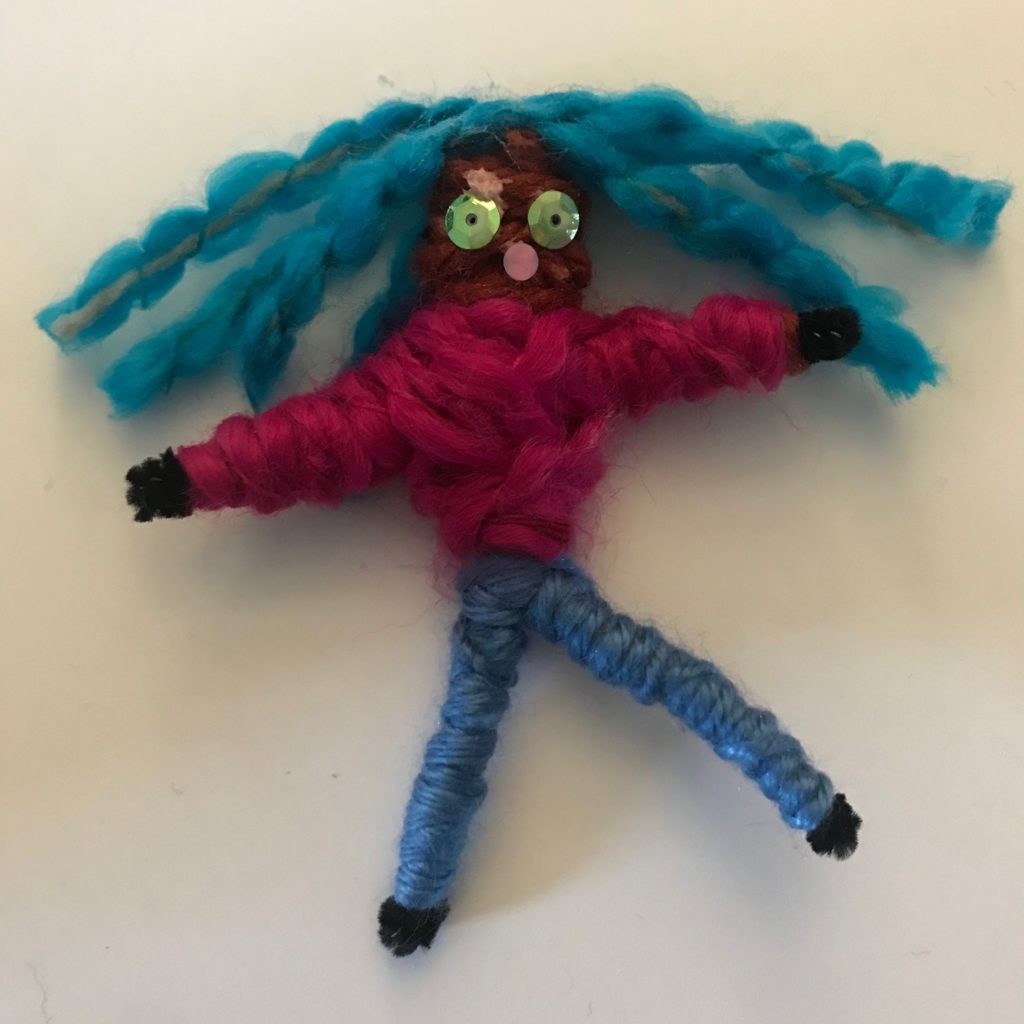
Step 2: “Dress” your doll. Tie a long piece of yarn around the middle of the doll, leaving about a half inch at the end. Fold this loose end over and catch it under the rest of the yarn as you work, to keep it in place. Wrap the yarn around your doll, weaving over and under any limbs, until it is covered to your satisfaction. You can switch in different colors of yarn by tying them onto the original piece, making sure to tuck any loose ends under, as before. We added a bit of Mod Podge as we went along to secure the yarn – especially on the popsicle stick – but this is not always necessary. When finished, tie the yarn off, and add a dab of glue to hold if desired.

Step 3: Accessorize! You can tie or glue bits of scrap fabric, sequins, or beads to the worry doll’s clothing or even glue a tuft of yarn to the top of its head to create hair. Draw on a simple face with markers (you can use a permanent marker directly on the yarn) or glue on an expression with sequins.

Step 4: Let the doll work its magic. Give your dolls names (ours were, predictably, “Anna” and “Elsa”). At bedtime, encourage children to tell their muñeca about anything that might be bothering them, then place the doll under their pillow just before you tuck them in. For extra effect, once your child is asleep, sneak in and remove the doll, placing it on a nearby nightstand or dresser to show that it has done its job and whisked all their troubles away.

Did you try this craft? Tell us your story; we’d love to hear from you!

Related key words in Spanish:

·      Muñeca (moon-YEH-kah) – Doll
·      Ropa (RO-pah)– Clothing
·      Cara (KAH-rah) – Face
·      Almohada (al-mo-AH-dah) – Pillow
·      Dormir (dor-MEER) – To sleep
·      Triste (TREE-steh) – Sad
·      Feliz (feh-LEASE) — Happy

Keep playing:

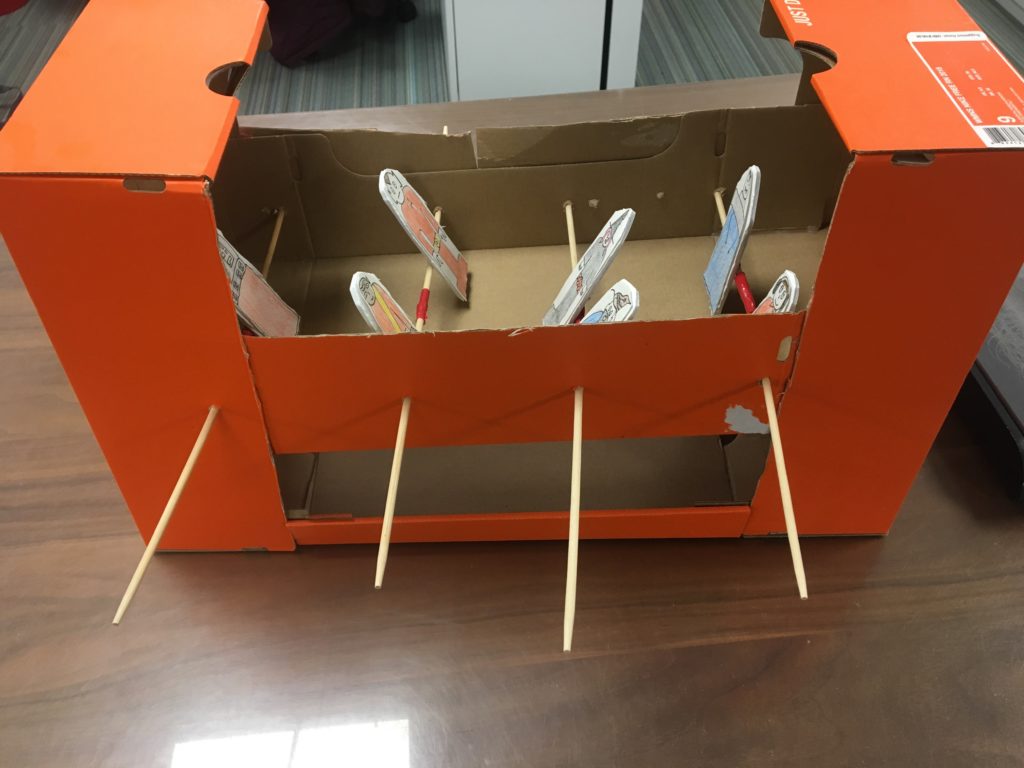
If the worry doll catches on in your household, as it has in mine, you can keep the game going! Find or make a special home for your muñecas to live in – ours ended up in an old shoebox that we fixed up and decorated for the occasion.

Check out our other Sanity Savers posts here!

Sanity Savers: Space Paintings

presented by national grid

By Dan Walsh
STEM Educator

Supplies needed:

 Small bowl or lid
Glue
Food dye
String  

Sanity Savers: Space Painting

Length:

Build time: 5-10 minutes
Drying time: 1-2 days    

Academic Subjects:

Science/Art    
This lesson supports the following standards:   
MS-ESS1-3
PreK-5 VA.Cr.1

Directions for Space Painting:   

When you see pictures of outer space, what do you think of? What colors do you think of? Do you imagine seeing black, yellows, and whites?

For the most part, when scientists take pictures of space, there are no colors. But, once the scientists receive the pictures from satellites, they colorize the pictures. The added color helps scientists understand what they are looking at better. Today we will be making space paintings.

Step 1.)   The first step is to get your plate or bowl ready. Have a grown-up pour glue onto the middle plate. We want enough glue to make sure it can be peeled off, but we don’t want too much glue that will make a mess.

Step 2.)    Once you are done pouring the glue pick out your favorite colors of food dye. Add a few drops of the food dye onto the glue.

Step  3.)   Take a toothpick and slowly swirl the drop around. Experiment with mixing colors! What colors can you make? 

Sanity Savers: Space Painting


Step 4.)   The next part will take some patience. Store the painting somewhere it will be safe. The glue will need to sit at least overnight to dry. It may even take a few days to dry completely. 

Step 5.)   Once the glue has dried, slowly peel the corners off. The glue should peel off in the shape of a circle. Then punch a hole at the top, tie a string through it, and hang it from your window!

As time goes by, the colors will eventually shrink and change because of the sunlight! Have the students predict how the colors will change over time.    

For more Sanity Savers projects click here!

Sanity Savers: Recycled Creations – Invent a Game!

Presented by National Grid

By Dan Walsh
STEM Educator and Cardboard Engineer Extraordinaire

Sanity Savers: Recycled Creations - Invent a Game

Download a printable version here!

Supplies Ideas:  

 Any recycled materials in the house will do the trick. Here are a few options Cardboard, shoe boxes, straws, paper clips, glue, rubber bands, paper, scissors, hot glue gun/ regular glue, marbles, clothespins.  

Sanity Savers: Recycled Creations - Invent a Game

Length:

Build time: 10-15 minutes 

Academic Subjects:

Science/ Engineering

This lesson supports your student’s curriculum:
Math: NY-2.MD.1
Arts: PreK-5 VA.Cr.1
SCI: 3-5-EST1.1

Directions for Game Day!

Everyone loves playing games! Now is your chance to invent your own game out of the materials you find at home. Games can be simple like ping-pong, marble mazes, or more complex like pinball! The invention process is the way a simple thought becomes something amazing! It’s a multi-step process, and each step is as important as the last. Today we are going to invent our own game! First, I will give a quick run-down of the invention process and how I chose to work on the classic game of foosball. 

The first step of the invention process is to think of a game you really enjoy. One of my favorite games is foosball! One may think foosball is a perfect game, but I found one small problem about the game. It’s too big! If I ever want to play foosball at a friend’s house, I can’t take the table with me.

This leads right into the second step. Brainstorm a way around the problem.

Brainstorming is one of my favorite steps in the invention process! There’s no limit to the possibilities! Try to think of as many ways you can change your game. Let your imagination run wild! For my foosball problem, what if I made a table out of a shoe box? What if I made the foosball table so small it would fit in my pocket? There are so many possibilities.

The third step is to pick one of your brainstormed ideas and run with it. The shoe box idea seems like a great starting point. Draw out your design on paper to see what your build will look like.This leads into the fifth step. Decide which materials you may need, pull them together, and start to build! For my foosball table I glued two shoe boxes together and poked holes along the sides. Then I glued players onto chop sticks and slid them through the holes.

Now that your invention is built, it’s time to try it out! Does it work how you think it would work? Is it fun? Can you change anything to make it better? 

For more Sanity Savers projects click here!

Sanity Savers: Lava Lamps

Presented by National Grid

By Dan Walsh
STEM Educator and Cardboard Engineer Extraordinaire

Sanity Savers: Lava Lamps

Download a printable flyer here.

Supplies needed:

Small jar/cup
Vegetable oil
Water
Depending on what you have this experiment works with either Alka-Seltzer, salt, or baking soda and vinegar.

Sanity Savers: Lava Lamps

Length:

Build time: 5-10 minutes   

Academic Subjects:

Science/ Engineering   
This lesson supports the following standards:  
3-5-ETS1-2
3-5-ETS1-3
3-PS2-1
3-PS2-2
4-PS3-2
4-PS3-3
4-PS3-4
5-PS2-1

Directions for Groovy Lava Lamps:

Alka-Seltzer Steps:

 Step 1: Fill your jar about two-thirds of vegetable oil, then fill the rest with water. Once you pour the water in, have the student observe how the two react.
Science Fact: Since the oil is less dense than the water, the oil will sit on top. To take it a step further the water molecules are only attracted to water and oil with oil.

Step 2: Pick your favorite color of food dye. We only need a few drops depending on the size of your container. Have the student observe what happens when you add the food dye. The drops should bead up on the surface of the water and then fall through.

Step 3: Give the container a quick swirl with a spoon. Have the student predict what will happen when a tablet of Alka-Seltzer or salt is added.

Step 4: Then drop in a tablet of Alka-Seltzer into the mix. The reaction may take a second, but once it starts it’s an amazing show! 

Salt Steps:

Repeat Steps 1 -3: Follow the steps above but instead of adding Alka-Seltzer we are going to add a teaspoon of salt. This reaction is a little slower than Alka-Seltzer, but still fun to watch. Once you mix the oil, water, and food dye add a pinch of salt. The reaction here is cool. The salt is heavier than both the water and oil. As the salt falls to the bottom of the glass it pulls oil down through the water. When the salt begins to dissolve the droplets of oil are released and float back to the top!  

Baking soda and vinegar steps:  

The measurements on this experiment depend on the size of your container.
First, we are going to put three tablespoons of baking soda in our container. (Use less if the container is small.) Pour about two-thirds of oil into the container. Do not mix the baking soda and oil!


In another container pour some vinegar into it. Add a few drops of your favorite color food dye into the vinegar. Then mix the food dye around to make sure the vinegar is the color you want it. Take a spoon and slowly add the vinegar into the oil container. Pour a little of the vinegar in at a time to make the experiment last longer. The baking soda is heavier than oil, so it sits at the bottom of the container. The vinegar is also heavier than the oil, as the vinegar is poured into the mixture it sinks through the oil and then reacts with the baking soda causing bubbles of carbon dioxide.   

Check out our other Sanity Savers posts here!

Sanity Savers: Paper Bag Piñatas

Supported by The Peter C. Cornell Trust

Written by: Julia Bozer
Cultural Program Educator

Sanity Savers: Paper Bag Piñatas

My household has a birthday coming up this weekend, and we will be social-distance partying at home. This seemed like a perfect time to break out one of my favorite make-and-break activities: the paper bag piñata! If you’re missing out on birthday revelries, are generally feeling festive, love tissue paper, and/or feel a need to hit something with a stick, this craft could be for you. I made one in under an hour with my four-year-old. 

Don’t have a birthday this week? Here are some other reasons to celebrate:
Tuesday (3/17): St. Patrick’s Day
Wednesday (3/18): Awkward Moments Day
Thursday (3/19): Vernal Equinox (11:49pm in Buffalo)
Friday (3/20): Mr. Rogers’s birthday
Saturday (3/21): Observance of Nowruz, the Persian New Year
Sunday (3/22): World Water Day 

Before we start, some background:

Piñatas are commonly associated with Mexican birthday parties, but they have a rich history that is hundreds of years old. In Europe, during the Middle Ages, people would break clay pots during the Catholic period of Lent – the word piñata actually comes from the Italian and Spanish terms for “pot.” The Spanish brought the practice to Mexico, where it blended with indigenous traditions. During some Aztec festivals, blindfolded participants would swing at treat-filled pottery typically decorated with colorful paper. Ever since, piñatas have been a key part of a flourishing papier-mâché folk-art tradition in Mexico, known popularly as cartonería.

You can make a simplified version of a traditional papier-mâché piñata using an inflated balloon, strips of newspaper, a paste solution (one part water to one part flour), and some patience – but we have none of the above. So, we turned to the next best thing: a trusty paper bag. 

Materials

Paper bag
Tissue paper
Glue stick
Scissors
Tape
String or yarn
Treats! 

Length:

~45 minutes total (40 to make, 5 to break) 

Academic Subject(s):

Social Studies 
This lesson supports your student’s 3rd grade curriculum:
SOC 3.4, 3.5, 3.6  
This lesson supports areas of Early Childhood Development and PreK Curriculum:
PreK Standards: Approaches to learning: Creativity and Imagination, physical development (fine motor), Social Studies: History and The Arts: Visual Arts


Directions:

Step 1: Gather your materials. For a small piñata, you can use a brown paper lunch bag; for a larger version, try recycling a shopping bag.  

Step 2: Fill the bag with treats. We used this project as a good excuse to search our shelves and drawers for forgotten treasures. We found leftover holiday candy, five tiny plastic dogs, stickers, and Frozen Band-Aids and added in a beloved monster finger puppet. Anything works! If you’re brave and don’t mind sweeping up afterwards, you can add in paper cuttings or sequins as confetti.

Sanity Savers: Paper Bag Piñatas

Step 3: Once your treats are “in the bag,” add some crinkled tissue paper to puff it up it and give it some shape. Fold the top of the bag over twice to seal it, and staple shut. (We do not have a stapler at home, so I got creative with some tape).

Sanity Savers: Paper Bag Piñatas

Step 4: Prepare tissue paper fringe. I used to cut squares of tissue paper and let my toddler paste them randomly onto the piñata (this is good fun, and it totally works!). But I recently found a clever way to make fringed tissue paper garlands, which look even better. Stack a few sheets of tissue paper in different colors on top of one another and fold in half 3-4 times, until you have a long, thin tube. Cut a strip about 2 inches thick off the end. Unfolding the strip just a bit, fringe it along one edge, cutting about 1 inch or halfway up its width. For those letting toddlers take charge here, the cut is helpfully about one snip length when using children’s scissors. Unfurl and untangle the stack of tissue paper to get multiple fringed ribbons in different colors.

Sanity Savers: Paper Bag Piñatas

Step 5: Decorate your piñata. Add glue to the top of a strip and attach it to the bag, wrapping it all the way around. Once affixed, I added tape to the top edge to secure. Repeat with alternating colors, or whatever pattern you desire, until the entire bag is covered. You can also glue on pom-poms, ribbons, or whatever other decorative material you have on hand. Once the piñata is fully decorated, punch two holes at the top of the lunch bag, along the fold (or more, if making a larger version) and thread some ribbon through each hole to form a sort of hook.                       

Sanity Savers: Paper Bag Piñatas

 Step 6: Enjoy! Destroy! String your piñata up in the middle of a room, at a safe distance from any windows, walls, breakable objects or people. Take turns swinging at it with a long, sturdy stick (we used a broom). Traditionally, those “at bat” are blindfolded and spun around prior to swinging, and a mischievous friend pulls at the piñata strings to create a moving target.

Our piñata lasted 10 minutes, or about as long as it took my daughter to want her toy monster back. We will be making another for the birthday party. 

Sanity Savers: Paper Bag Piñatas

¡Learn some key words en español!:

·Papel (pah-PEL) – Paper
·Colores (coh-LOH-res)– Colors
·Tijeras (tee-HEH-ras) – Scissors
·Escoba (es-COH-bah)– Broom // Palo (PAH-loh) de escoba – Broomstick
·Dulces (DOOL-ses)– Sweets/candy
·Juguetes (hoo-GEH-tes)Toys

Fun Facts

·In Mexico, your time swinging at the piñata is measured by a song, sung by your family and friends and anyone else you invited. It concludes with the chorus:

Ya le diste uno,
ya le diste dos,
ya le diste tres,
y tu tiempo se acabó.
Now you’ve hit it once,
now you’ve hit it twice,
now you’ve hit it three times,
and your time is up. 

·Today, the most common piñata shape is a donkey (there are also cartoon characters, flowers, donuts, you name it) but, historically piñatas were shaped as a seven-pointed star. The seven points represented the seven deadly sins and temptations, which had to be destroyed and overcome during the time of Lent.
·The Mexican papier-mâché tradition of cartonería also includes expressive festival masks and alebrijes – colorful sculptures of fantastical, make-believe creatures. You might remember alebrijes from the movie Coco

For more Sanity Savers projects click here!

Field trips are back! Please be aware that it will be busier than usual.