Presented by: M&T Bank
By: Julia McMahon
Lead Play to Learn Facilitator
Materials
Containers; one for each type of seed (Alternatives: upcycled plastic container, such as a yogurt cup or plastic dip container, egg carton, etc.
Be sure to make a few drainage holes in the bottom.)
Soil: a potting or seed starting mix works well, but you can also try soil from outside
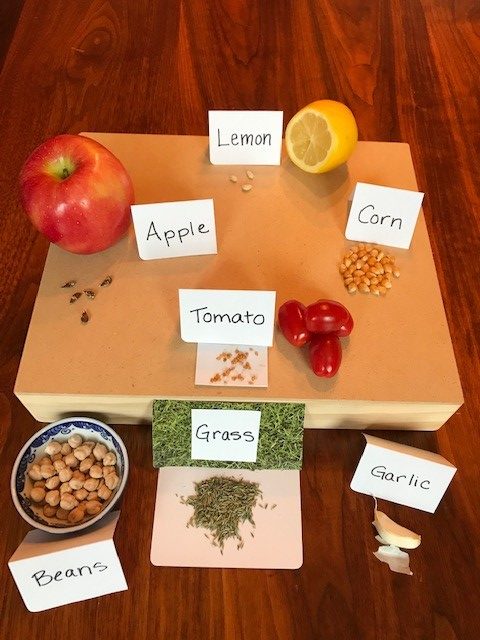
Seeds: collected from fruit you’ve eaten, your pantry, or your garage/basement
Water
Tray or plate
Scoop or trowel (optional)

Length:
Set up: 20-30 minutes (depending on how many seeds and pots you have)
Inactive: Typically a week or more before the seeds germinate, but don’t forget to water!Observations: 3-5 minutes each day afterward
Academic Subject(s):
Science
This lesson supports your student’s K – 2nd grade curriculum: SCI: P-LS1-1 1 -LS3-1.
Directions:
Step 1: Collect seeds from fruit in your house (Fact: If there’s a seed in it, it’s a fruit! Some things we call vegetables, like tomatoes, cucumbers, eggplant, peppers, for example, are actually the fruit of a plant.) You may also have seeds in your pantry, like dried beans. Finally, check your garage, closet, or basement, in case you have any leftover seeds, such as grass seeds, from last year.
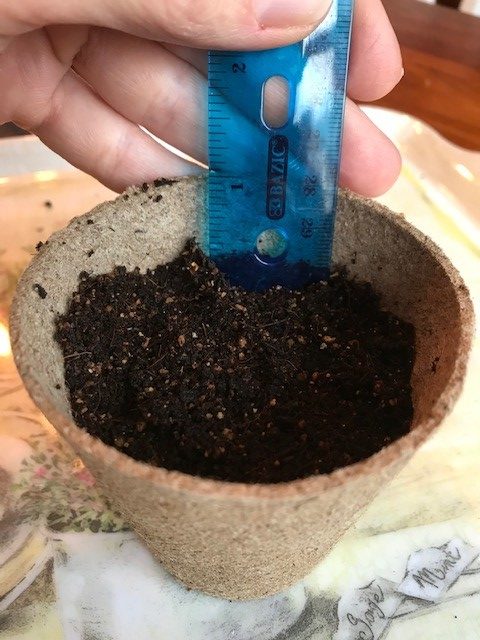
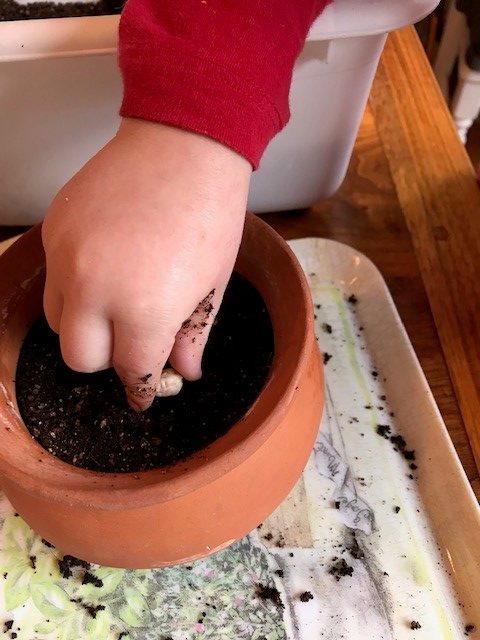
Step 2: Fill each container with soil and pat gently with fingertips. Soil should be about an inch from the top of the pot, as pictured.
Step 3:
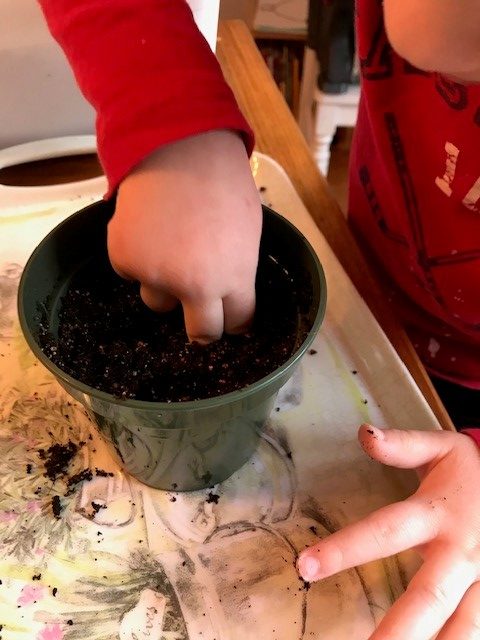
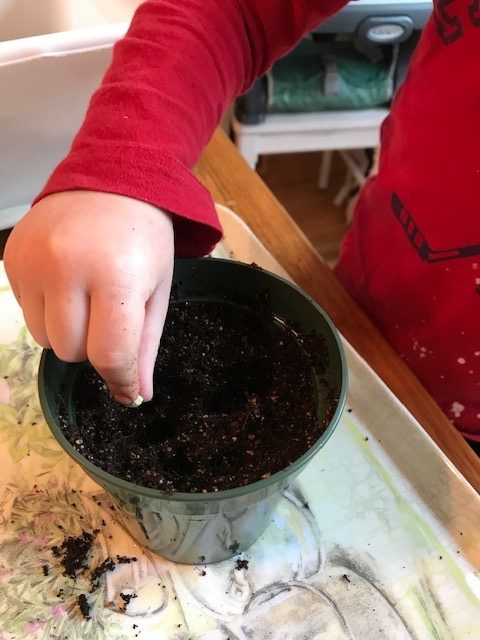
• For bigger seeds like lemon, beans, and apple, make a 1 inch deep hole with your fingertip, as pictured. If you put more than one seed in each pot, be sure to space them evenly. Using your fingertips, cover the holes with the soil already in the pot.
• For smaller seeds, like grass, sprinkle the seeds on top of the soil, then work them into the soil with your fingertips.

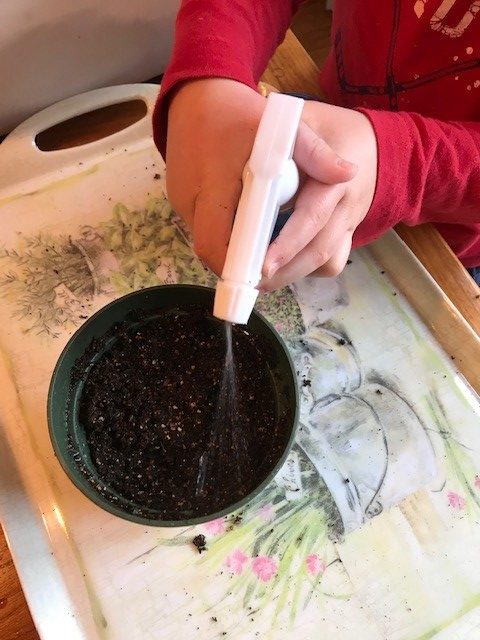

Step 4: Water the soil. A spray bottle easily wets the soil without disturbing the seeds. However, you can also use a pitcher, a cup of water, or water from the faucet, just administer a slow stream of water so you don’t disturb the seeds. Water when the top layer of soil looks dry (roughly, every 1-3 days).
Step 5: Put your plants on a tray to catch any excess water and place them in a sunny window.
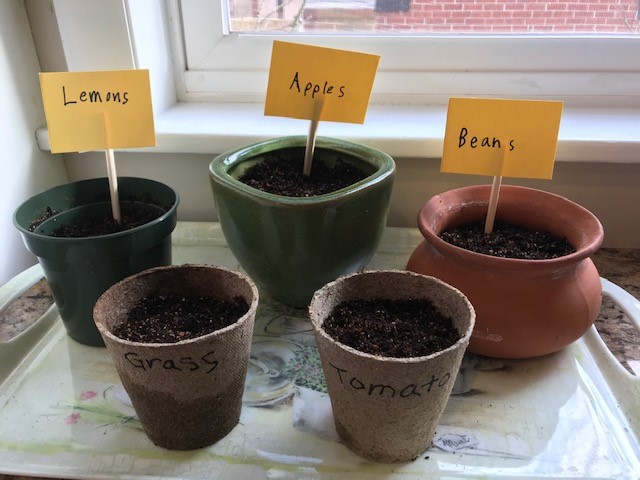
Step 6: Be sure to label your plants so you know which are growing and which aren’t.
Step 7: Observe the plants daily. Be sure to note if and when they germinate. Once they germinate, draw what you see every day. You will see changes daily once they begin to sprout!
Tip: Not all seeds will grow! Seeds need air, heat and water to grow. Did you provide all these things? Some seeds require special treatments (for example, tomato seeds need to ferment before they are ready to grow) in order to start growing. If you’re curious why certain seeds aren’t growing, do a little research into their germination requirements!
Tip: If your plants start to look crowded, pull a few out to give them more room to grow (except for grass, which grows well when its crowded). Leave some pots crowded and observe!
Vocabulary Words
• Germinate: To begin to grow; sprout.