Sanity Savers: Papel Picado (Mexican Fiesta Banner)

Supported by the Peter C. Cornell Trust

Written by: Amelia Schrader
Senior Manager of Learning and Education
Translated by: Tamara Alsace
Secretary, Hispanic Heritage Council of WNY, Inc. 
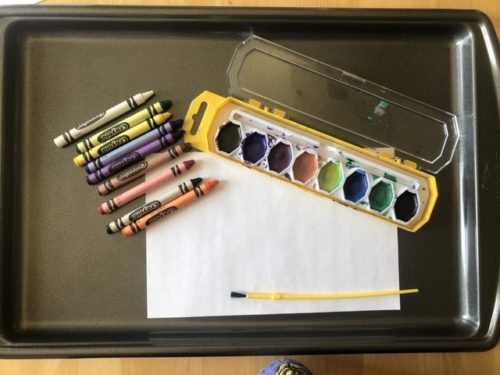
Materiales:

Filtros para café
Tijeras (de seguridad para niños)
Colorante alimenticio o marcadores
Botella atomizadora de agua
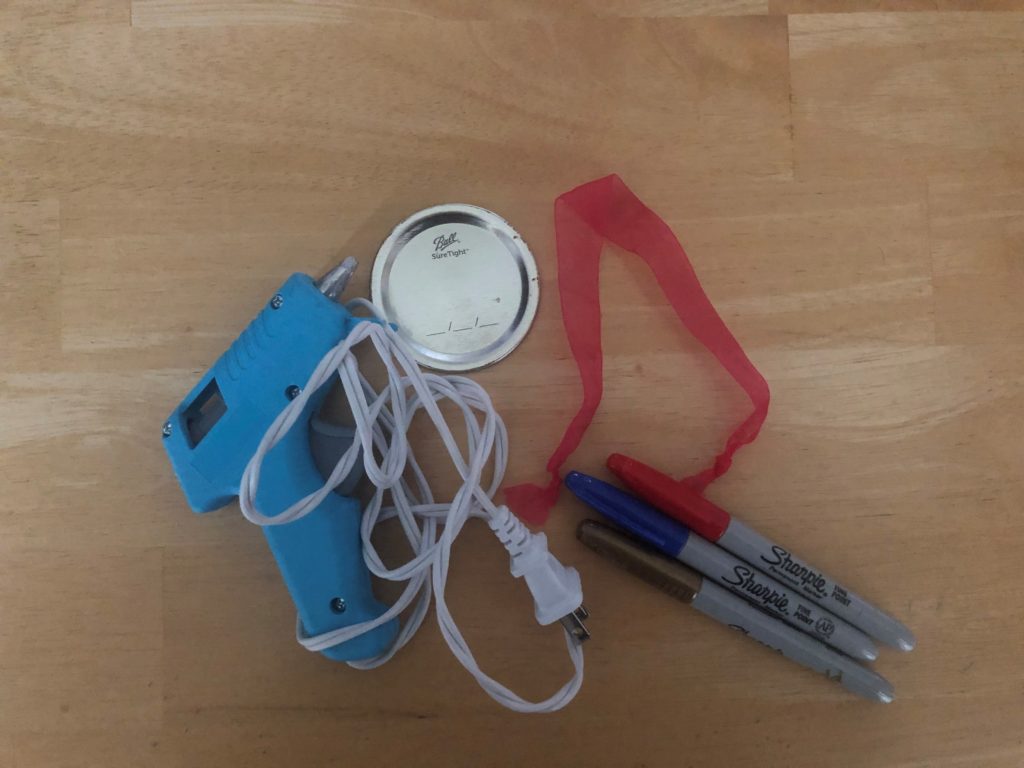
Cordón
Cinta adhesiva
Bandeja para hornear grande (opcional)
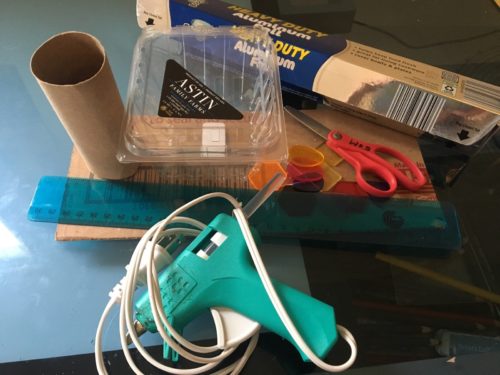
Sanity Savers: Papel Picado (Mexican Fiesta Banner)

Materials:

Coffee Filters
Scissors (kid safe)
Food coloring or markers
Spray bottle of water
String
Tape
Large baking tray (optional)  

Tiempo requerido:

Aproximadamente 5 minutos por cada filtro de café

Time Required

About 5 minutes per coffee filter  

Tema(s) Académico(s):

Destrezas sicomotrices finas, estudios sociales, arte 

Academic Subject(s):

Fine motor skills, social studies, art

¡Feliz cinco de mayo!  Contrario a lo que creen muchos estadounidenses, ¡el cinco de mayo no es el día de la independencia de México!  Es el día de conmemoración de la victoria de México sobre Francia en la Batalla de Puebla el cinco de mayo de 1862. Mientras que en México este día no es muy celebrado, ha llegado a ser increíblemente popular en los Estados Unidos de América como una manera de celebrar la cultura mexicana. 

Hoy, ¡te vamos a enseñar como hacer una versión simplificada de una banderola de papel picado papa celebrar la belleza de la cultura mexicana!

Happy Cinco de Mayo! Contrary to what many people in the United States believe, Cinco de Mayo (the 5th of May) is not Mexico’s Independence Day! The holiday commemorates Mexico’s victory over France at the Battle of Puebla on May 5, 1862. While this holiday is not widely celebrated in Mexico, it has become incredibly popular in the United States of America as a way to celebrate Mexican culture.

Today we are going to teach you how to make a simplified version of a Papel Picado banner to celebrate the beauty of Mexican culture!

Instrucciones: 

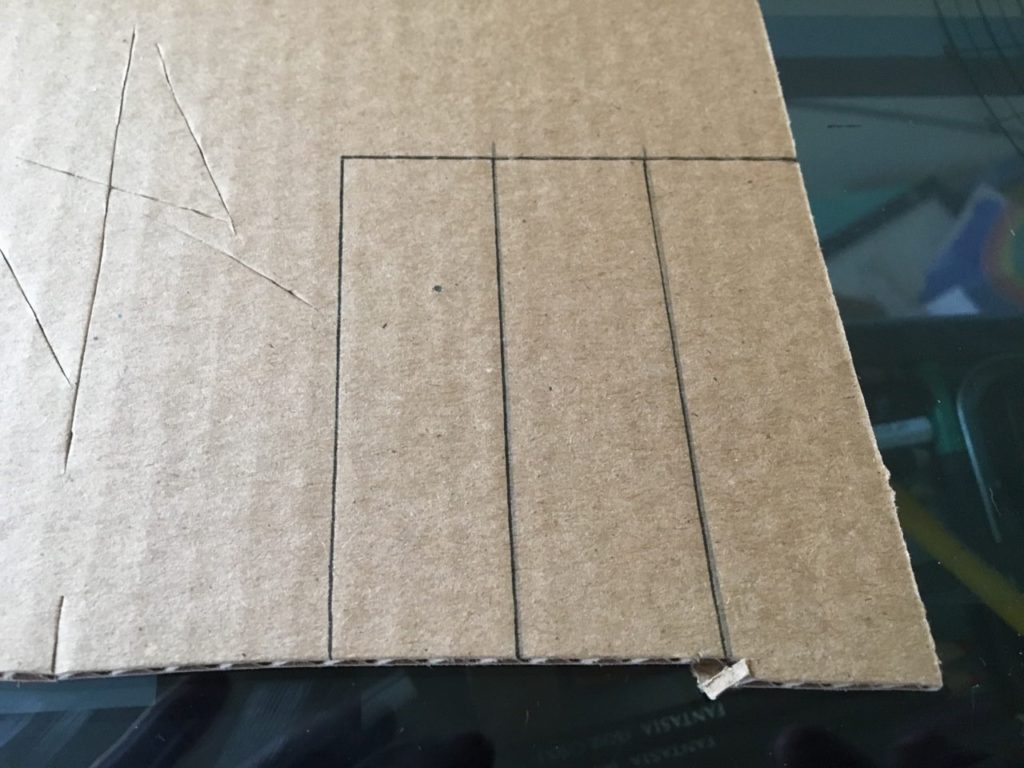
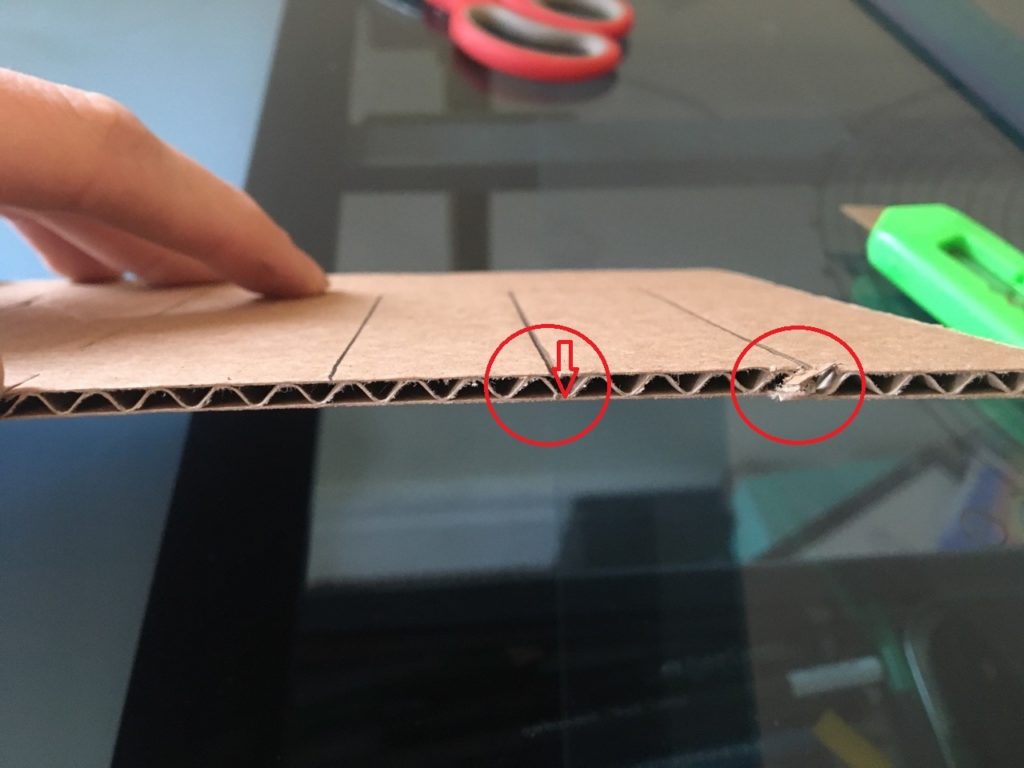
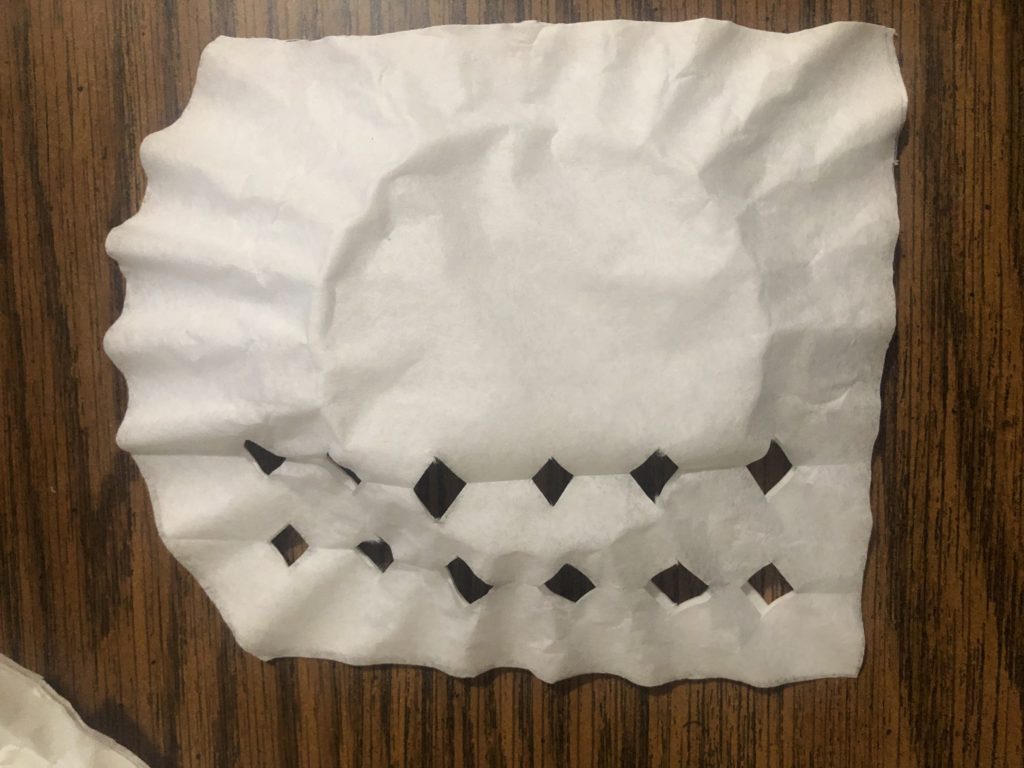
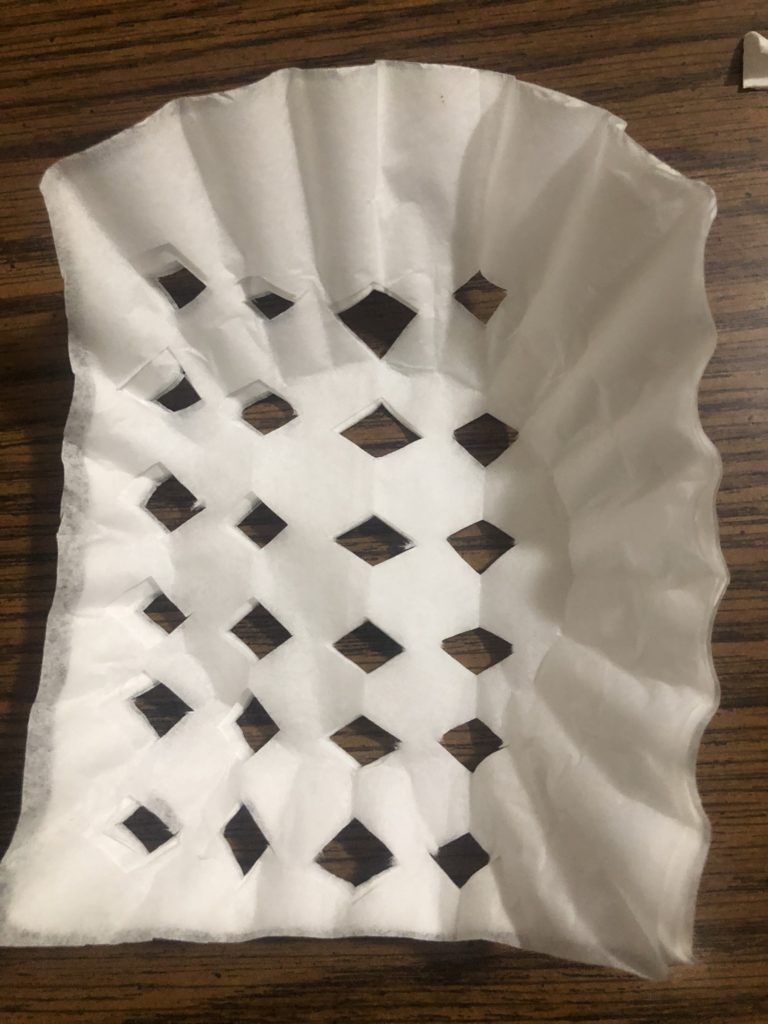
Paso1:  Corta 3 orillas del filtro de café para formar un rectángulo con un lado redondeado en la parte de arriba.  Este lado redondeado será doblado en uno de los siguientes pasos.  Para los pasos uno y dos, yo corto varios filtros de café a la vez.

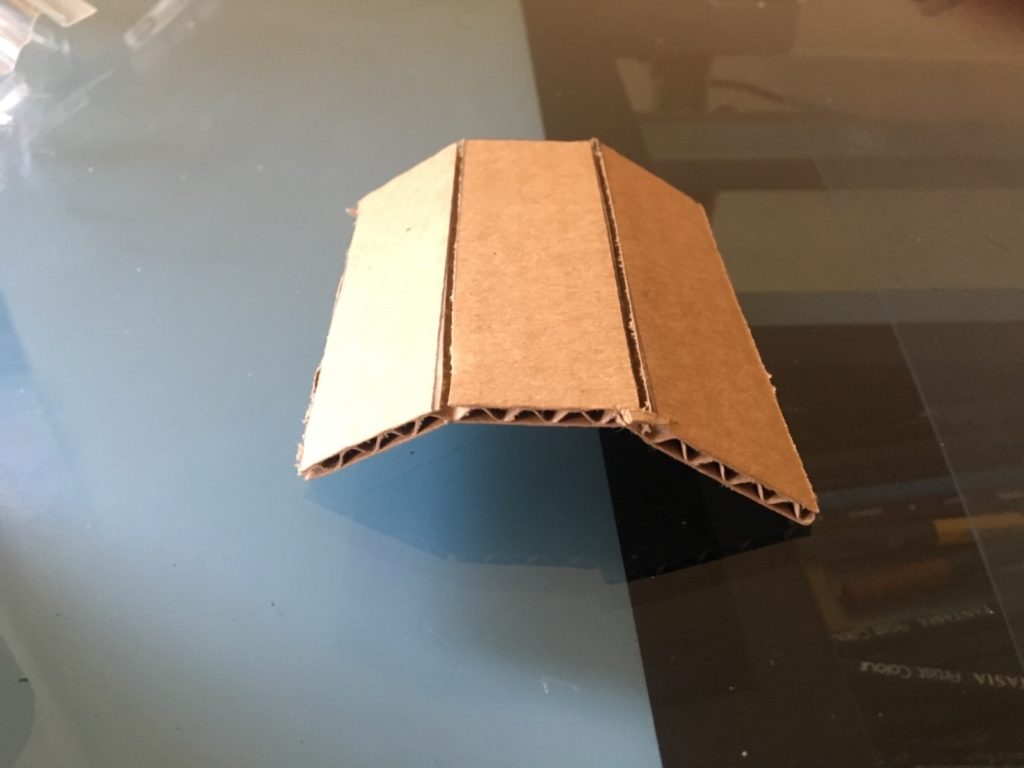
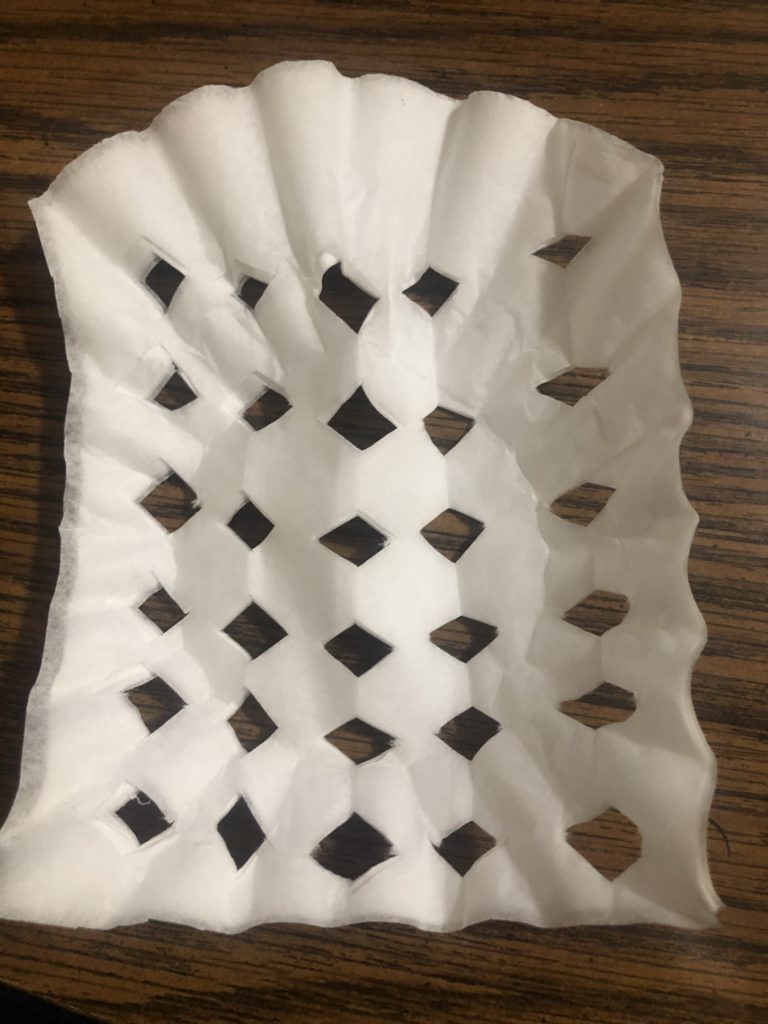
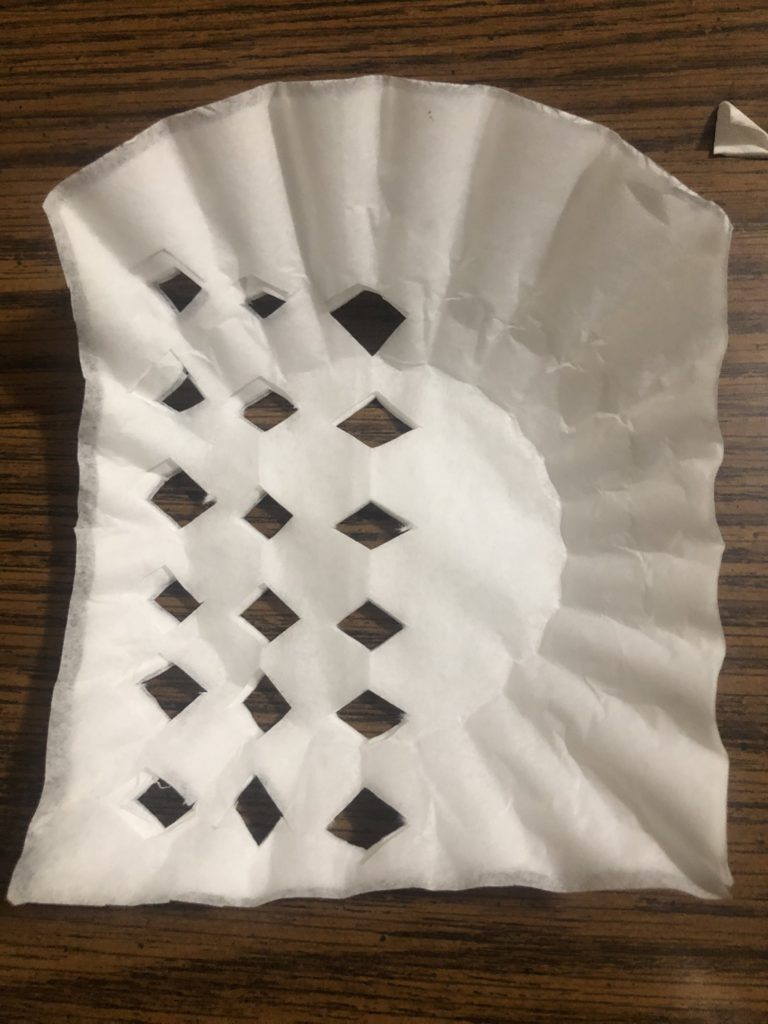
Paso 2:  Doblando una orilla a la vez, corta un triángulo de la orilla doblada (creando un diamante cuando se abra).  Haz esto varias veces por todo el filtro de café. (vea las fotos como ejemplo) 

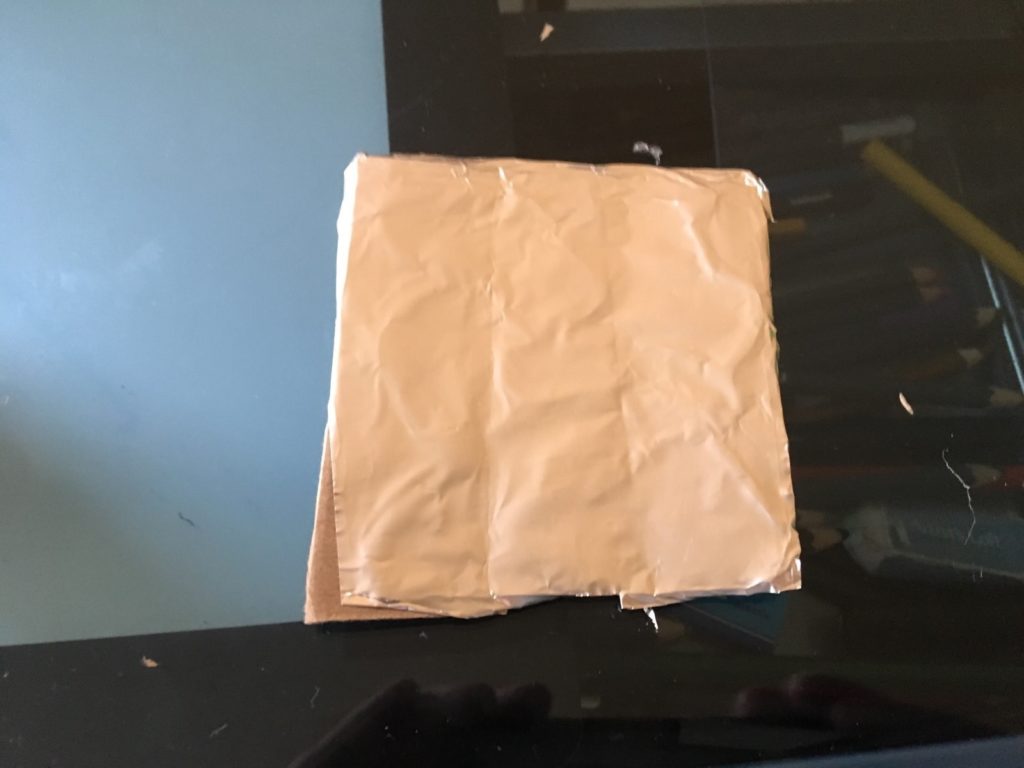
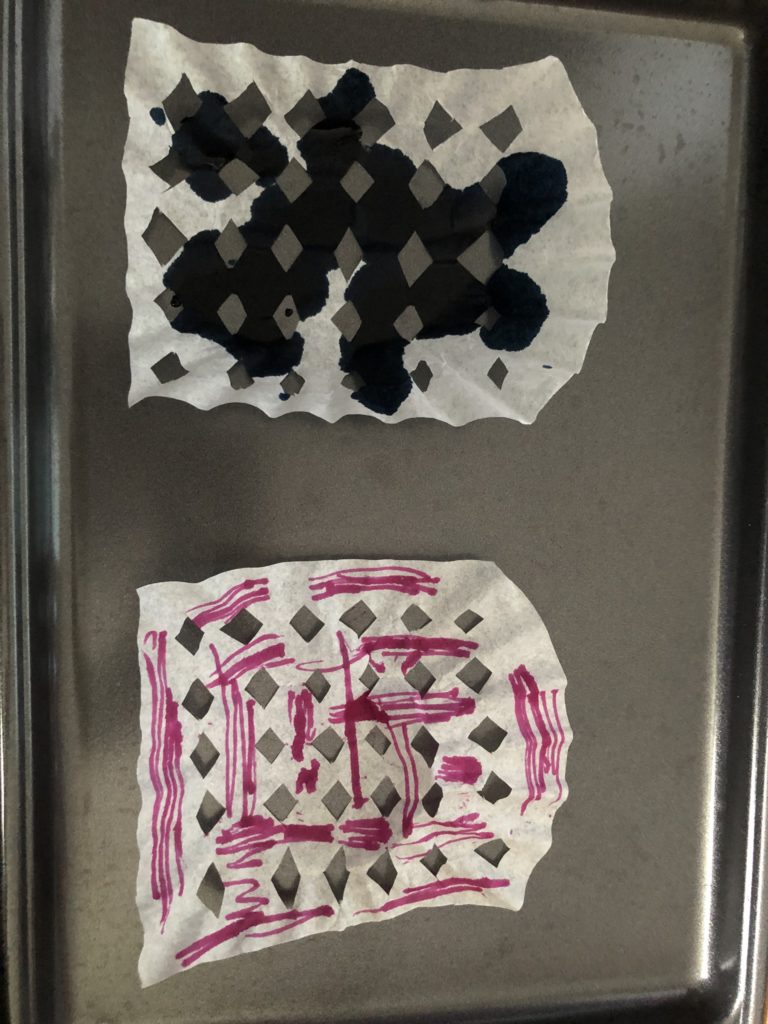
Paso 3:  Echa gotas del colorante alimenticio en varias partes del filtro de café.  Yo suelo echar de 5 a 7 gotas por filtro, pero puedes echar más o menos hasta conseguir el color que deseas.  También puedes usar marcadores para este paso.  Si decides usar marcadores, no tienes que llenar todas las áreas blancas.  Echando agua con el atomizador te ayuda a esparcir el color por todo el filtro.

Nota:  Puedes empezar con los Pasos 3 y 4 y luego hacer los Pasos 1 y 2 cuando estén secos los filtros.  Yo corto los filtros primero porque encuentro que es más fácil cortar varios a la misma vez antes de separarlos.  Si decides colorear los filtros con marcadores en vez de usar colorante alimenticio, recomiendo que empieces con el Paso 3. 

Paso 4:  Échale agua al filtro de café con el atomizador. Esto causará que el colorante se esparza por todo el filtro.  Estírelo en una superficie plana hasta que se seque completamente.
Nota:  SI tiene una bandeja de hornear disponible, recomiendo que ponga los filtros en la bandeja para echarle el agua.  Los colores pueden pasar por el filtro y manchar otras superficies.

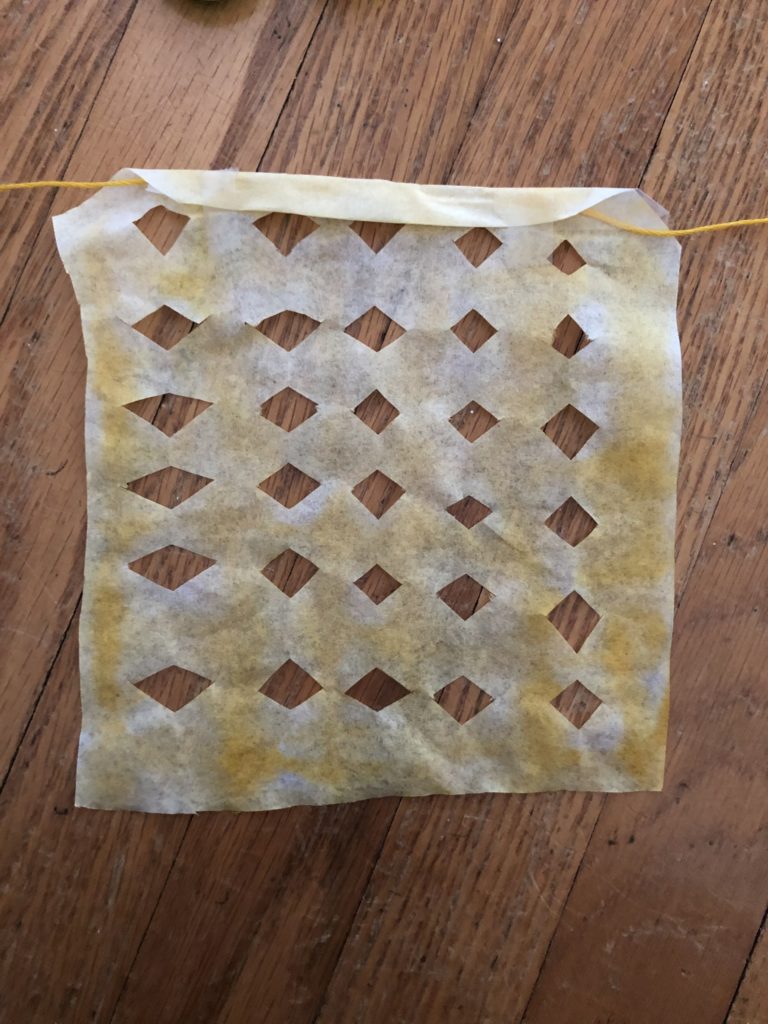
Paso 5: Cuando estén completamente secos los filtros, use la cinta adhesiva para pegarlos al cordón (un poco debajo de la orilla redondeada que dejaste sin cortar en el Paso 1).  Cuando el cordón esté en lugar fijo, dobla la orilla redondeada  encima del cordón para formar un rectángulo. 

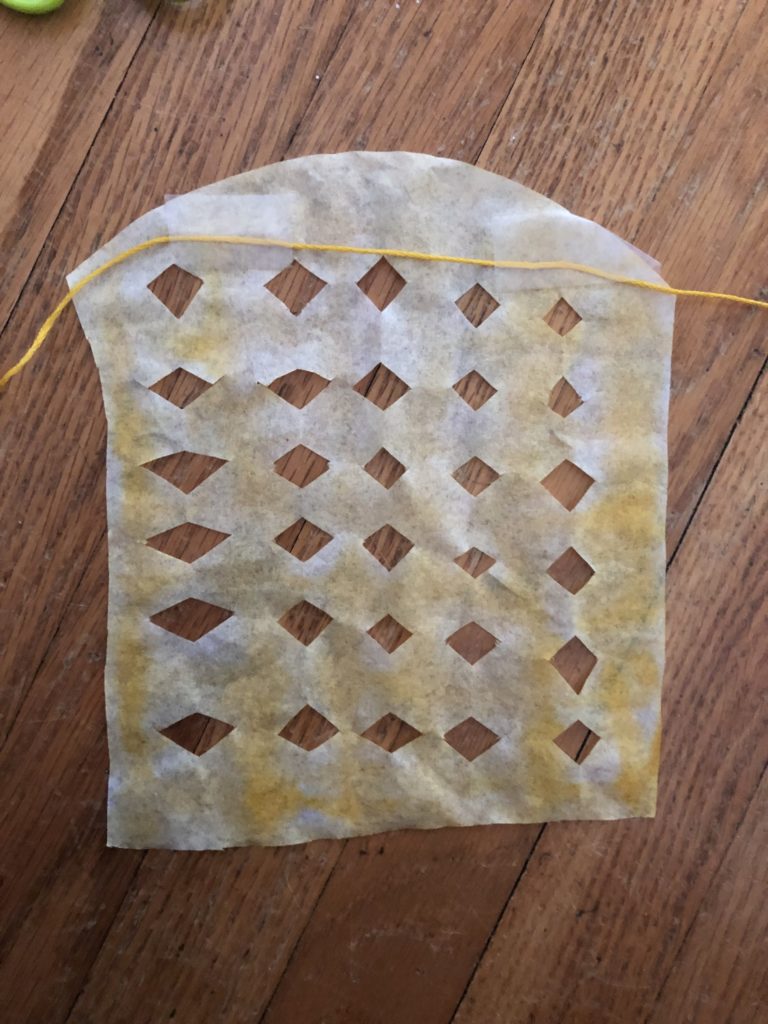
Paso 6:  Repite este paso varias veces usando el mismo pedazo largo de cordón para que estén todos conectados. Asegúrate de dejar espacio entre los filtros de café.

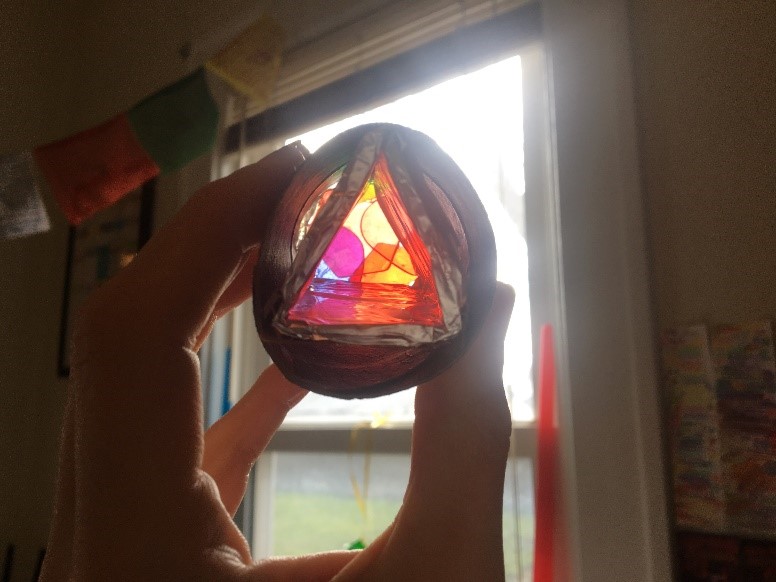
Paso 7:  ¡Cuelga el cordón en tu casa para celebrar el cinco de mayo o para cualquier otra celebración que tengan pendiente!

Ahora, los pasos descritos arriba son para nuestra manera simplificada de crear papel picado.  La manera tradicional de hacer esta bella artesanía folklórica de México es usando una plantilla y un cincel.  Los artistas de papel picado empiezan cortando el papel al tamaño y a la forma correctos.  Luego el artista crea una plantilla de la imagen deseada para el banderín.  Se usan varios tamaños de cinceles para cortar la imagen de la plantilla en el papel.  Las hojas terminadas se pegan con adhesivo (cola) a un cordón y se amarran juntos para formar una banderola.  Hoy en día, muchas banderas son hechas de material plástico para que sean más durables. 

Las banderolas de papel picado posiblemente empezaron como parte de la celebración del Día de Muertos, ¡pero estas coloridas obras de arte son usadas ahora para celebrar los días de fiesta, las bodas, los cumpleaños, y mucho más por todo México y con personas Mexicanas o de descendencia Mexicana por todo el mundo!

Directions: 

Step 1: Cut three edges of the coffee filter to form a rectangle with one rounded side on the top. This rounded side will be folded over in a later step. For both steps one and two I cut several coffee filters at one time.  

Step 2: Folding one edge in at a time cut a triangle out of the fold (creating a diamond when opened). Do this several times across the coffee filter. (see photos for example)  

Step 3: Drop food coloring on the coffee filter in various places. I tend to do about 5-7 drops per filter but you can do more or less to get your desired color! You can also use marker for this step. If you are choosing to use marker, you do not need to fill in all the white space. Spraying the water (Step 4) will help spread the color throughout the filter. This spreading is called diffusion.  

**Note: You can choose to start with Step 3 and 4 then do Steps 1 and 2 once the filter is completely dry. I choose to cut first because I find it easier to cut several in a pile before they are separated.  If you choose to color the coffee filters with markers instead of using food coloring, I highly recommend you start with Step 3.**

Step 4: Spray the coffee filter with the water in the bottle. This will cause the food coloring to bleed throughout the coffee filter, spreading it all over! Lay flat and allow the filter to dry completely.  

 **Note: If you have a baking tray available I recommend placing your coffee filters on this to do the spraying. The color will bleed through the coffee filter quickly and can cause staining on surfaces, especially if you are using food coloring.
 
Step 5: Once the filters are completely dry, tape a string to the filter slightly under the top (the rounded side you left uncut in Step 1). Once the string is secured in place, fold the rounded side over the string creating a rectangle.  

Step 6: Repeat this step several times, using the same long piece of string so they are all connected together. Make sure you leave some space between each coffee filter.

Step 7: Hang the string in your house to celebrate Cinco de Mayo or any other upcoming celebration!  

Now the steps described above are our simplified way to create a papel picado. The traditional way of making of making this beautiful work of Mexican Folk Art is using a stencil and chisel. Papel picado artists start by cutting the paper to the correct size and shape. The artist then creates a stencil of the image desired for the banner. Various sizes of chisels are used to cut out the image of the stencil into the paper. The finished pieces are then glued to a string and tied together to form a banner. Today, many flags are also made of a plastic material so they are more durable and last longer.  
Papel Picado banners may have started out as part of celebrations of Día de los Muertos, but these colorful works of art are now used to celebrate major holidays, weddings, birthdays and more across Mexico and with Mexican people and those of Mexican descent around the world!

Check out our other Sanity Savers posts here!

Sanity Savers: Crayon Resist Space Painting

Written by: Amelia Schrader
Senior Manager of Learning and Education

Materials

Water cup
Watercolors
Paintbrush
Crayons
PaperTry (optional)  

Sanity Savers: Crayon Resist Space Painting

Length:

10 minutes + 

Academic Subject(s):

Science, Art   

Today we are doing a great STEAM project to learn about how oil and water don’t mix. This simple project can be done with all ages – the complexity of the drawing will increase with older children. Since it is May 4th, I decided to do a space theme for this project!  

Directions:

Step 1: Draw a picture on the paper. You can do a space theme like me or anything you can imaging! For younger children this is a great opportunity to practice drawing shapes, counting or engaging in color recognition activities. Make sure you include some white crayon because that will be the most eye catching change!  
Hint: Don’t have a white crayon? You can also use a white birthday candle! The wax from the candle will react the same way as a crayon and will be similar to holding a crayon for your child.

 Step 2: Dip your paintbrush in water and the water color bricks (if you are using liquid water color you may not need additional water depending on your brand). Begin painting over the entire surface of your crayon drawing! I like to do this step on a tray of some kind, so it is easier to clean up later. 

Step 3: As you paint, make sure you observe the wax crayon repelling the water on the paper! The watercolor seems to roll right off the drawing.  


Step 4: Compete cover your paper with water color and allow to dry!  I hope you enjoy this simple STEAM project as much as I do! You can do this project with all different images! Try doing a picture all with white crayon and see you image revealed as you paint over the surface.
Have fun and “May the 4th Be With You”! 

Vocabulary Words


Repel: to drive or force back or away
STEAM: Science, Technology, Engineering, Arts and Math! This is an educational approach that incorporates the arts into STEM learning.  

Check out our other Sanity Savers posts here!

Storytime: Mayor Byron Brown reads Max Meets the Mayor

Mayor Byron Brown reads Max Meets the Mayor by Mark Goldman

Explore & More Children’s Museum is all about Buffalo and Western New York! This story is written by a local author and also celebrates our great city! In our story, Max wants to be the Mayor of Buffalo when he grows up! What do you want to be when you grow up? Comment with your dream on the Explore & More Facebook page! Max loves meeting new people! Do you love meeting new people? Is there someone special in our community that you would love to meet? For more Storytime Stories head here: https://exploreandmore.org/programs/storytime/

Sanity Savers: Olympic Games and Medal Craft

Written by: Will Kawalec
Lead Play to Learn Facilitator

At Home Olympics + Gold Medal Craft Materials

Jar top, glue, ribbon, stickers and/or permeant markers. Notebook 

Length:

Set up: 10 Minutes
Activity 20-60 Minutes  

Academic Subject(s):

Art, Physical Fitness 
This lesson supports Pre-K to Fifth Grade:
VA:Cr1NYS Physical Education Standard 1: Personal Health and Fitness    

Crafting these gold medals is only half the fun.  Parents or bigger siblings can design an at home Olympics to carry out and award.  This lesson heavily emphasizes fine motor development as well as promoting physical fitness and exercise. 

Directions:

Medal Creation
Step 1: Remove and clean a jar top, should look for silver, gold, and bronze.
Step 2: Decorate the front of the jar lid, perhaps draw the Olympic rings, or draw 1st, 2nd, and 3rd, depending on the medal.
Step 3: Glue a portion of your ribbon to the back end of the jar top.  Making sure the loop is at the top. 
Step 4: Award the medals after “Olympic” events have been completed.  

Creating the Olympic Games
The more work done on planning here the more fun the games will be!
Step 1: Create a list of events that will have to be performed in these Olympics.  If there are multiple children try to choose activities that can be done by all ages. Below are some ideas for at home Olympics activities.
·        Jumping jacks can one do in 30 seconds, (variation: first to 10 jumping jacks) this can be done with sit-ups, squats etc.  
·        Who can stand on one foot the longest (how long can the child stand on one foot).
·        Catches of a ball can they make without dropping.
·        Getting dressed the fastest, time how long this takes.
·        Standing Long Jump: how far can child jump.
·        Crab walk race: set up a course and have children walk it (this can be timed).  This can also be modified for bear crawl or even walking.
·        Flexibility: who can touch their toes or touch their knees and stretch. 
You may add whatever you want to the event list, though display the list for every child to see.
It may be fun to create a board with the Olympic medal count standings.  Here you can track the who has won what event, this can be done by simply using a dry erase board, or a sheet of construction paper and marker.  

Vocabulary Words 

Olympics: A global event where people compete on behalf of countries in sporting events.  There are Summer and Winter variety each occurring every four years.  The Olympics started in ancient Greece more thank 2,700 years ago!  Though have existed in their modern capacity since 1896. 
Anthem: An important song, usually one of national relevance.  At the Olympics they play the National Anthem of the gold medal winners home country. 
Relay: To pass along from something or someone.  In the Olympics there are many events that are relays.  These events have their competitors continue the event after another athlete. 
Torch: A flame that is carried on a stick.  Every Olympics there is a torch relay that lights the Olympic flame, this lighting symbolizes the start of the Olympic Games.   

Check out our other Sanity Savers posts here!

Sanity Savers: Rainbow City – 119th Anniversary of the Pan Am Exposition

Sponsored by: National Grid

Written by: Dan Walsh
STEM Educator

Sanity Savers: Rainbow City - 119th Anniversary of the Pan Am Exposition

Supplies ideas:

Toilet paper tube (or Pringles can), reflective paper such as tin foil or scrap booking paper, colored beads, tissue paper, glitter, ruler, cardboard, glue, tape, fruit container or any see through cap 

Sanity Savers: Rainbow City - 119th Anniversary of the Pan Am Exposition

Length:

30 minutes

Academic Subjects:

Art and Science  

Directions for Rainbow City Kalidoscopes   

May 1st marks the 119th anniversary to the opening of the Pan-American Exposition located in Buffalo NY. The Pan-Am Expo was a world fair that showcased culture, scientific advancements, and of course electricity!

Electricity wasn’t a household thing yet, so people traveled from all over the world to see the entire fair powered with electric lights. The fair was powered by a hydroplant near Niagara Falls! The lights on the Electric Tower were covered with the spectrum of the rainbow, thus Buffalo was nicknamed Rainbow City. 

1.) Begin by lining up your roll with a plastic container or cap. Place the roll over the plastic and draw a circle around it. Include 4 tabs to make the gluing easier.  Make two of these circles and then cut them out. 

Sanity Savers: Rainbow City - 119th Anniversary of the Pan Am Exposition


2.) Fold the tabs and then make sure the circles fit inside the tubes. Next place a little glue on each tab. Slide into tube about a quarter of an inch and let the tabs dry. Place a little glue on the outside of the tabs to make sure the plastic stays put.  

Sanity Savers: Rainbow City - 119th Anniversary of the Pan Am Exposition


3.) Add glitter, colored jems, beads, or tissue paper onto the first circle. 

Sanity Savers: Rainbow City - 119th Anniversary of the Pan Am Exposition


4.) Glue the next circle over the top of your roll.


5.) Next we are going to work on our prism. Measure the inside of the roll with a ruler. If using reflective scrapbook paper, or any other reflective paper skip to Step 10.   

Sanity Savers: Rainbow City - 119th Anniversary of the Pan Am Exposition

6.) Use this measurement to measure out your cardboard. Outline it on the cardboard. Measure out three equal rectangles lengthwise. I made mine about 1.5 inches each.   

Sanity Savers: Rainbow City - 119th Anniversary of the Pan Am Exposition

7.) Next we are going to cut the prism out. A neat trick for this part involves lightly cutting the two middle vertical lines. Don’t cut through the entire sheet, this will allow you to bend the cardboard later. If you cut it in the valley, you can see how far to cut. (Pictured below)  

Sanity Savers: Rainbow City - 119th Anniversary of the Pan Am Exposition

8.) Cut through the outline. Bend at the vertical lines slightly.    

Sanity Savers: Rainbow City - 119th Anniversary of the Pan Am Exposition


9.) Measure out a piece of tin foil and cut it to size. Then glue down on top of the cardboard.

Sanity Savers: Rainbow City - 119th Anniversary of the Pan Am Exposition

10.) Bend the cardboard (reflective paper) into a triangle shape. Place tape on top.   

Sanity Savers: Rainbow City - 119th Anniversary of the Pan Am Exposition

11.) Slide the prism into the roll. Head towards a window or light and marvel at the colors you see. Slowly turn the roll to see different colors!   

Sanity Savers: Rainbow City - 119th Anniversary of the Pan Am Exposition

Vocabulary

Geomety– a branch of matamatics that studies shapes, points, lines, surfaces, and solids.

Prism– a geometric shape that has two equal ends and are connected perpendicualry.   

Check out our other Sanity Savers posts here!

Field trips are back! Please be aware that it will be busier than usual.