Presented by National Grid
Written By Dan Walsh
STEM Educator
Supplies ideas:
contact paper or clear packing tape, tissue paper, hole punch, scissors, string, construction paper
Length:
10 minutes
Academic Subjects:
Science
Directions for Stained Glass Windows:
Stained glass windows are the perfect blend of all things STEAM. This quick activity looks at geometry and art. Stained glass dates back to as early as 675 AD. The term of stained-glass windows refers to colored glass that is made to be ornate.
Frank Lloyd Wright was famous for his architectural designs as well as the over 4,000 lead stained glass windows that were installed in over 150 of his buildings. He often referred to these windows as “light screens.” Many of his designed incorporated geometric shapes, which contrasted from the elaborate storybook like designs typically associated with stained glass.
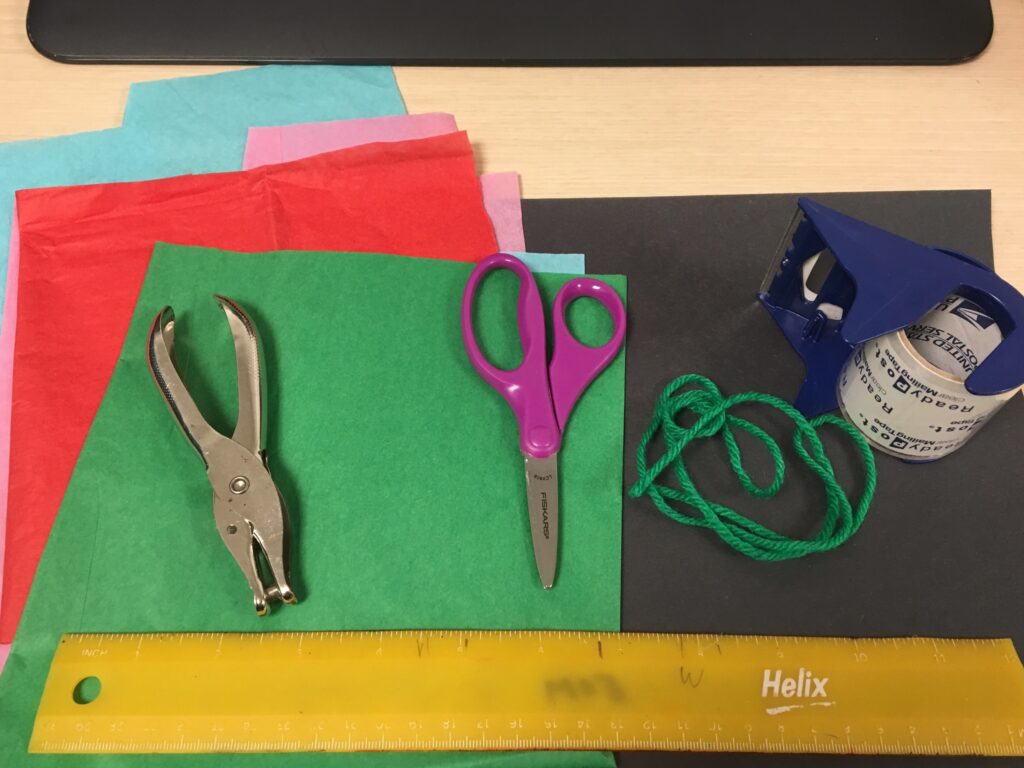
If using contact paper, follow these steps;
1. Cut a piece of contact paper into a ten by ten-inch square. Fold the piece of contact paper in half. Place a piece of carboard between the two halves.
2. Cut small squares of tissue paper out. Then cut thin strips of black construction paper out.
3. Be extra careful on this step. Peel one side of the contact paper and leave the cardboard divider in between the sheets. We will be working on the sticky side. Place black construction paper strips down first. These will act as your dividers.
4. Place the multicolored tissue paper squares down in any pattern.
5. Slide the cardboard divider out. Slowly peel the rest of the contact paper off.
6. Fold the contact paper over so the sticky side is sealed up.
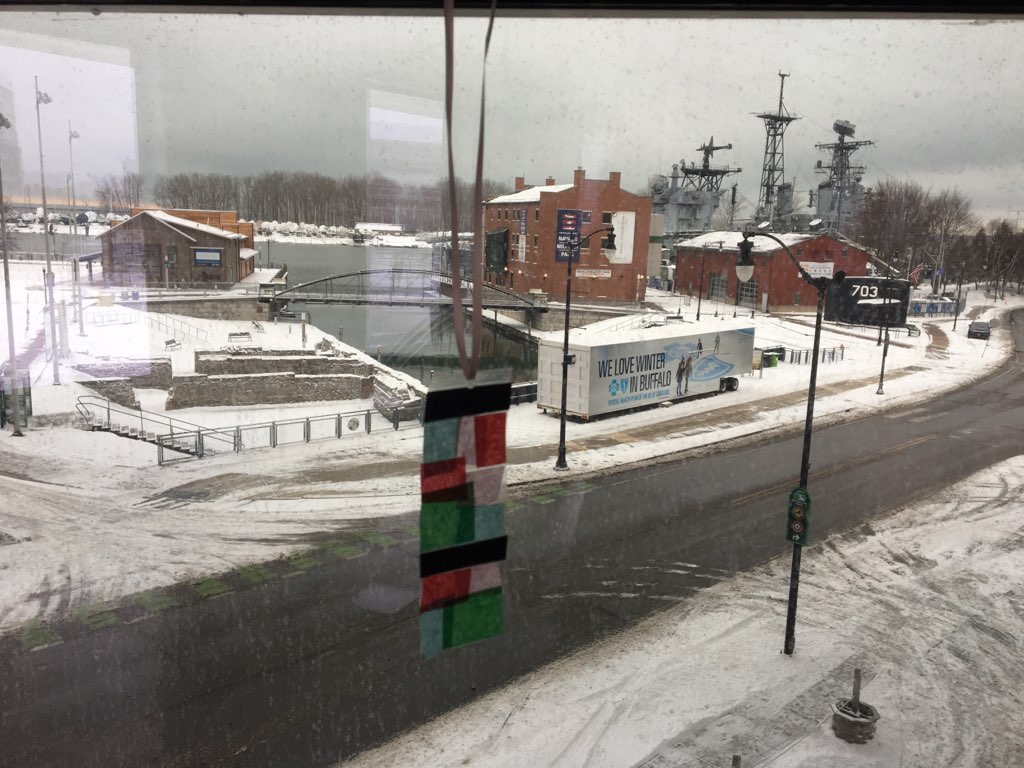
7. Decide which side you like more, then using a hole puncher, place a hole at the top of the sheet. Tie a piece of string through the hole.
8. Find a window in your house with the most sun light. Hang the masterpiece from the window.
If using packing tape, follow these steps;
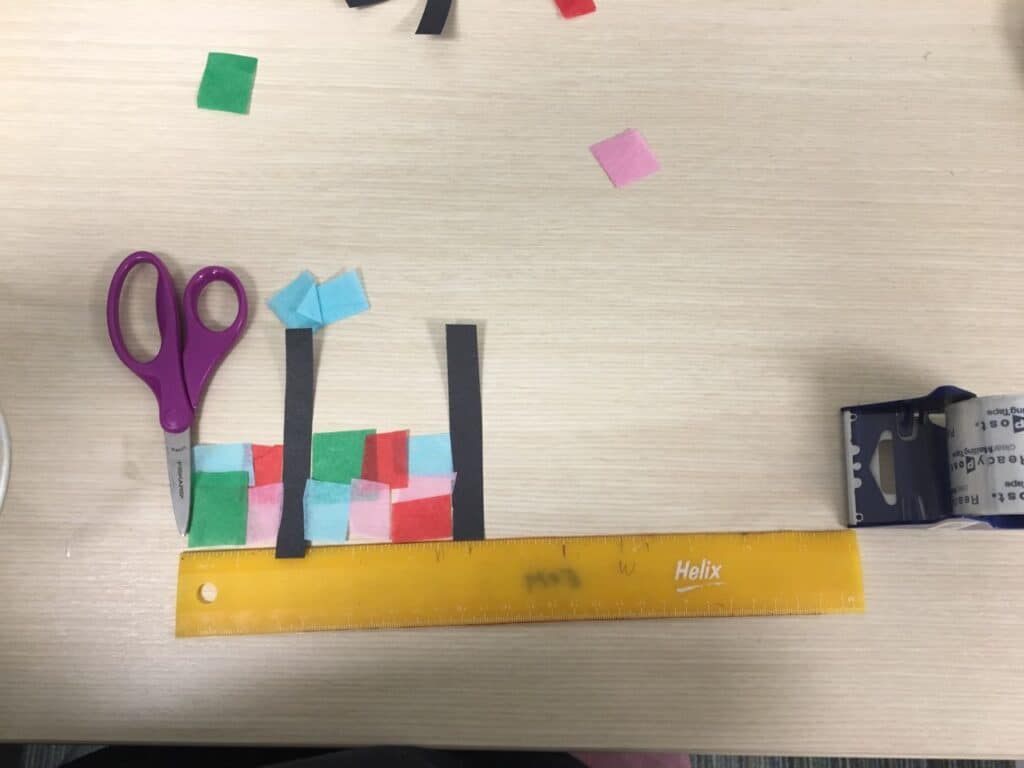
1. Keeping the tape on the spool, pull eleven inches of tape out. Place an anchor at the one inch mark to keep the tape from folding up.
9. Using your scissors and construction paper, Cut small squares of tissue paper out. Then cut thin strips of black construction paper out.
2. Place a thin strip of black construction at the five-inch mark. You will be decorating below the five-inch marker.
3. Using your tissue paper place, them on the piece of tape. You can use the black construction paper to make lines.
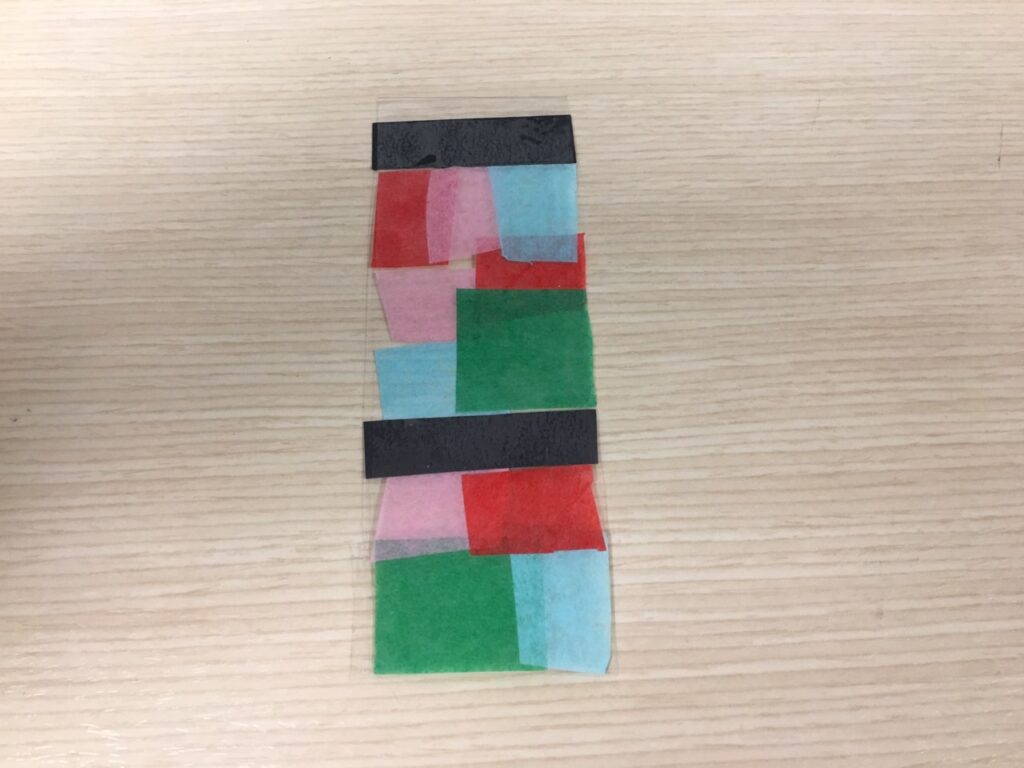
4. Once you are finished decorating, cut the very top of the tape, then fold the tape over itself. The tape should go all the way to the anchor. Cut off any extra bits.
5. Decide which side you like more, then using a hole puncher, place a hole at the top of the sheet. Tie a piece of string through the hole.
6. Find a window in your house with the most sun light. Hang the masterpiece from the window. This craft can also be used as a great bookmark!
Stain Glass Window Vocabulary:
Geometry– The kind of mathematics that deals with shapes and figures.
Angle– Formed when two lines meet at a shared point.