Storytime: John McGinty reads The Fantastic Flying Books of Mr. Morris Lessmore by William Joyce Morris
Lessmore loved words. He loved stories. He loved books. But every story has its upsets. Everything in Morris Lessmore’s life, including his own story, is scattered to the winds. But the power of story will save the day. Stunningly brought to life by William Joyce, one of the preeminent creators in children’s literature, The Fantastic Flying Books of Mr. Morris Lessmore is a modern masterpiece, showing that in today’s world of traditional books, eBooks, and apps, it’s story that we truly celebrate—and this story, no matter how you tell it, begs to be read again and again.
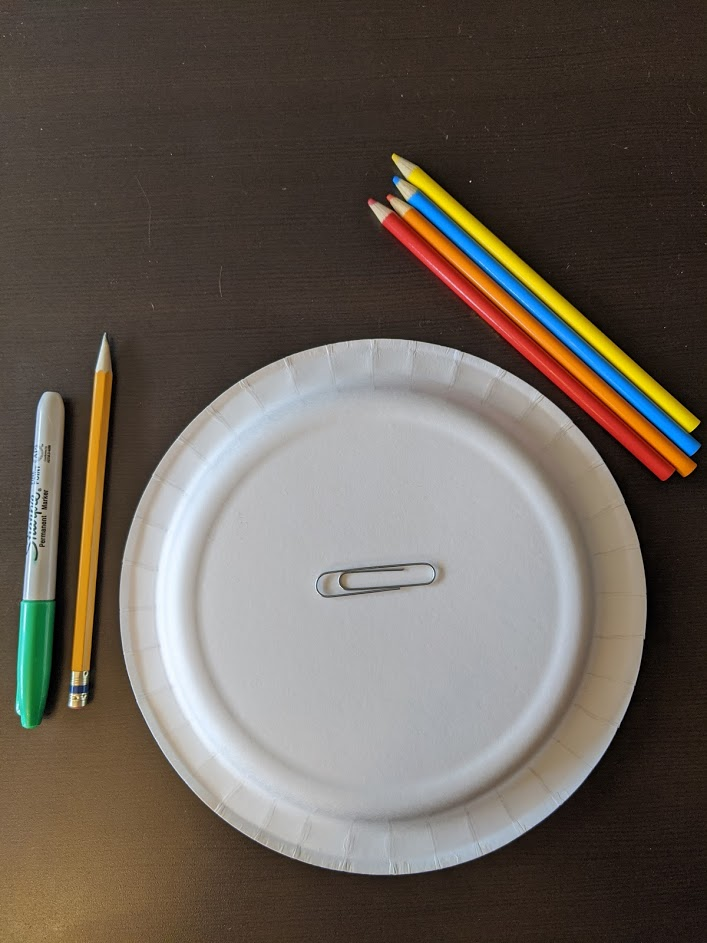
1 paper plate1 bold marker 1 paper clip1 pencil Coloring tools (pencils or markers)
Length:
Prep: 5 minutes Play Time: Unlimited!
Academic Subject(s):
This project targets children ages 4-7
Art
English language Arts
Cognition (emotional awareness)
Motor skills
Introduction: This special “Sanity Saver” blog entry is based on the Living Lab project originally planned to be implemented with our visitors in Spring of 2020. The Living Lab is a collaborative project between UB’s Early Childhood Research Center (ECRC) and Explore & More – The Ralph C. Wilson, Jr. Children’s Museum. The Living Lab is designed to bring child development research and knowledge directly to you through play-like experiments with your child! In each of the Living Lab sessions, UB graduate student researchers would engage your child in a brief and play-like experiment based on cutting-edge research. They would then explain to you the purpose of the experiment and why it is important. In addition, they would provide some fun activities and ideas for you to try at home to facilitate your child’s learning and development. Since all in-person activities are on hold the ECRC and E&M partnered together to still be able to reach you in your living room! The UB student researchers have created fun and engaging activities based on their research experiments. We hope you will try them out. As Explore & More’s community partner, ECRC also welcomes you to check out its online resources and activities for young children (ages 2-6) and their parents and caregivers; for more information click here.
There is never a better time to start talking with our kiddos about all of the different emotions that they are experiencing, and what is a better way to do it than through a fun game? Talking about emotions helps children become more aware of the causes and effects of different emotions, which can help with emotional regulation.
Creating this fun spinner helps make these conversations more light-hearted and game-like! Simply have your child spin the wheel and describe, draw, or act out a time when they felt the emotion the paper clip lands on. Then, talk to your child about why they felt that way. Through rich conversations with children, caregivers can help foster strong emotional development and help their children make sense of their emotions.
Directions:
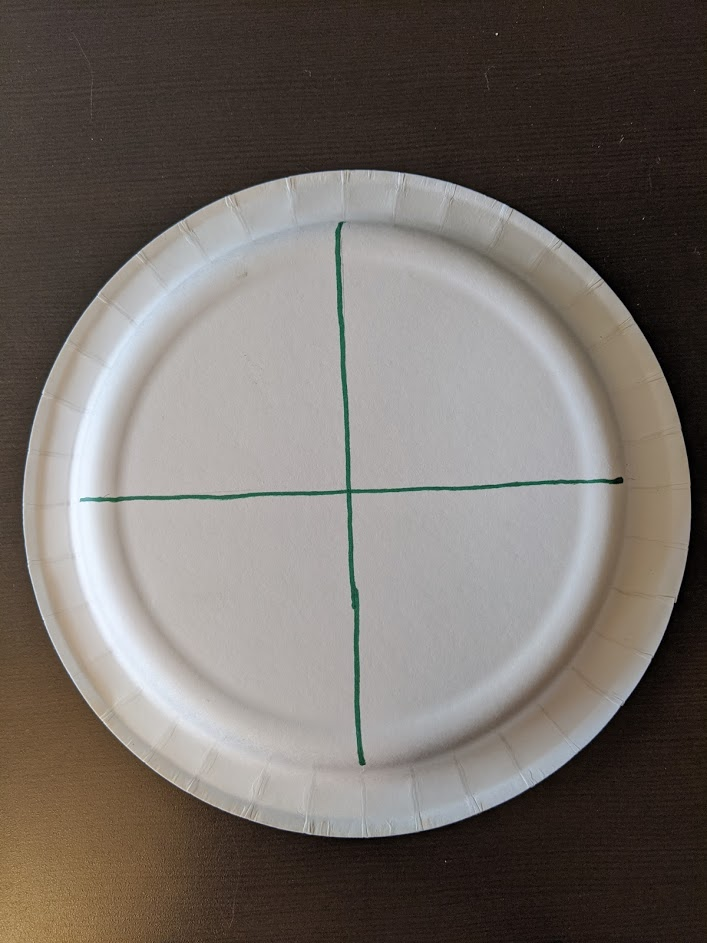
Step 1: Flip the paper plate upside-down to use the back. Using the bold marker, divide the plate into four quadrants by making a plus sign that meets in the middle of the plate. (If you prefer to analyze more emotions, divide the paper plate into as many sections as emotions desired!)
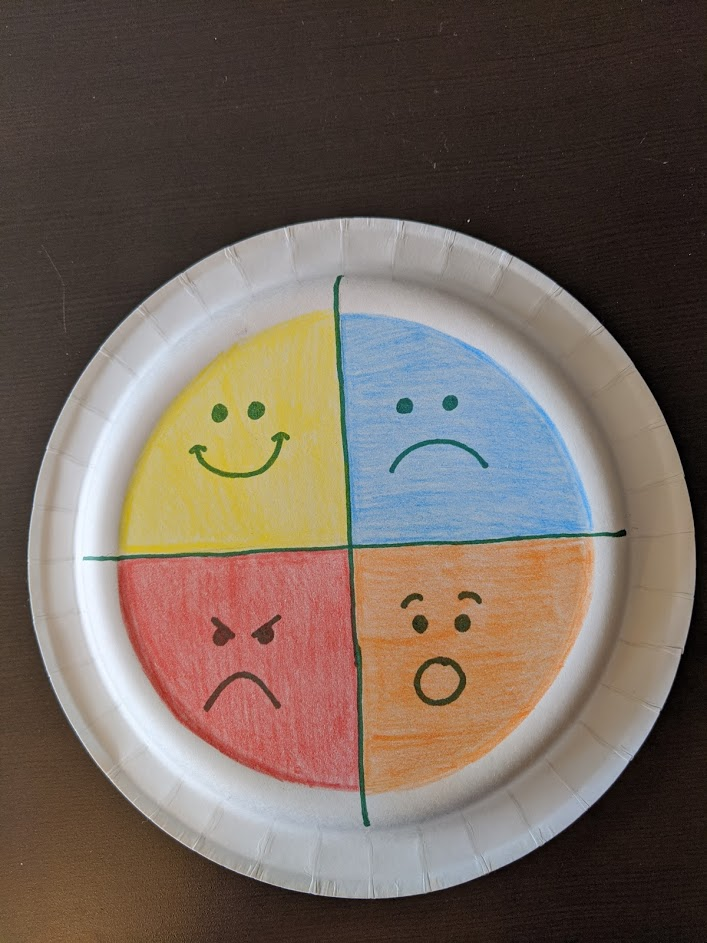
Step 2: In each quadrant, use the bold marker to draw a facial expression that will match the emotion you are planning to ask your child about. In the example here, the emotions used are happy, sad, mad, and surprised. Color in the quadrants with markers or colored pencils to make the spinning wheel more fun!
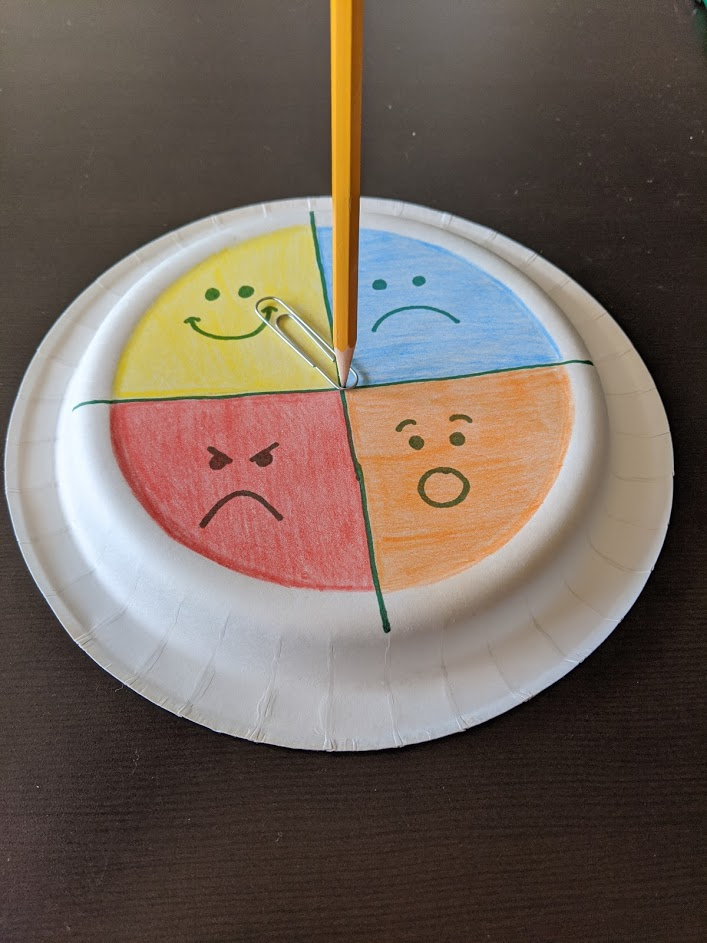
Step 3: Place one round side of the paper clip on the center of the paper place where the lines meet. Place the tip of a pencil through the round end of the paperclip so that it is resting on the paper plate. You now have a spinner that you can flick!
Step 4: Have your child flick the paper clip and watch it spin! When the paper clip lands on an emotion, ask your child about a time when he/she/they felt that emotion and why they felt that way. This will give you a better idea of your child’s emotional development, while also opening communication even more between you and your child. Your child will love telling stories and making the connection between the story details and emotions felt. For additional fun, have your child draw, act out, or come up with a fictional story that would evoke the emotion that they landed on.
Vocabulary Words:
1. Emotion: “A state of feeling” 2. Expression: A Look on someone’s face that conveys a feeling 3. Surprise: “The feeling caused by something unexpected or unusual” 4. Problem: A source of confusion or unhappiness 5. Solution: “An action or process of solving a problem” (“Dictionary by Merriam-Webster… “, n.d..). Resources:Dictionary by Merriam-Webster: America’s most-trusted online dictionary. (n.d.). Retrieved from https://www.merriam-webster.com/
Science This lesson supports the following standards: ETS1.A: Defining Engineering Problems- Possible solutions to a problem are limited by available materials and resources (constraints).
Directions for Rollercoaster Wall:
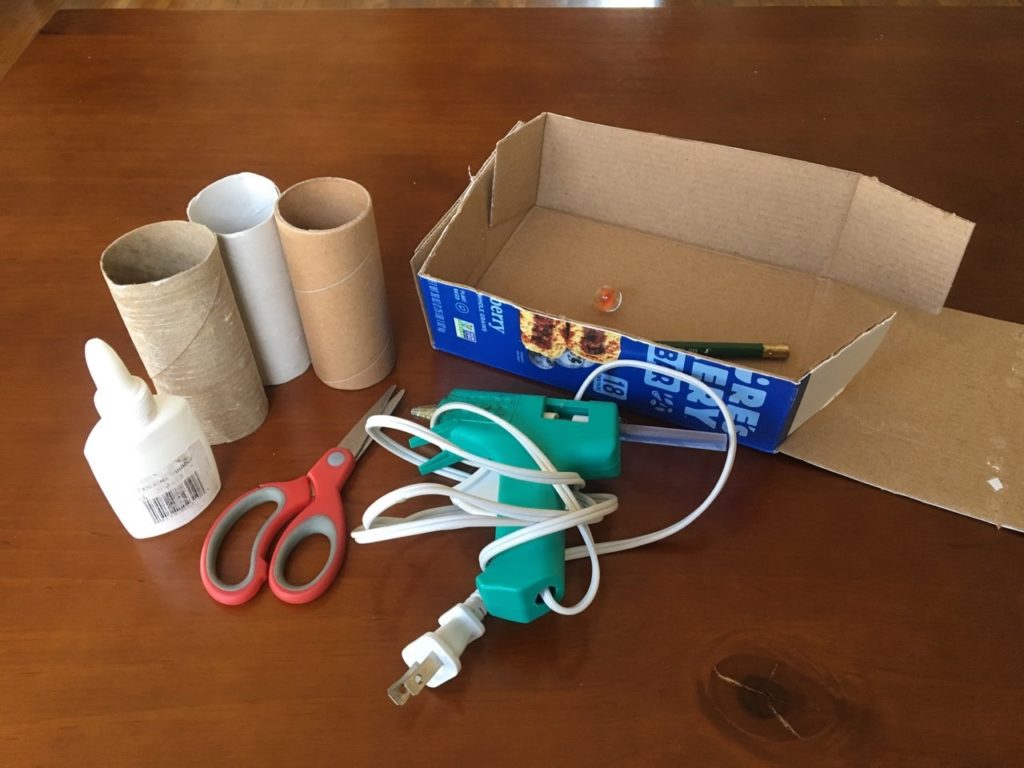
One of my favorite things to do at Explore & More is use the rollercoaster wall. I miss it so much that I decided to build my own! Here are the steps to build a rollercoaster wall. 1.) Gather a few cardboard tubes together. They can be gift wrap, toilet paper, or paper towel tubes. Don’t cut them just yet. 2.) Find a cardboard box with four sides. It can be a shoe box or in my case a granola bar box I cut in half. The box will need close walls because the marble is going to bounce off them and continue down the track. 3.) Decide on a layout for the rollercoaster wall. This will determine how big to cut your tubes. Visualize the rollercoaster by drawing lines where you will place the cardboard tubes. Each one needs to be diagonal and opposite of the last tube.
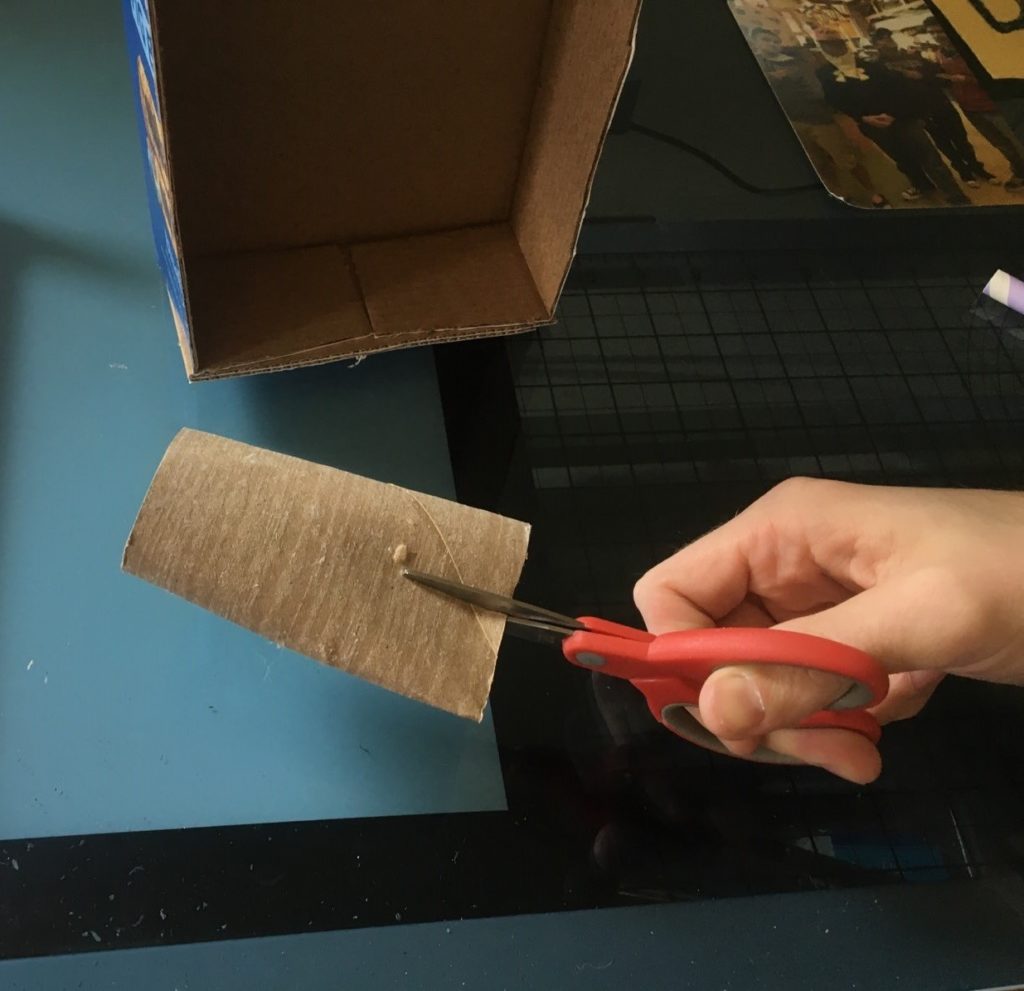
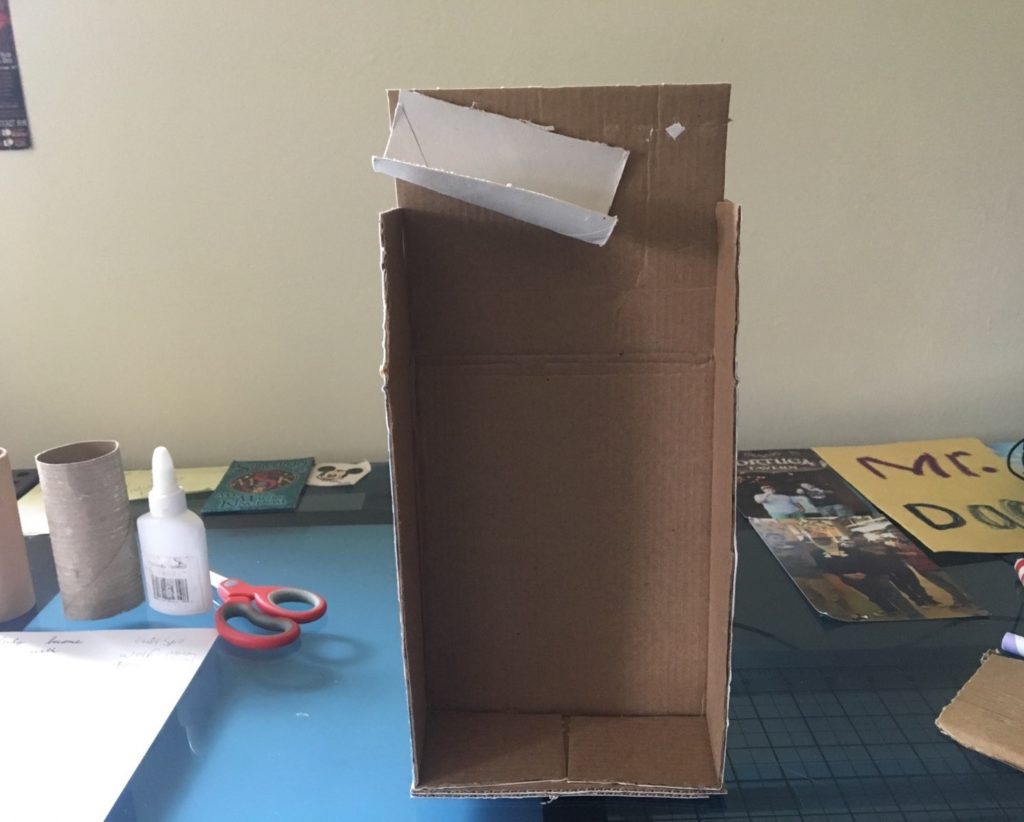
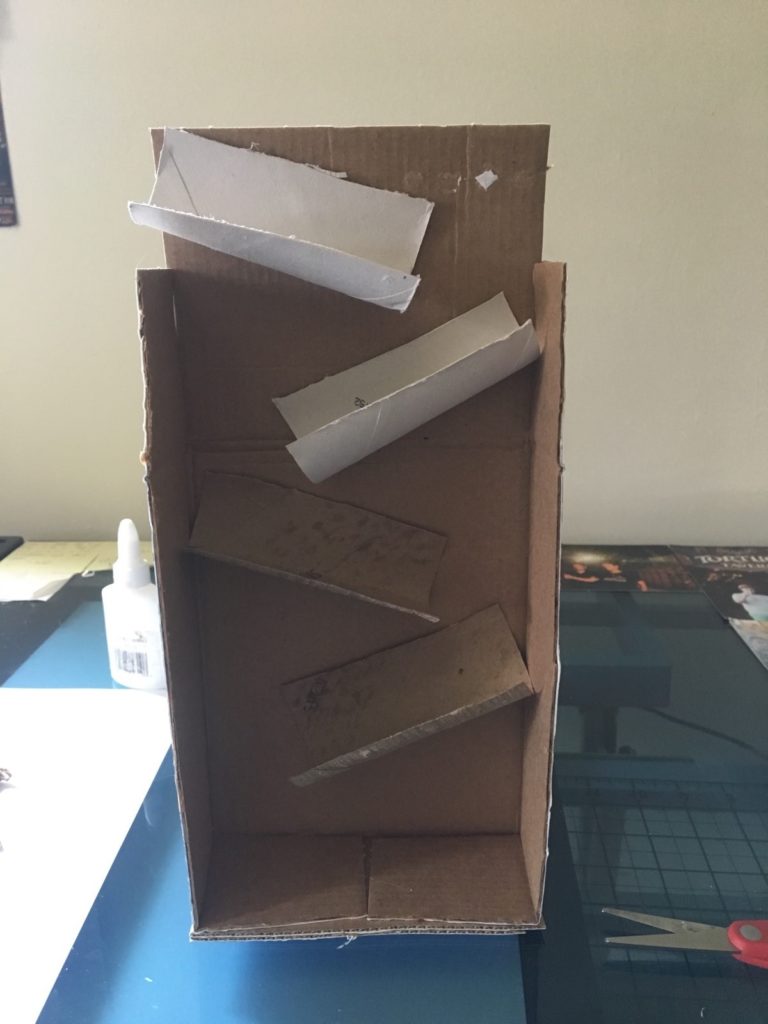
4.) Place the tubes against your cardboard box to decide how to cut them. Then cut each cardboard tube in half. 5.) Put a little glue on the side of the cardboard tube and glue it right to the wall. 6.) Repeat this process and place the next cardboard tube at an angle going down. Keep repeating until the wall is full! 7.) Finally when the glue is dry, place a marble at the top and watch it go down the tubes!
Have you ever wondered how rollercoasters work? Rollercoasters don’t have engines so they use different types of energy to drive all the way around the track. First rollercoasters need to get up a hill by either chain or other launch methods. As the rollercoaster car is going up the first hill it is building potential energy. Potential energy is stored energy that is going to be used later. Once the rollercoaster car gets to the top of the hill, gravity takes over and the car descends down the hill. At this point the potential energy changes into kinetic energy, which is moving energy. The car continues down the track using kinetic energy until the tracks hit the brakes and the car stops!
Vocabulary-
Engineer– a person who builds, or maintains engines, machines, or public works. Gravity– the force that pulls two objects together.
Science This lesson supports the following standards: ETS1.A: Defining Engineering Problems- Possible solutions to a problem are limited by available materials and resources (constraints).
Directions for Amazing Marble Mazes:
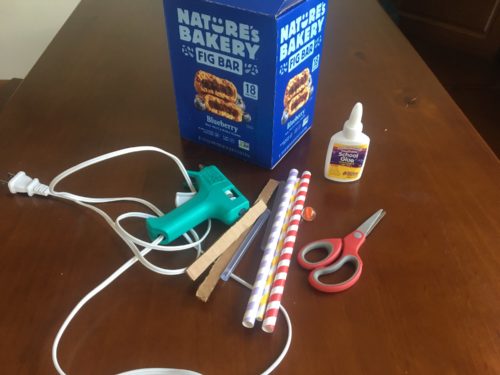
Today we are going to be building marble mazes! Think about a time you have done a maze in a coloring book. What sort of things did you see? How many paths to the end were there? Did anything stump you? Now’s your chance to build your own maze! You can even make the maze more exciting by giving it a maze! Will your maze feature a spaceship trying to zoom through an asteroid field? Or will your maze feature a mythological warrior running through a labyrinth!? Although regular glue can be used for this project, this activity is a good introduction to safe tool use by using a hot glue gun. Grownups can provide guidance as the child handles the hot glue gun.
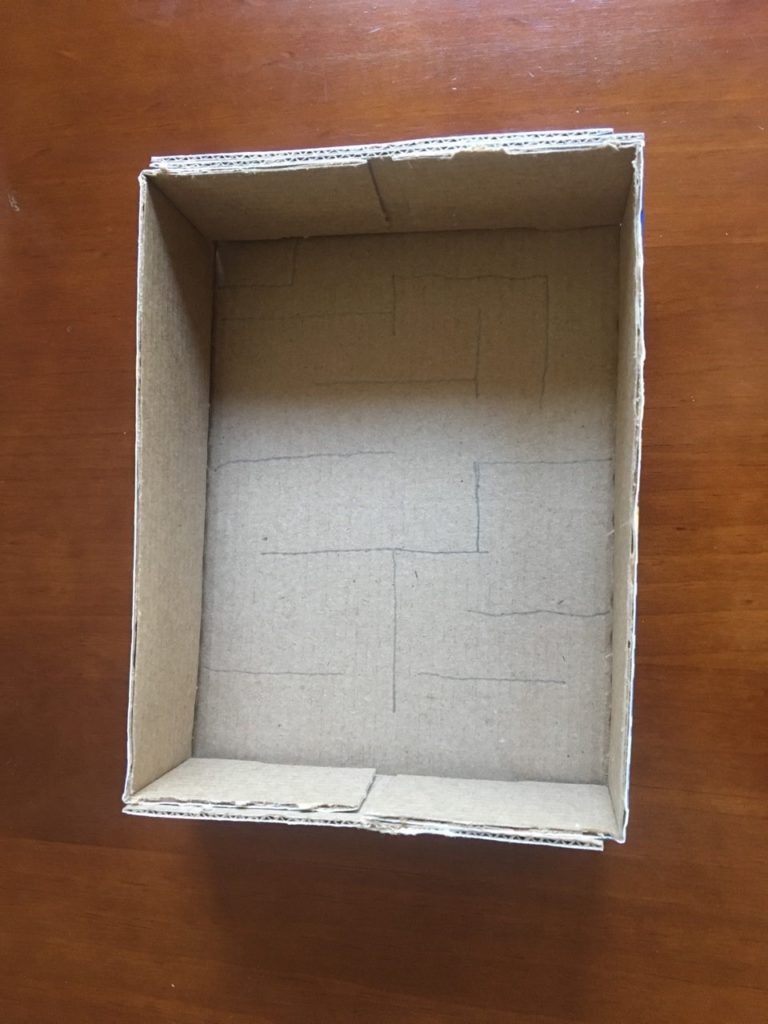
1.) We are going to design the layout of our maze by drawing it with a pencil. Where will you start and end be? For the demonstration the start is at the bottom and the end is at the top of the box. Where ever you put your exit, we are going to outline a small hole for the marble to fall through. When we are designing we want to make sure our marble will fit down every pathway. If the pathway is too narrow the marble will not fit.
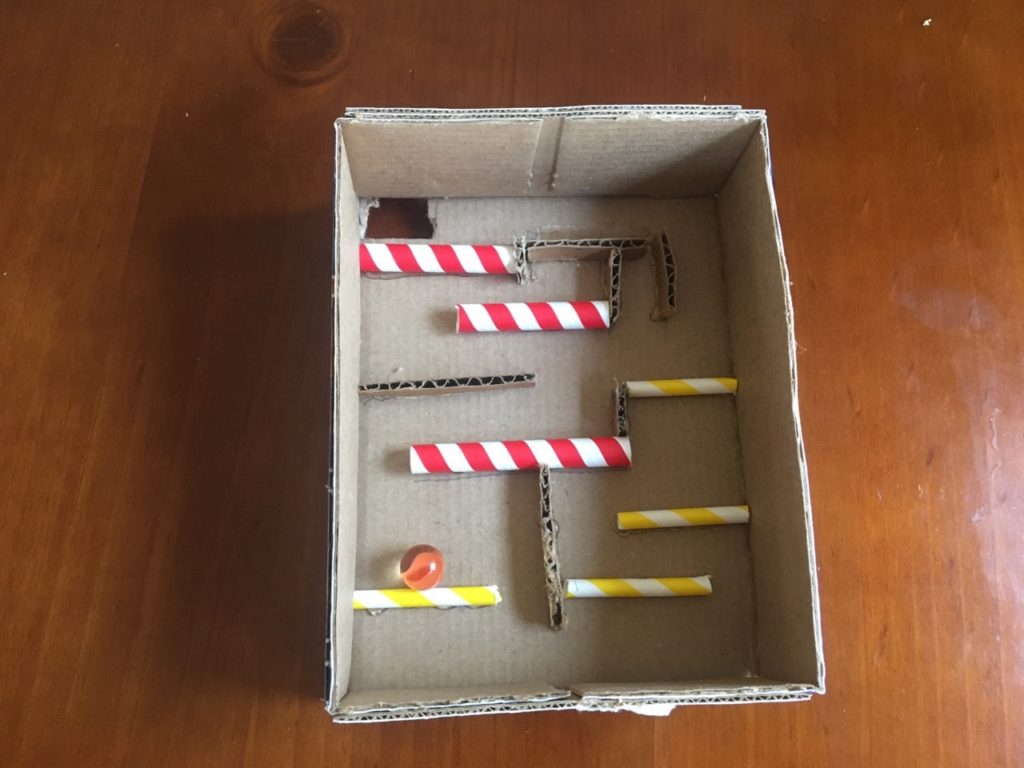
2.) Next we are going to start to glue down our walls. The walls can vary from straws, cardboard strips, and wooden dowels. You can measure them by laying them on your piece of cardboard and then using scissors to cut them. If you are using a hot glue gun, lay out some safety rules such as, not touching the nozzle. When the glue is coming out watch your fingers, it is very hot. Only place down ONE single line of glue per wall, then place it on your maze.
3.) Cut a small hole at the end of your maze. This is where your marble will fall through.
4.) Make sure all your walls are dry, if they aren’t leave it somewhere safe to dry.
5.) This is the fun part, testing out your game! Grownups can join in on the fun and try the game themselves!
Facts about mazes:
Did you know what of the largest mazes in the world is located at Dole Plantation in Hawaii? The maze is over two and a half miles long!
Vocabulary:
Labyrinth– A complicated way of passages in which it is difficult to find one’s way. Hedge– A fence that is formed by closely growing bushes or shrubs.
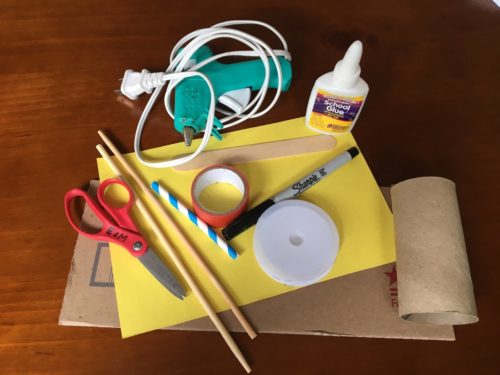
Toilet paper tube, round object to use for tracing wheels, construction paper, craft stick, wooden dowels, glue, tape, markers, straw, cardboard
Length:
10-15 minutes
Academic Subjects:
Science This lesson supports the following standards: ETS1.A: Defining Engineering Problems- Possible solutions to a problem are limited by available materials and resources (constraints).
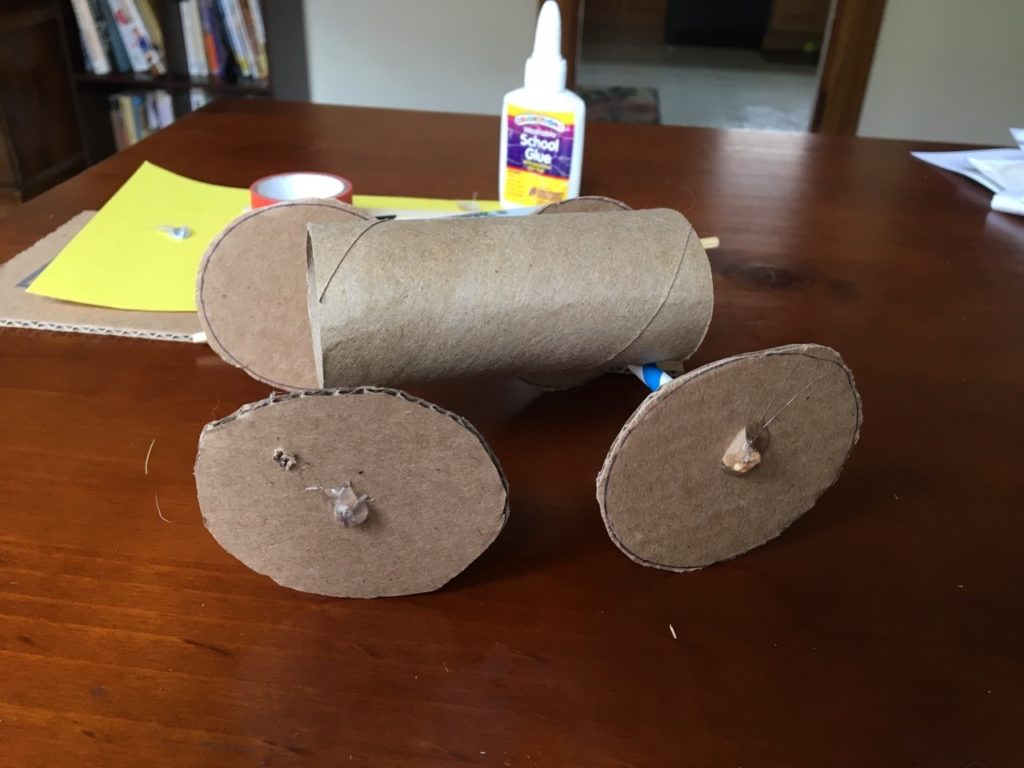
Directions for Wind Powered Cars
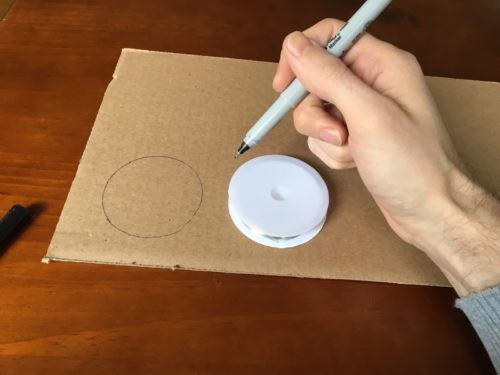
1.) Using a round object, trace 4 circles onto a sheet of cardboard. (You can also use recycled caps or even cd’s!)
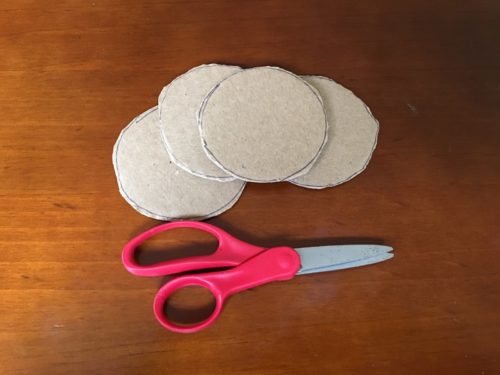
2.) Cut all four wheels out. Try to make them as similar and smooth as possible.
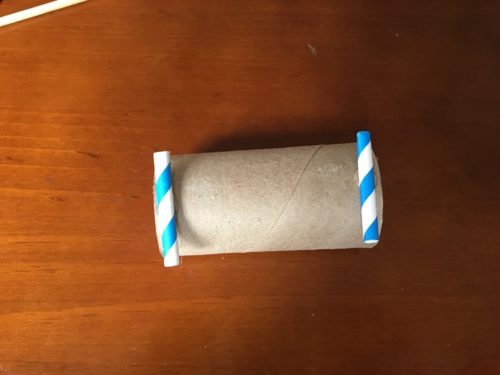
3.) Cut your paper straw to fit on the bottom of a toilet paper roll. Then glue each straw onto the tube. Make sure there is plenty of distance between the two straws.
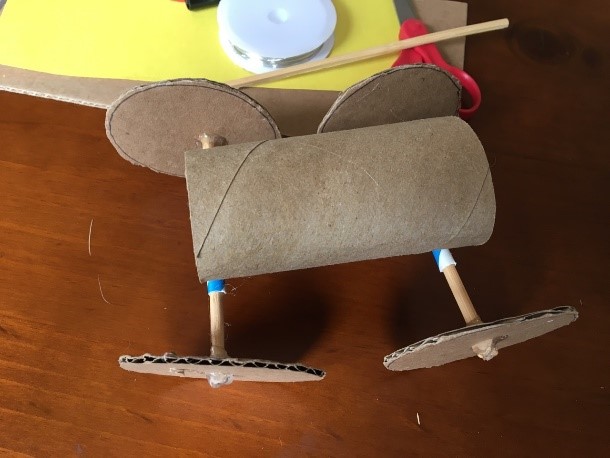
4.) Slide your wooden dowels through the straws. Then one at a time we are going to line a cardboard wheel up to the dowel. Carefully poke a hole through the center of your wheel and slide it onto the dowel (axel) Glue or tape the wheel onto the dowel. I glued the outside and the inside of the hole to make sure the wheels would not slide off.
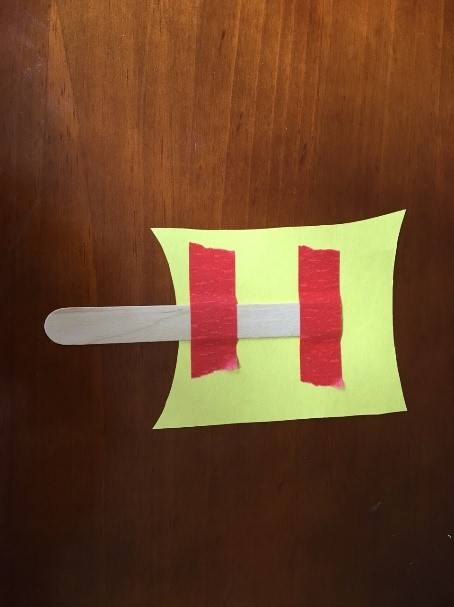
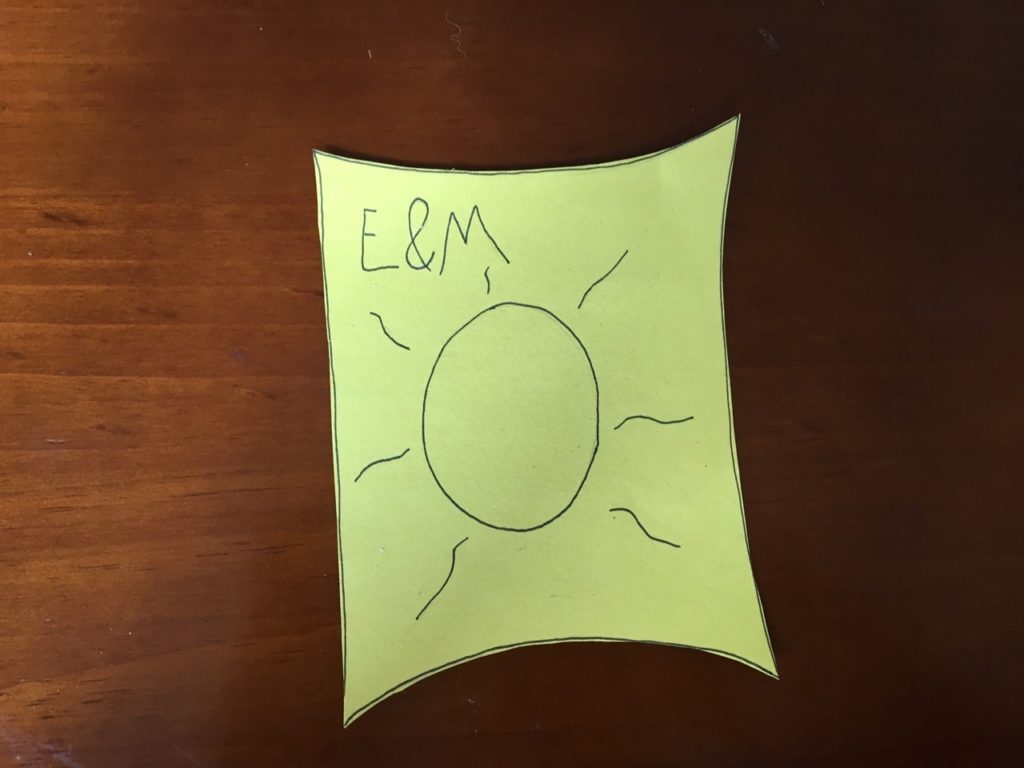
5.) Design your sail! Then tape it onto a craft stick.
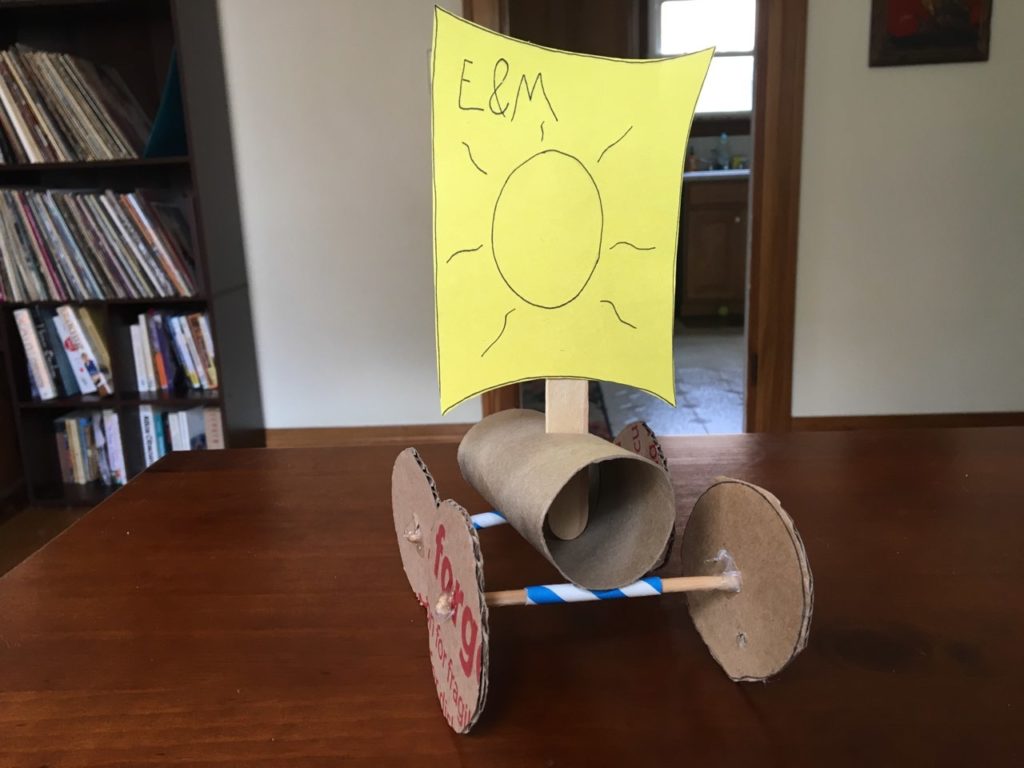
6.) Carefully cut a slit horizontally into the top of the paper towel tube. Then slide your sail into the hole.
Is your car not sailing as fast as you want? Make sure your wheels are round enough. Make sure your straws are balanced so they’re not lopsided. This car uses a simple machine called wheels and axels. The axels are the rods that connect the two wheels together. Wheels and axels can be found anywhere from your bike to door knobs!
Vocabulary
Energy– the ability to do work (and play) Energy is how things change and move.
Wind energy– This type of energy is created with wind. It is considered a renewable source, because we cannot use up all the wind.