Sanity Saver: S.M.A.R.T. Goals

By: Jacalyn Slingerland, Play to Learn Facilitator

This lesson gives you and your child the information needed to help make S.M.A.R.T goals. S.M.A.R.T is an acronym that stands for specific, measurable, achievable, relevant and timely. It’s always awesome to set a new goal for yourself, especially around the new year. This is called a new year’s resolution. Do you have any goals for the new year? Maybe you want to spend more time with your family, ride your bike more often, earn a better grade in a class, or eat healthier. Setting a S.M.A.R.T goal will help you meet your new year’s resolution. 

When writing your goal keep in mind you want your goal to be specific, measurable, achievable, relevant, and timely. 

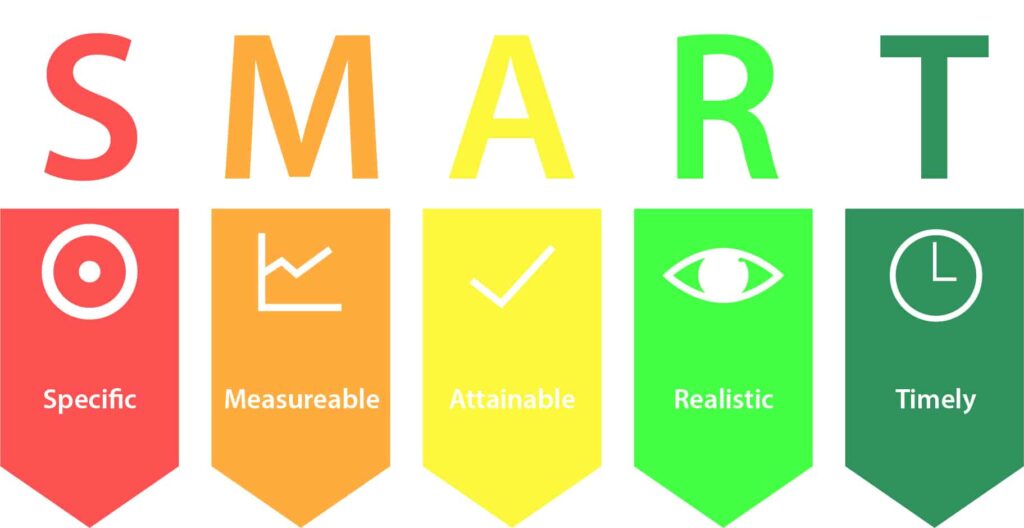
Specific: Meaning well defined and clear. Is the goal linked to a single activity or one thought?

Measurable: You’ll use specific criteria to measure your progress. Can you plot your progress on a graph? You’ll want to see your progression as you come closer to your goal. 

Achievable:  Attainable and not impossible to achieve. Think about what task you’ll be doing. Think of obstacles you might find on your way; would they make your goal unrealistic?  

Relevant: Your goal should be within reach and relevant to your life. Ask yourself: Is this worthwhile? 

Timely: Write your goal with a clearly defined timeline, including a starting date and a target date. How long will it take to achieve your goal? Days, weeks, or months?

Example: I want to eat more fresh vegetables. Specifically, I will be following the federal guidelines recommendation for healthy eating. Eating more vegetables daily will help me to be healthy and strong.  Every day I should eat 2-3 cups of vegetables, or 5 servings. Every day I will write down how many vegetables I’ve eaten. Even if I don’t meet my goal amount it’s ok if I’m keeping track of my progress. By the end of next month, I want to have eaten 3 cups of vegetables every day for a week straight. I will start by eating a cup of vegetables for lunch today, and a cup of vegetables for dinner tonight. An obstacle I may face would be running out of vegetables in my fridge. I can avoid this obstacle by regularly updating my grocery list, visiting the grocery store once a week, or simply buying more vegetables while I’m at the store next.

Materials: 

Pen, Paper 

Optional: Different colored writing utensils to keep track of your S.M.A.R.T goal. 
(I used red, orange, purple, green, blue)

Length: 

15-30 minutes
Academic Subject(s):  1L4, 1L5, – 4L3 
This lesson supports First to Fourth Grade.

Directions: 

Step 1: Think of an achievable goal you’d like to have for the new year. Make sure it is relevant to your life! 

Step 2: Follow my example with eating more vegetables; I make sure my goal is specific and measurable. How will you measure your goal? How will you know you’ve completed your goal? 

Step 3: Make your goal timely by giving yourself a start and end date. It’s ok if you need a long time to finish this goal! 

Step 4: (optional) when you write your goal, use multiple colors to make sure your goal is S.M.A.R.T! 

Step 5: Hang your new year’s resolution in a spot you can see it so you can track your progress. 

Step 6: Tell your friends and family about your goal so they can help you! 

Vocabulary Words

Acronym: An abbreviation formed from the initial letters of other words and pronounced as a word.
New year’s resolution: A promise to do something differently in the new year.

For more Sanity Savers click here!

Countdown to First Night Sanity Saver: Ōmisoka

Presented by Independent Health

By: Jacalyn Slingerland, Play to Learn Facilitator

Download a PDF version of this lesson here!

This lesson gives your child the opportunity to create a Buddhist bell, also called a bonshō. A bonshō’s ring is supposed to offer a fresh start for the New Year.

Materials: 

one paper cup 
scissors
paint
paint brush
pipe cleaner or ribbon
marker
a jingle bell (optional)

Length: 

Set up: 2 Minutes

Activity: 20-30 Minutes 

Inactive time: 10-15 minutes

Academic Subject(s): 

Art, Social Studies

SS 3.4a, 3.4b, 3.5a, 2.6, 2.8, 1.8

VA: CR 1.2. 1,2,3a 

VA: PR 5. 1,2,3a

This lesson supports areas of Elementary Education:

While celebrating this year’s holidays from home, there is a great opportunity to see how other cultures and other nations celebrate the holidays.  With this lesson your child will be able to experience new traditions and cultures. Japan celebrates the new year with many special traditions. The celebration of the new year is called Ōmisoka. It is common to clean the office and home, and to pay bills. This allows a fresh start for the new year! By dinner time a large feast is prepared. Enough food is usually made for the next few days, because it is considered unlucky to cook in your home for the first 3 days of the new year. Finally, many visit the Buddhist temples in the last half hour of Ōmisoka. The bonshō are tolled 107 times before midnight, and once after. The bells ring when they are hit with either a hammer or a beam. We will share with you how to make your own bonshō.

Directions: 

Step 1: Have a grown up gently make 2 holes in the bottom of your cup using scissors. 

Step 2: Paint your bonshō. Bonshō are usually made of bronze, so I painted mine using brown, black and white paint. Allow some time to dry. 

Step 3: Once your bell is dry, make designs on It with marker. With a grown up’s help, you can search for Bonshō reference images, if you need inspiration. 

Step 4: Thread your (optional) jingle bell through your pipe cleaner, then thread the pipe cleaner through the holes you made earlier. In reality, bonshō do not have clappers in the center. This bell in the center allows your paper cup to make a ringing noise when you hit it. 

Step 5: Twist the pipe cleaner at the top. You can make it into an interesting shape if you’d like.

Step 6: Hit your bell from the outside, what kind of noises does it make? Only 107 more tolls to go! 

Vocabulary Words 

Japan: A country consisting of a chain of islands along the eastern coast of Asia.

Ōmisoka: Literally translates to “last great day”. It is the celebration of the new year. 

Bonshō: Large hanging bells kept in Buddhist temples throughout Japan, used to summon the monks to prayer and to demarcate periods of time.

Bronze: Metal that is a mixture of copper and tin

Buddhism: a widespread Asian religion or philosophy, founded by Siddhartha Gautama.

Temples: A building devoted to worship

For more Storytime stories click here!

Countdown to First Night Sanity Saver: Evergreen Tree Craft

Presented by Independent Health

By: Valerie Drapeau
Education Coordinator

Download a PDF version of this lesson here!

 Materials:

2 Pieces of green construction paper 
Scissors
Tape
Black Marker
Glue
Decorations for your tree

Set-up:   5 minutes

Activity: 20 minutes 

Academic Subject(s): Art

This lesson supports the following NYS Curriculum Standards:  VA: CR2.3.1-6

Evergreen trees are recognized as symbols of lasting life—their needles stay green both in the warmest of Summers and the harshest of Winters.  The origin of the evergreen tree being used in a Christmas celebration appears to be rooted in Germany during the Middle Ages. In 1419, a guild in Freiburg put up a tree decorated with apples, flour-paste wafers, tinsel and gingerbread.  Trees were also decorated with wool thread, straw, apples, nuts and pretzels. In our craft today we are going to create our own evergreen tree.  How would you decorate your tree?

Directions: 

Step 1:  Begin by stacking two pieces of construction paper together and folding them in half. Then use a marker to draw a half-tree shape on the outside of your paper stack (with the middle of the tree being the fold). Finally, cut along the lines through both sheets of paper. You will now have two identical tree shapes.

Step 2:  Find and mark the vertical center of each tree by folding it in half vertically (fold the pointed tip of the tree down to the base of the tree,) then lightly crease or mark the center. Finally, cut a slit in one tree from the top down to the center mark, and cut a slit in the other tree from the bottom up to the center.

Step 3: Join the two shapes and form the tree. Slide the two pieces together along the slits so that the middles match.  Then use a few small pieces of clear tape at the top and bottom of the tree to hold it all together. Finally, fold the tree open so that it stands on its own.

Step 4: Decorate your tree!  With whatever materials you have at home, add pompoms, glitter, tinsel (pipe cleaners wrapped around), etc. to add color to your tree.  You can even glue a star or pompom on top!

Vocabulary Words:

Evergreen – relating to or denoting a plant that retains green leaves throughout the year.

Tinsel – a form of decoration consisting of thin strips of shiny metal foil.

For more Storytime stories click here!

Countdown to First Night Sanity Saver: Winter Solstice Lanterns

Presented by Independent Health

By: Will Kawalec, Play to Learn Facilitator

Download a PDF version of this lesson here!

Supply ideas:

Wax paper, construction paper, glue tape or stapler, electric tea lights, hole punch, string   

Length:

10 minutes 

Academic Subjects:

Science
This lesson supports the following standards:    
3.4a People in world communities use legends, folktales, oral histories, biographies, and historical narratives to transmit cultural histories from one generation to the next.

Directions for Winter Solstice Lanterns  

The winter solstice is the shortest day of the year. This means we have the shortest amount of daylight and the longest night of the year. This year we celebrate the solstice on December 21st.  Solstice is a Latin word that translates to “sun stands still” Let’s celebrate this winter solstice by creating our own paper lanterns. 

  1. Cut a twelve by twelve piece of wax paper. 
  2. Cut two twelve inch by one inch strips of construction paper.  
  3. Tape the ends of your wax paper together to form an oval. 
  4. Tape the two strips of construction paper to the bottom and top of your lantern.
  5. Using your lantern as a guide, place it on top of your construction paper and trace the outline of your lantern onto the paper. Draw four half inch tabs on the circle. 
  6. Cut the circle out, then tape the tabs onto your lantern.   
  7. Hole punch two holes at the top of your lantern. Tie a piece of string through the holes. 
  8. Place an electric tea light into your lantern to guide you through the winter solstice! 

Winter Solstice Lanterns Vocabulary:   

Equator– The earth is divided by an imaginary line called the equator. The equator breaks the Earth into two parts. 

Hemisphere– The planet is divided into two parts, the north and south hemisphere. While we are celebrating the winter solstice in the northern hemisphere, the people in the southern hemisphere will be celebrating the summer solstice.  

For more Storytime stories click here!

Countdown to First Night Sanity Saver: Kwanzaa Unity Cup (Kikombe cha Umoja)

Presented by Independent Health

BY Will Kawalec, Play to Learn Facilitator

Download a PDF version of this lesson here!

This lesson gives your child the opportunity to create a Kwanzaa Unity Cup, an item that is instrumental in celebrating the holiday!

Materials:

2 Paper or plastic cup (paper preferred)

Toilet paper tube

Black marker or paint

Glue or hot glue

Red, black, and green paint or markers

Masking Tape

Miscellaneous decorations (stickers, jewels, string, beads, etc…) 

Optional: construction paper 

Length: 

Set up: 2 Minutes

Activity 10-25 Minutes 

Academic Subject(s): 

Art, Social Studies

SS 3.4a, 3.4b, 3.5a, 2.6, 2.8, 1.8

VA: CR 1.2. 1,2,3a 

VA: PR 5. 1,2,3a

This lesson supports First to Third Grade: 

This lesson supports areas of Elementary Education.

While celebrating this year’s holidays from home, there is a great opportunity to see how other cultures and other nations celebrate the holidays.  With this lesson your child will be able to experience new traditions and cultures.  In this case specifically relating to Kwanzaa.  A unity cup’s primary purpose is to celebrate one’s African ancestors.

Directions: 

Step 1: Paint or color the cups and the toilet paper tube completely black.  OR wrap cups in construction paper to avoid paint! Either method works!!

Step 2: Take time to decorate your Unity cup especially with the colors red and green.  These colors represent the struggles, celebrations, and pride of the African people and people of African descent.  

Step 3: Cut one of the cups about an inch from its base making a smaller cup (when flipped over this will be the base of your Unity Cup.

Step 4: Connect the toilet paper tube to the base of the cup with hot glue or tape, and then connect the other end of the tube to the painted and decorated cup.

Step 5: At this point you’re almost finished, now add any finishing touches to your cup.

Step 6: Your cup is now completed; you now have experienced creating an item that is a vital part of any Kwanzaa tradition. 

Step 7: With your new knowledge inform and connect with new people about different holiday traditions.

Vocabulary Words

Kwanzaa:  A holiday that acts more like a celebration for African American culture, and focuses on celebrating African culture and histories, as well as promoting Black pride.

Unity: to be joined or brought together as a whole.

Ancestor(s): a person related to, you who lived long ago.

For more Storytime stories click here!

Field trips are back! Please be aware that it will be busier than usual.